
Malibu L4-2.4L (2010)
30. Inspect the timing chain tensioner seal for damage. If damaged, replace the seal.
31. Inspect to ensure all dirt and debris is removed from the timing chain tensioner threaded hole in the cylinder head.
Note: Ensure the timing chain tensioner seal is centered throughout the torque procedure to eliminate the possibility of an oil leak.
32. Install the timing chain tensioner assembly. Tighten the timing chain tensioner to 75 Nm (55 lb ft).
33. The timing chain tensioner is released by compressing it 2 mm (0.079 in), which will release the locking mechanism in the ratchet. To release the
timing chain tensioner, use a suitable tool with a rubber tip on the end. Feed the tool down through the cam drive chest to rest on the cam chain.
Then give a sharp jolt diagonally downwards to release the tensioner.
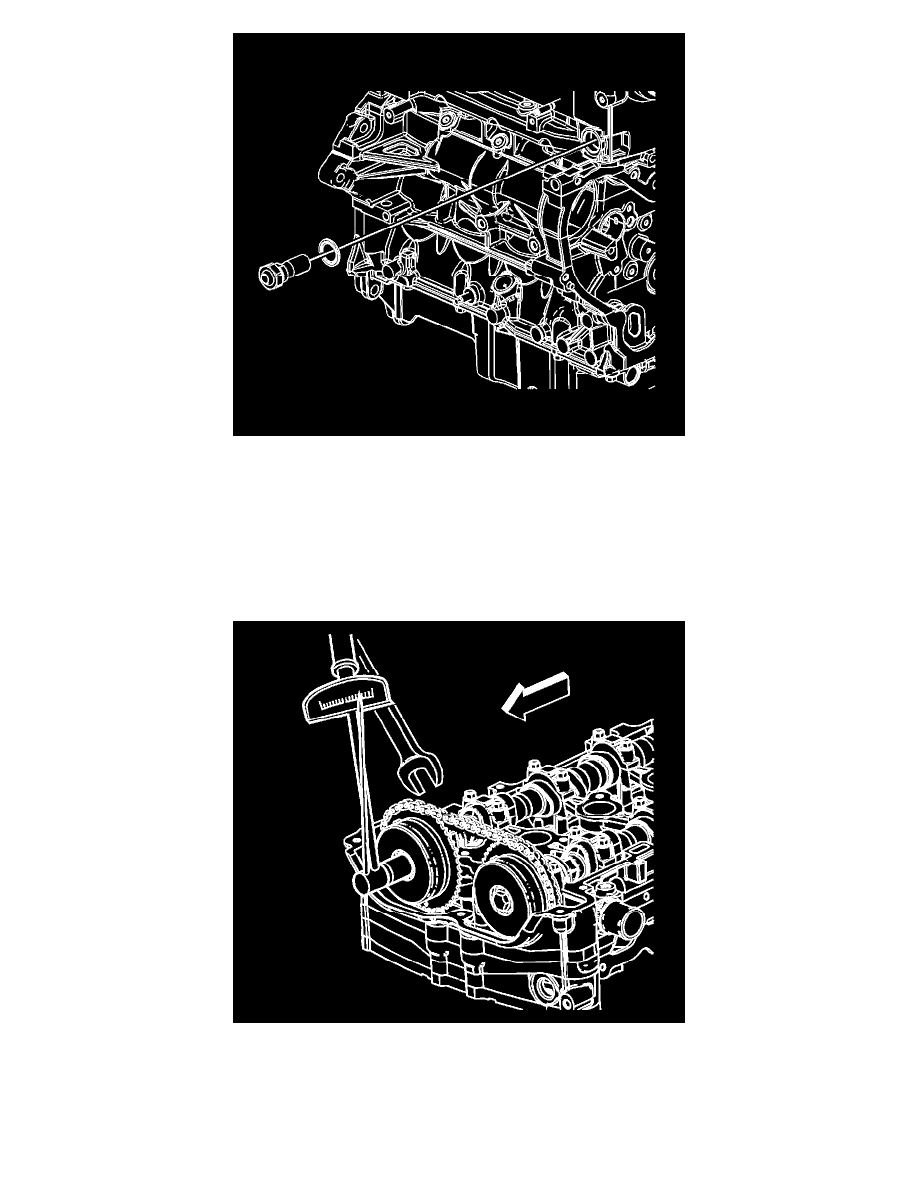
34. Using a 24 mm wrench, engage the hex on the intake camshaft, and using a torque wrench, tighten the camshaft actuator bolt. Tighten the intake
camshaft position actuator bolt to 30 Nm (22 lb ft) plus 100 degrees using the EN-45059 - meter.
35. Using a 24 mm wrench, engage the hex on the exhaust camshaft, and using a torque wrench, tighten the camshaft actuator bolt. Tighten the exhaust
camshaft position actuator bolt to 30 Nm (22 lb ft) plus 100 degrees using the EN-45059 - meter.