
Malibu L4-2.4L (2010)
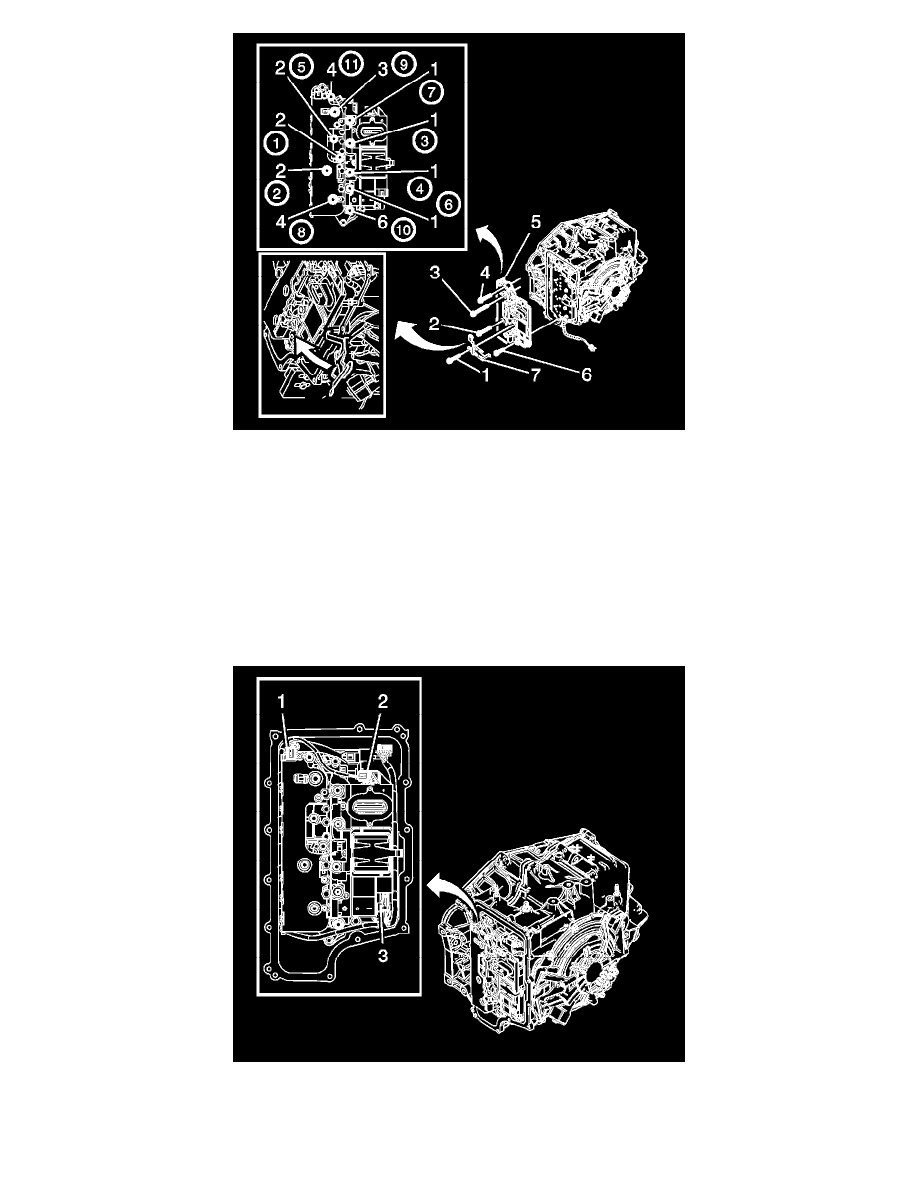
2. Install the control solenoid valve body and TCM assembly (5).
3. Rotate the control solenoid valve spring (7) into position.
Caution: Refer to Fastener Caution (See: Service Precautions/Vehicle Damage Warnings/Fastener Caution).
Note: Install all bolts before tightening, then tighten in specified sequence.
4. Install the 4 control valve body bolts (1) M6 x 80.
5. Install the control valve body bolt (6) M6 x 55.
6. Install the 3 control valve body bolts (2) M6 x 95.
7. Install the control valve body bolt (3) M6 x 42.
8. Install the 2 control valve body bolts (4) M6 x 65 and tighten to 12 Nm (106 lb in).
9. Connect the input speed sensor electrical connector (1).
10. Connect the output speed sensor electrical connector (2).
11. Connect the shift position switch electrical connector (3).
12. Install the control valve body cover. Refer to Control Valve Body Cover Replacement (See: Transmission and Drivetrain/Automatic