
Malibu L4-2.4L (2010)
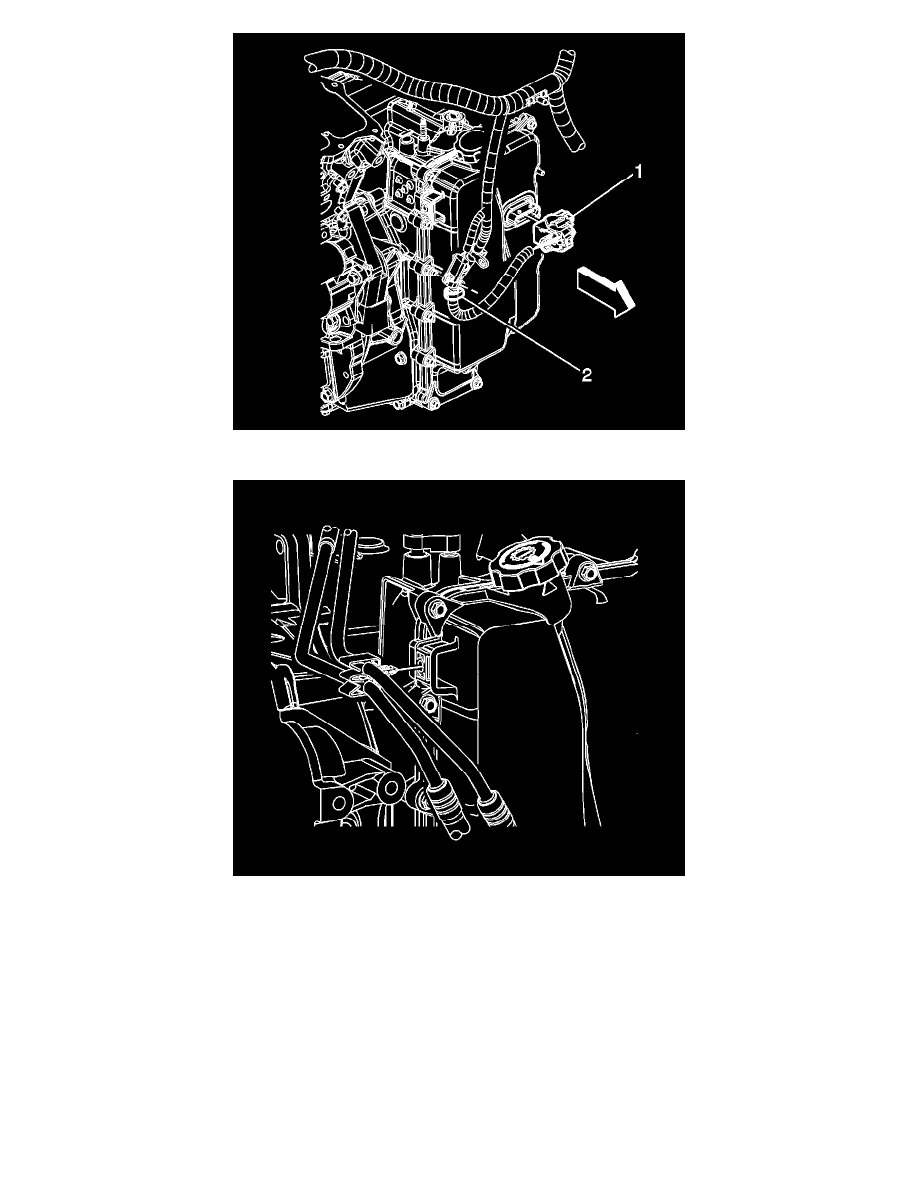
10. Connect the control valve body TCM electrical connector (1).
11. Install the oil cooler inlet and outlet hoses to the retainer on the control valve body cover.
12. Install the wire harness retainer (2) to the control valve body cover stud.
13. Tighten the nut to 12 Nm (106 lb in).
14. Install the front transmission mount. Refer to Transmission Front Mount Replacement (See: Transmission Mount/Service and Repair/6T70/6T75
- Automatic Transmission/Transmission Front Mount Replacement).
15. Install the front air dam. Refer to Front Air Deflector Replacement (See: Body and Frame/Spoilers, Flaps, and Air Dams/Air Dam/Service and
Repair/Front Air Deflector Replacement).
16. Install the left engine splash shield. Refer to Engine Splash Shield Replacement - Left Side (See: Body and Frame/Splash Guard/Service and
Repair/Engine Splash Shield Replacement - Left Side).
17. Lower the vehicle.
18. Connect the negative battery cable. Refer to Battery Negative Cable Disconnection and Connection (See: Starting and Charging/Battery/Battery
Cable/Negative/Service and Repair/Battery Negative Cable Disconnection and Connection).
19. Fill the transmission. Refer to Transmission Fluid Replacement (See: Service and Repair/Removal and Replacement/6T70/6T75 - Automatic
Transmission/Transmission Fluid Replacement).
20. Install the air cleaner outlet duct.