Malibu V8-350 5.7L DSL (1982)

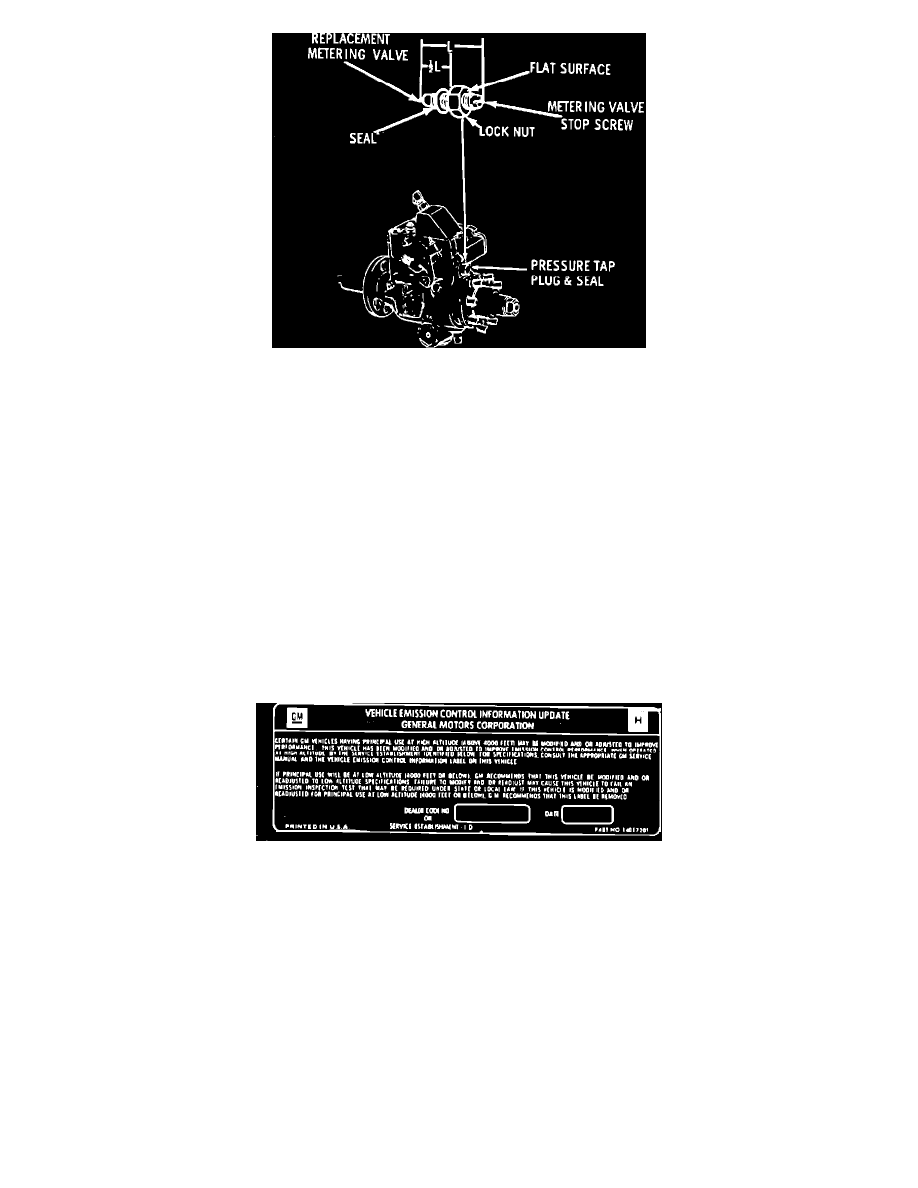
FIGURE 2
4.
Install shop towel, in the intake manifold valley area under the injection pump head to absorb any fuel leakage. Remove housing pressure tap plug
and seal located on the rear of the pump (Figure 2).
5.
Assemble locknut and new seal (O-ring) to metering valve stop screw as shown.
6.
Install assembly in injection pump until locknut contacts pump housing. Tighten locknut.
7.
Place transmission in park, turn A/C off and start engine.
8.
Loosen locknut and slowly turn metering valve stop screw clockwise until idle speed drops approximately 10 rpm.
9.
Turn metering valve stop screw counterclockwise three (3) turns on wagons and 2-1/2 turns on all except wagons and tighten locknut.
10.
Check installation for fuel leaks and remove shop towel from intake valley.
11.
Turn engine off.
12.
Remove magnetic tachometer probe and screened covers from intake manifold and reinstall parts removed.
FIGURE 3
13.
Type or print with ballpoint pen the dealer code and date in the space provided on the supplemental emission control label, P/N 14057201 or
equivalent, Figure 3 (part of kit). The label must be placed next to the existing underhood emission control information label to the extent possible.
The label should not be affixed to any equipment that can be easily detached from the vehicle. Wash off the area with soap and water, dry
thoroughly, and apply the new label.
PARTS INFORMATION
Part
P/N
1.
EGR Valve Vacuum Control Assembly High Altitude Application
All Models Except Wagons
3-Speed A/T
22515542 or equivalent
Wagon with 3-Speed A/T
22515167 or equivalent
