
Metro L3-061 1.0L VIN 6 TBI (1998)
Fuel Level Sensor: Service and Repair
Fuel Sender Assembly Replacement
Fuel Sender Assembly Replacement
Removal Procedure
Notice: Do not attempt to disassemble the fuel sender assembly. Damage may occur to the sender assembly and the component parts. A re-assembled
fuel sender assembly will not perform properly after installation to the vehicle.
1. Remove the fuel tank from the vehicle. Refer to Fuel Tank Replacement.
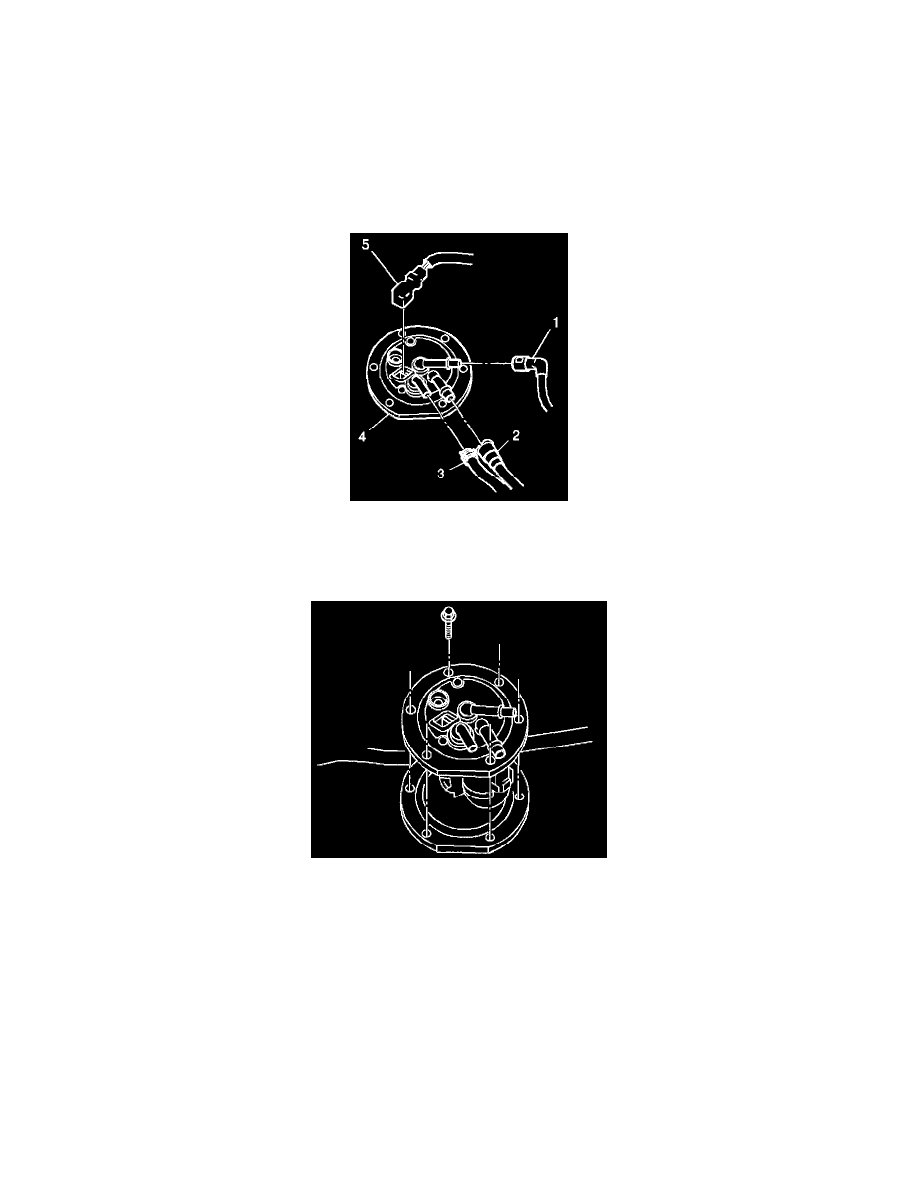
2. Disconnect the fuel sender assembly electrical connector (5) from the fuel sender assembly (4).
3. Remove the clamp and the fuel vapor hose (3) from fuel vapor pipe on the fuel sender assembly (4).
4. Disconnect the quick connect fuel return line (1) from the fuel sender assembly (4). Refer to Quick Connect Fitting(s) Service (Plastic Collar).
5. Disconnect the quick connect fuel feed line (2) from the fuel sender assembly (4). Refer to Quick Connect Fitting(s) Service (Plastic Collar).
6. Remove the 6 screws attaching the fuel sender assembly to the fuel tank.
7. Remove the fuel sender assembly from the fuel tank.
Installation Procedure
1. Install the fuel sender assembly to the fuel tank with a new gasket.
Notice: Refer to Fastener Notice in Cautions and Notices.
2. Install the 6 bolts securing the fuel sender assembly to the fuel tank.
Tighten
Tighten the 6 fuel sender assembly bolts to 10 N.m (7.5 lb in).