
Monte Carlo V6-3.5L VIN K Flex Fuel (2006)
5. Align the frame to the body by inserting two 19X203 mm (0.74X8.0 in) pins in the alignment holes (2) on the right side of the frame.
*
Tighten the new front frame bolts to 145 N.m (107 lb ft).
*
Tighten the new rear frame bolts to 160 N.m (118 lb ft).
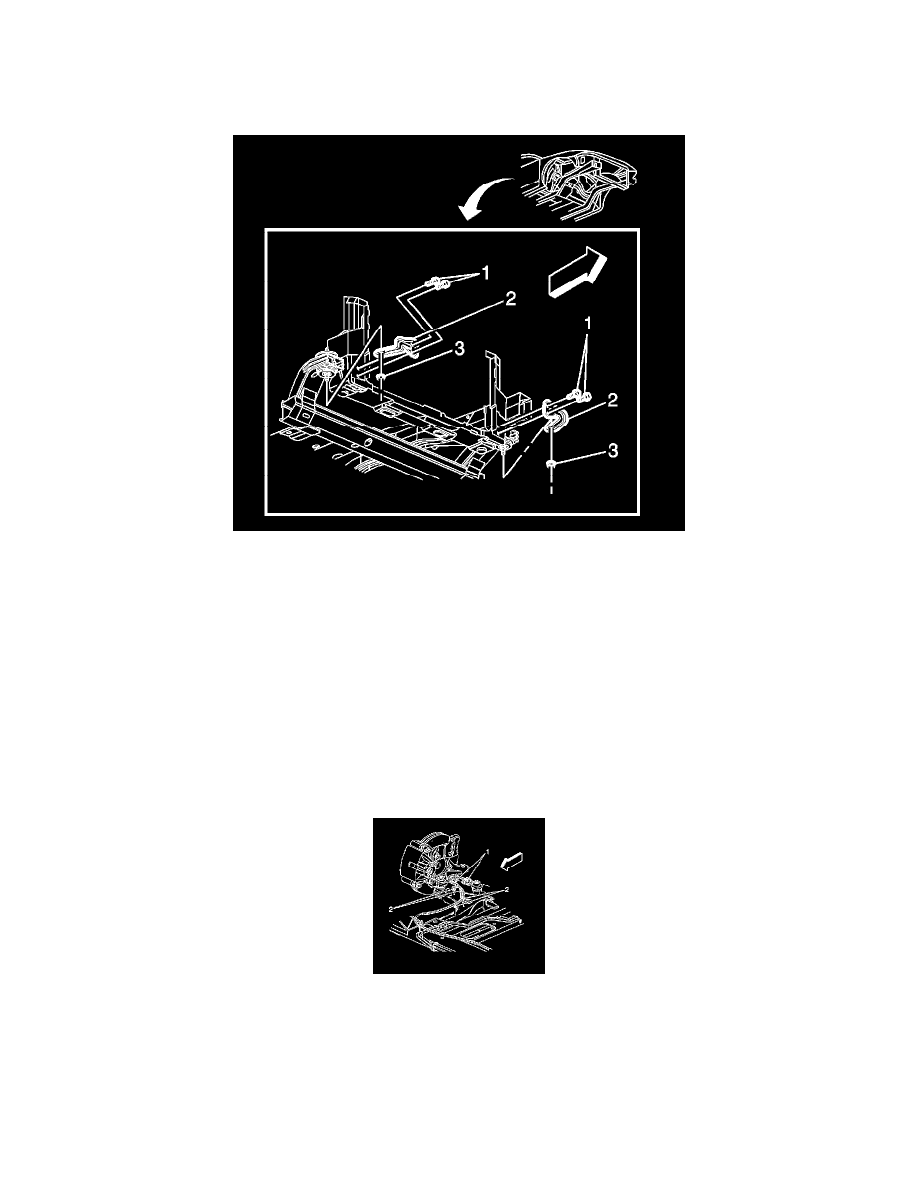
6. Install the frame reinforcements (2).
7. Install the frame reinforcement bolts (1).
Tighten the bolts to 20 N.m (15 lb ft).
8. Install the frame reinforcement nuts (3).
Tighten the nuts to 20 N.m (15 lb ft).
9. Connect both the lower ball joints to the steering knuckle.
10. Install the nuts which secure the engine mount to the frame.
11. Install the nuts which secure the transaxle mount to the frame.
12. Remove the power steering gear from the exhaust pipe. Position to the frame.
13. Install the steering gear mounting bolts.
14. Install the stabilizer shaft links.
15. Connect both front wheel speed sensor connectors (1), if equipped.
16. Install both front wheel speed harness retainers (2) to the frame and to the lower control arm, if equipped.
17. Install the positive battery cable.
18. Install the power steering cooler pipe.
19. Install the radiator lower air deflector.
20. Install the front tires and wheels.
21. Lower the vehicle.
22. Remove the engine support fixture.
23. Inspect the front wheel alignment.