
Prizm L4-108 1.8L DOHC VIN 8 MFI (1998)
Fuse Block: Service and Repair
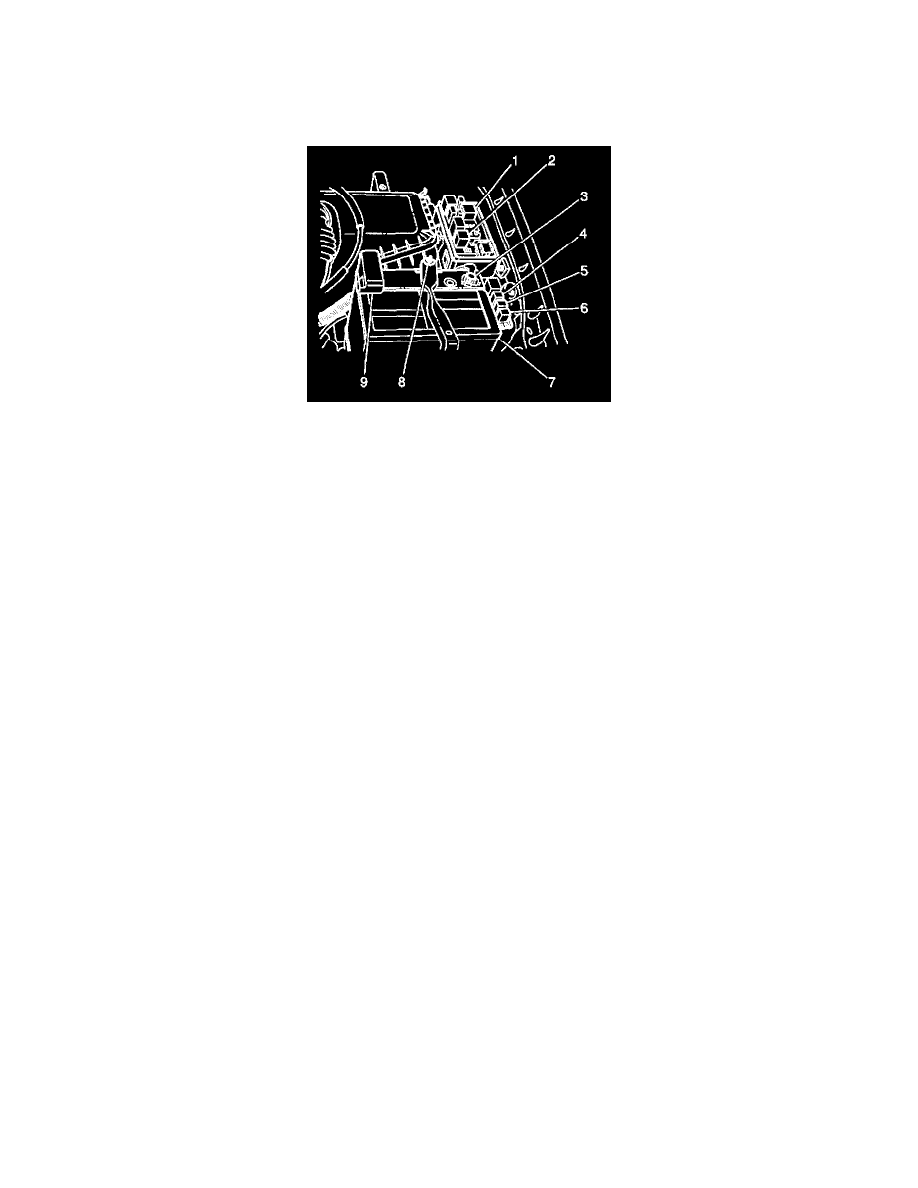
Underhood Fuse Block Replacement
Fuse and Relay Block
REMOVAL PROCEDURE
CAUTION: Refer to Battery Disconnect Caution in Cautions and Notices.
1. Disconnect the negative battery cable.
2. Remove the air cleaner assembly.
3. Remove the 2 bolts that hold fuse and relay block 1 to the inner fender.
4. Carefully pull fuse and relay block 1 away from the inner fender and unsnap the lower cover.
5. Disconnect each of the harness connectors.
6. Remove fuse and relay block 1 from the vehicle.
INSTALLATION PROCEDURE
1. Install fuse and relay block 1 to the vehicle.
2. Connect each connector to fuse and relay block 1.
3. Install the lower cover.
4. Install fuse and relay block 1 to the inner fender. Secure with the 2 bolts.
5. Install the air cleaner assembly.
6. Connect the negative battery cable.
Tighten
Tighten the negative battery cable to 15 N.m (11 lb ft).
Engine Accessory Harness
REMOVAL PROCEDURE
CAUTION: Refer to Battery Disconnect Caution in Cautions and Notices.
1. Remove the battery.
2. Remove the air cleaner assembly.
3. Disconnect the following underhood electrical connectors:
^
The generator
^
The engine coolant temperature (ECT) sender
^
The crankshaft position sensor
^
The manifold absolute pressure (MAP) sensor
^
The camshaft position sensor
^
The 4 fuel injectors
^
The idle air control (IAC) valve
^
The throttle position sensor (TPS)
^
G105
^
The starter connector
^
The starter wire
^
C101 (A/C compressor clutch) if equipped
^
The battery positive wire from the battery positive terminal