
Prizm L4-108 18L DOHC VIN 8 MFI (1998) - Windshield Pillar Garnish Molding Replacement
Windshield Replacement: Installation Procedure
6. Shake the primers vigorously that are provided in the urethane adhesive kit GM P/N 12346284 (or equivalent).
7. Use the Glass Prep Primer (1) (Clear Number 1) on the window prior to the Glass Primer (Black Number 2). The Glass Prep Primer (Clear
Number 1) does not require drying time.
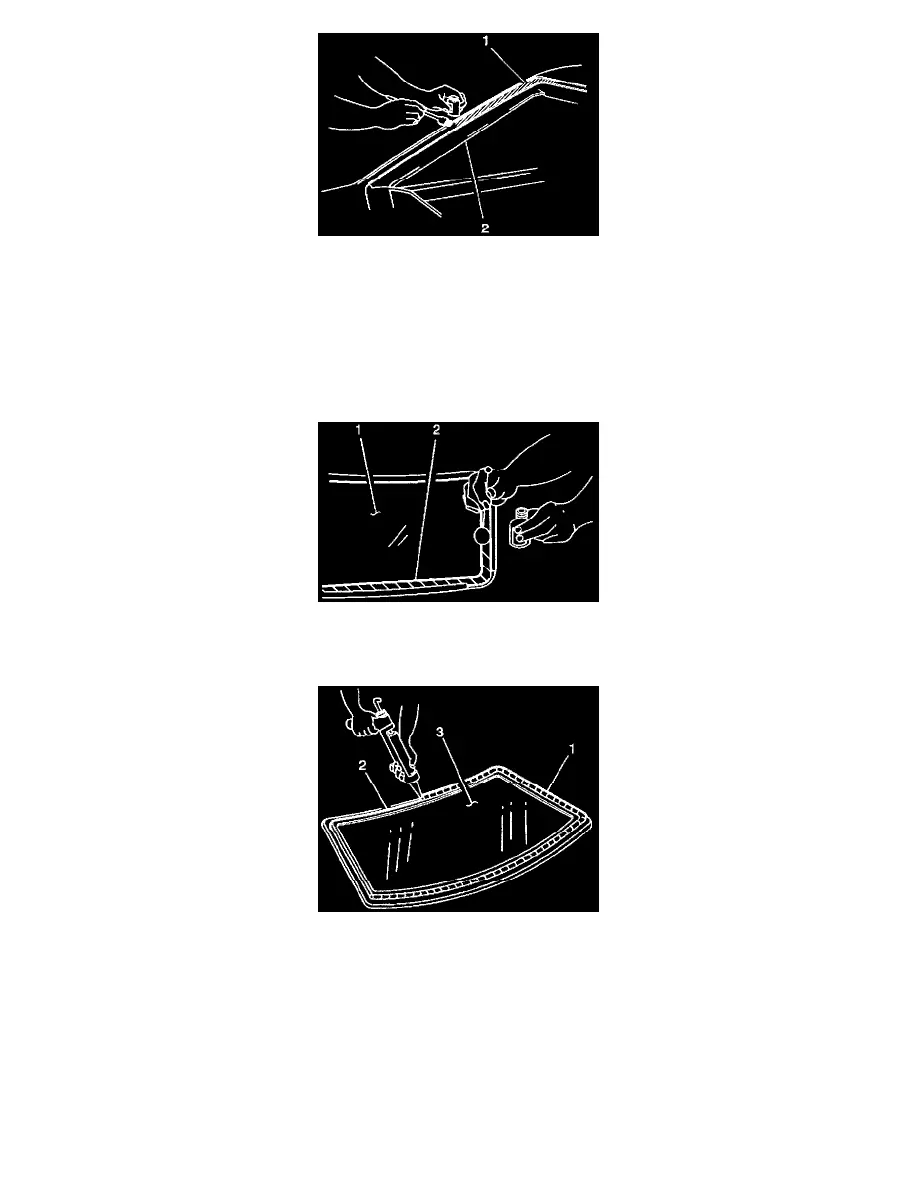
8. Apply the Glass Prep Primer (Black Number 2) around the entire perimeter of the windshield edge and 6 mm (1/4 inch) inboard on the inner
surface.
Allow the Glass Prep Primer (Black Number 2) to dry for 6-10 minutes.
Windshield Replacement: Installation Procedure
9. Apply the Pinch-Weld Primer (2) (Black Number 3) to the pinch-weld area. Allow the primer to dry for 10 minutes.
Windshield Replacement: Installation Procedure
10. Apply a smooth continuous bead of urethane adhesive (1) around the edge of the windshield (3) where the primer was applied.
11. With the aid of an assistant, use suction cups in order to lift the windshield into the opening.
12. With windshield centered in the opening, use the previously-applied tape guides in order to carefully place the windshield in the proper position.
13. Press the windshield firmly in order to wet-out and seat the urethane adhesive.
^
Using a small disposable brush or flat-bladed tool, paddle the material around the edge of the windshield in order to ensure a watertight seal.
^
If necessary, paddle additional material in order to fill voids in the seal.
^
Do not cause an appearance problem by creating excessive squeeze-out.