
R 10 P/U 2WD V8-454 7.4L (1987)
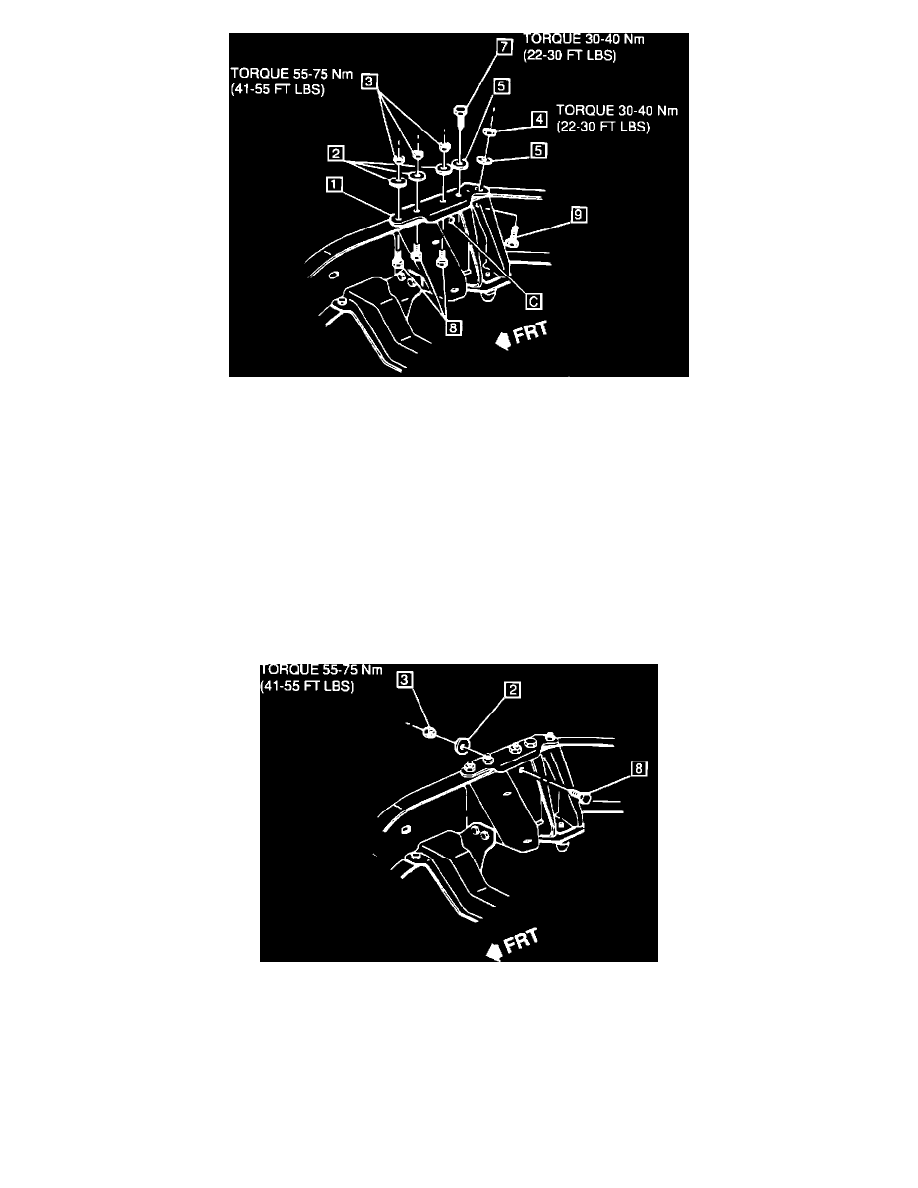
Figure No. 3 (RH)
5.
Remove existing bolt (7) and washer (5). DISCARD. Refer to Figure 3 RH.
6.
Weld crack using welding procedure, if necessary.
7.
Position bracket (1) on top flange area of frame rail. Refer to Figure 3 RH.
8.
Install new bolts (8), washers (2), and nuts (3). Torque nuts (3) to 55-75 N-m (41-55 lbs.ft.). Refer to Figure 3 RH.
9.
Install new bolt (9), washer (5), and nut (4). Torque nut (4) to 30-40 N-m (22-30 lbs. ft.). Refer to Figure 3 RH.
10.
Install new bolt (7) and washer (5). Torque bolt (7) to 30-40 N-m (22-30 lbs.ft.). Refer to Figure 3 RH.
11.
Using bracket (1) as a template, enlarge hole C with 15/32 in. diameter high speed drill. Access through right-hand wheel opening is suggested.
Refer to Figure 3 RH.
Figure No. 4 (RH)
12.
Install bolt (8), washer (2), and nut (3). Torque nut (3) to 55-75 N-m (41-55 lbs.ft.). Refer to Figure 4 RH.