
S10/T10 Blazer 2WD V6-262 4.3L VIN Z (1994)
TIGHTEN
^
Tighten screws (11) in same order to 5.3 Nm (47 lb.in.).
7. Wiring protectors (33) and (34).
8. Support bracket (52).
9. Hex head bolt (53).
TIGHTEN
^
Tighten bolt (53) to 30.0 Nm (22 lb.ft.).
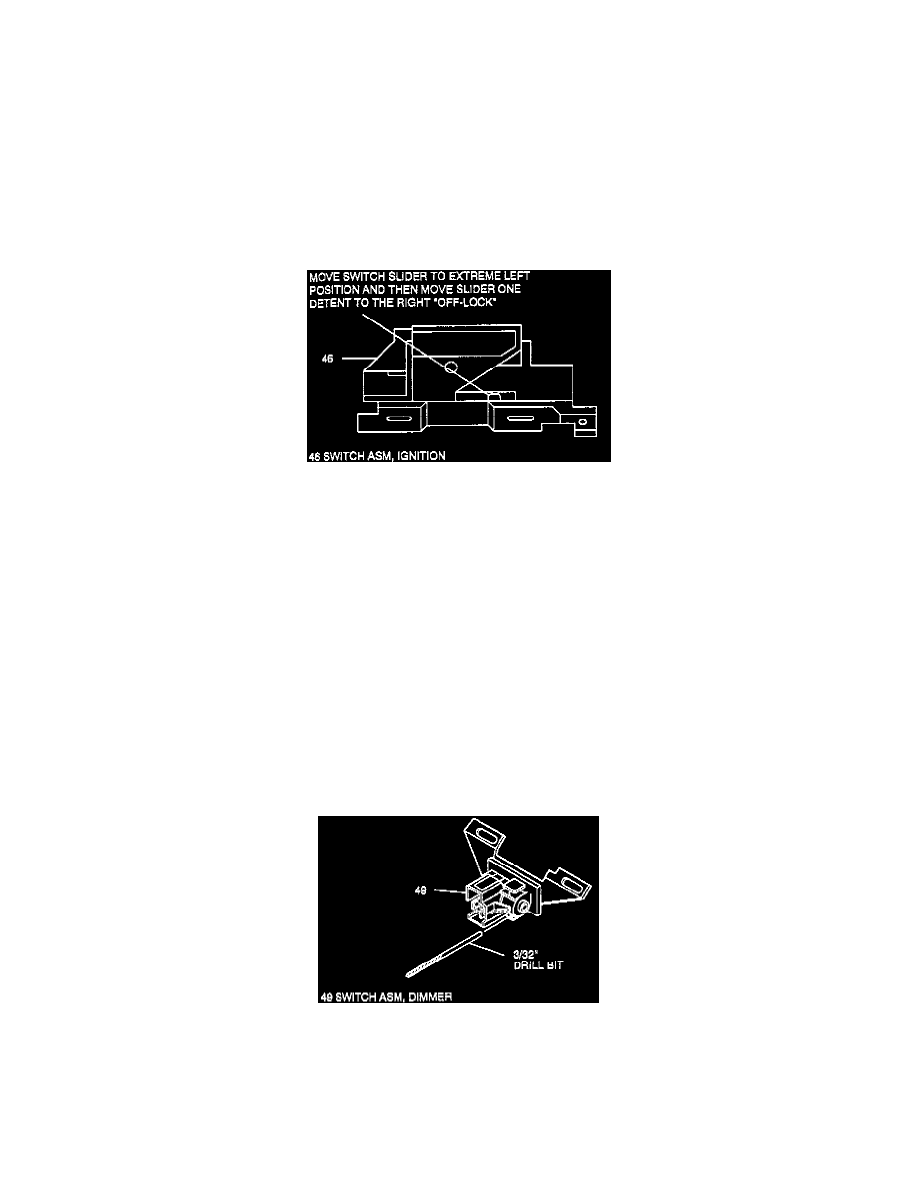
NOTICE: Install ignition switch (46) to jacket (45) with switch in "OFF-LOCK" position. (See Figure 13) New ignition switch will be pinned in
"OFF-LOCK" position. Remove plastic pin after switch is assembled to column. Failure to do so may cause switch damage.
Adjusting Ignition Switch
ADJUST
^
Ignition switch assembly (46).
A. Move switch slider to extreme left position.
B. Move switch slider one detent to right "OFF-LOCK" position.
10. Ignition switch assembly (46) and dimmer & ignition switch mounting stud (47).
TIGHTEN
^
Tighten screw (47) to 4.0 Nm (35 lb.in.).
11. Dimmer switch rod (51).
12. Dimmer switch assembly (49) to rod (51).
13. Washer head screw (50) and hexagon nut (48).
^
Tighten finger tight.
ADJUST
^
Dimmer switch (49).
Adjusting Dimmer Switch
A. Place a 3/32-inch drill bit in hole on switch to limit travel.
B. Position switch on column and push against dimmer switch rod to remove all lash.
C. Remove drill bit.
TIGHTEN