S10/T10 Blazer 4WD V6-262 4.3L (1989)

Intake Manifold: Service and Repair
VIN Z Non Turbo Engine
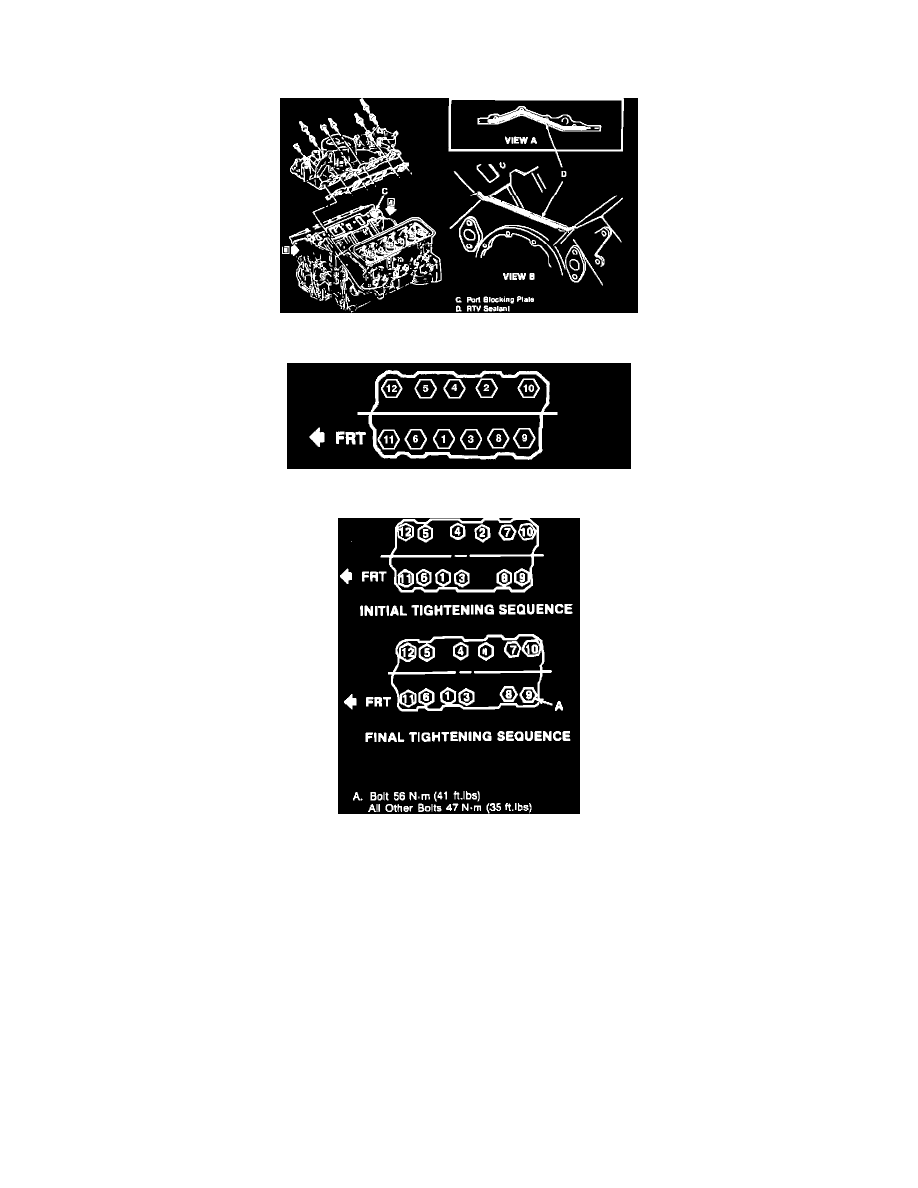
Fig. 5 Intake Manifold Sealant Application
Fig. 6 Intake Manifold Tightening Sequence.
Fig. 7 Intake Manifold Tightening Sequence. Bravada
1.
Disconnect battery ground cable.
2.
Remove air cleaner and heat stove tube.
3.
Remove two braces from rear of fan belt tensioner.
4.
Drain cooling system, then remove upper radiator hose.
5.
Remove emission relays and bracket.
6.
Remove wiring harnesses from retainers and position aside.
7.
Remove power brake vacuum pipe, then ground cable from manifold stud.
8.
Disconnect heater hose pipe from manifold.
9.
Disconnect fuel pipes from throttle body.
10.
Remove electrical connectors from sensors on manifold, then the ignition coil.
11.
Remove distributor.
12.
Remove electrical connectors and hoses from throttle body.
13.
Remove throttle, TVS and cruise control cables, as equipped.
14.
Remove EGR hose, then the manifold bolts.
15.
Remove intake manifold.
16.
Reverse procedure to install, noting the following:
