
S10/T10 Blazer 4WD V6-4.3L VIN W (1997)
5. Install the lower intake manifold to the engine. Apply sealer to the lower intake manifold bolts.
6. Install the lower intake manifold bolts.
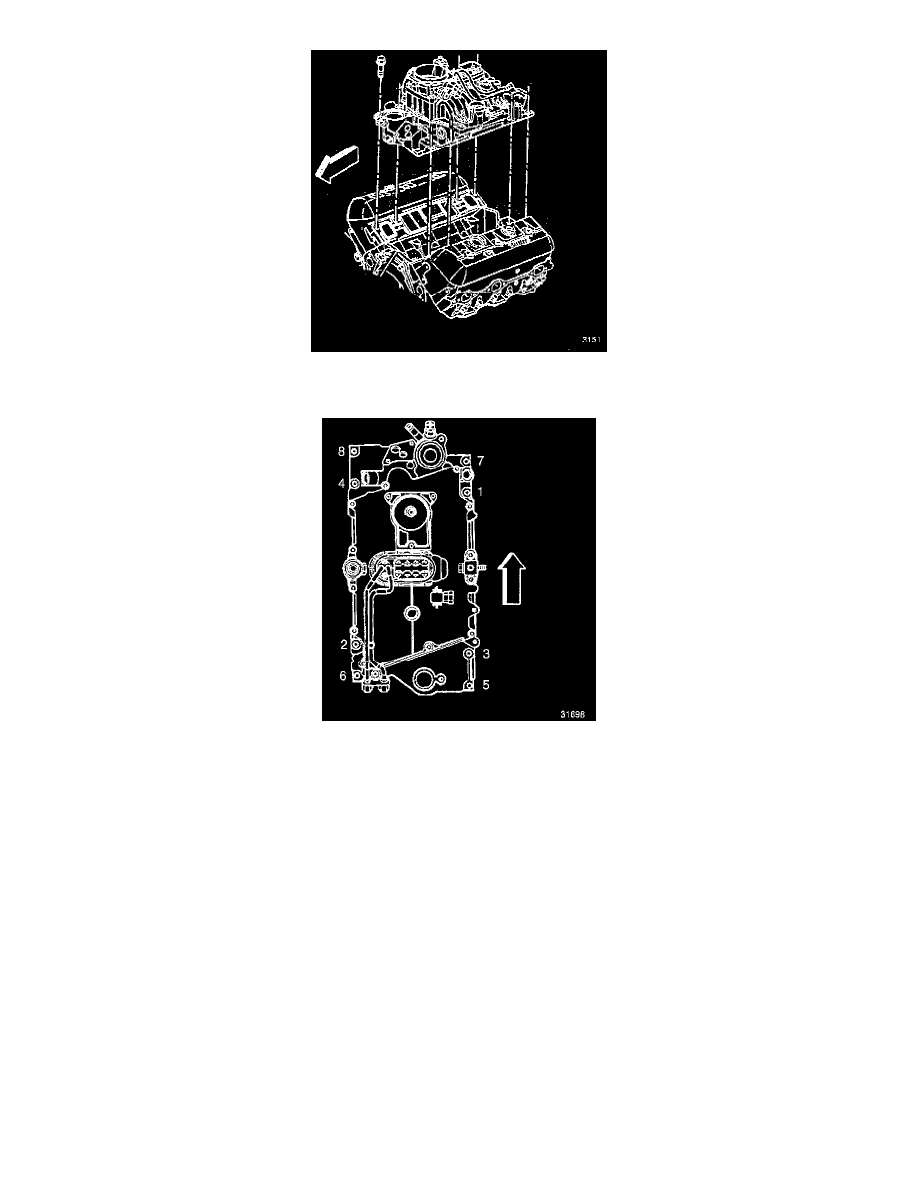
Tightening Sequence
7. Use the tightening sequence shown in order to tighten the bolts in three steps:
a. Tighten the bolts in the first pass to 3 Nm (27 inch lbs.).
b. Tighten the bolts in the second pass to 12 Nm (106 inch lbs.).
c. Tighten the bolts in the final pass to 15 Nm (11 ft. lbs.).
8. Install oxygen sensor wire support bracket and nut.
^
Tighten nut to 11 Nm (97 inch lbs.).
9. Install EGR inlet tube, clamp, and bolt.
^
Tighten bolt to 25 Nm (18 ft. lbs.).
10. Install the wiring harnesses. Include the following items:
^
The exhaust gas recirculation (EGR) valve
^
The engine coolant temperature sensor
^
The Central (Sequential Fuel Injector)
^
The MAP sensor
^
The mass air flow sensor
^
Distributor spark plug wires
11. Install the air conditioning compressor bolts into the A/C bracket.