
S10/T10 P/U 2WD V6-4.3L VIN W (1997)
Parking Brake Shoe: Service and Repair
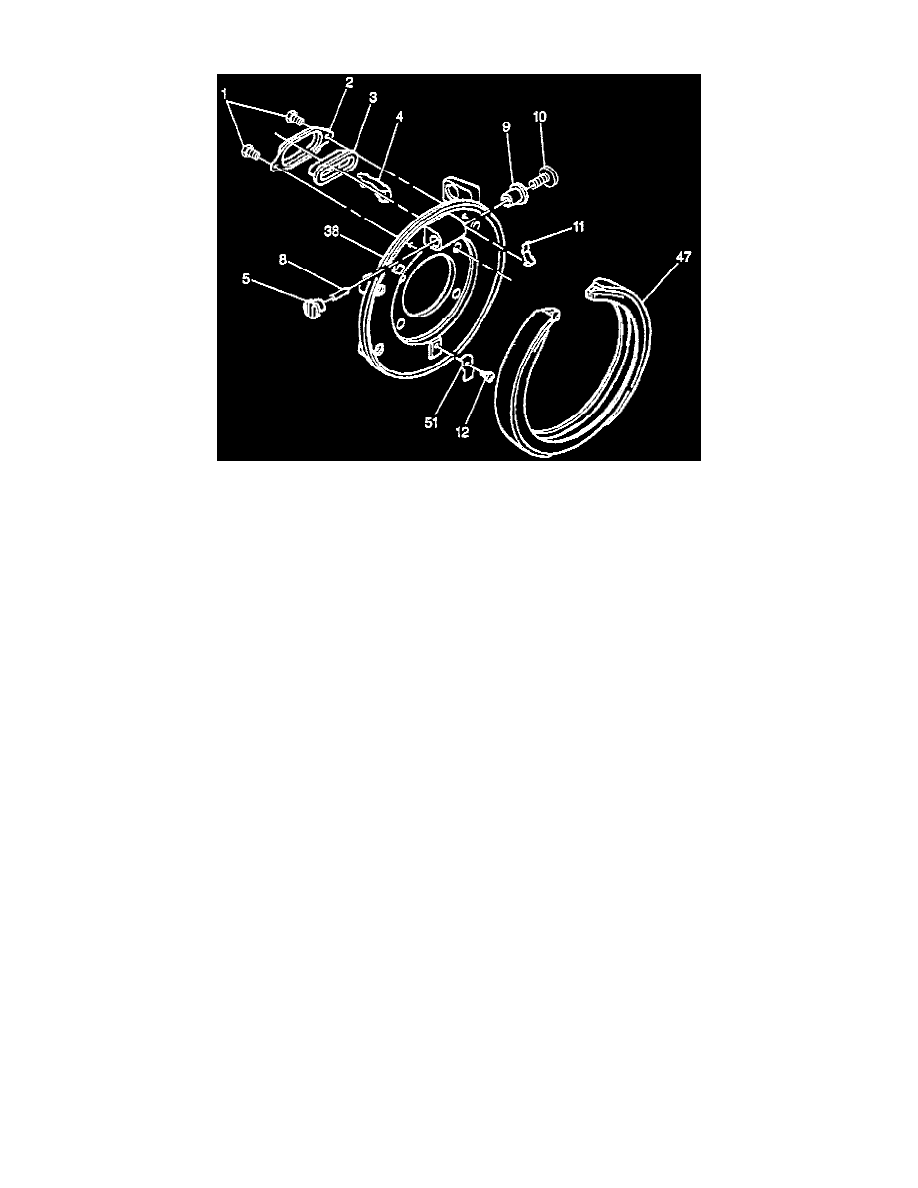
Rear Parking Brake Components
Remove or Disconnect
1. Raise and support the vehicle with safety stands.
2. Remove the wheel and tire.
3. Remove the caliper and rotor.
4. Remove the paring brake cable from the parking brake lever.
5. Remove the parking brake shoe assembly by sliding the shoe towards the hold down spring until the shoe is disengaged from the spring.
6. Remove the shoe from the actuation mechanism.
^ Clean the debris and dust from the parking brake components using a clean shop towel.
7. Turn the adjustment screw to the fully home position in the notched adjustment nut, then back it off 1/4 turn.
8. Align the slots in both the adjusting screw and tappet to be parallel with the backing plate face.
Install or Connect
1. Install a new parking brake shoe.
2. Position the shoe on the inboard side of the actuation mechanism.
3. Clip the shoe on the hold down spring.
^ Inspect the shoe assembly position. The shoe must be central on the backing plate and with both tips located in the slots.
4. Manually check the parking brake for proper operation.
5. Install the parking brake cable to the parking brake lever.
6. Adjust the parking brake shoe.
7. Install the caliper and rotor.
8. Install the wheel and tire.
9. Lower the vehicle.