S10/T10 P/U 2WD V6-4.3L VIN W (1997)

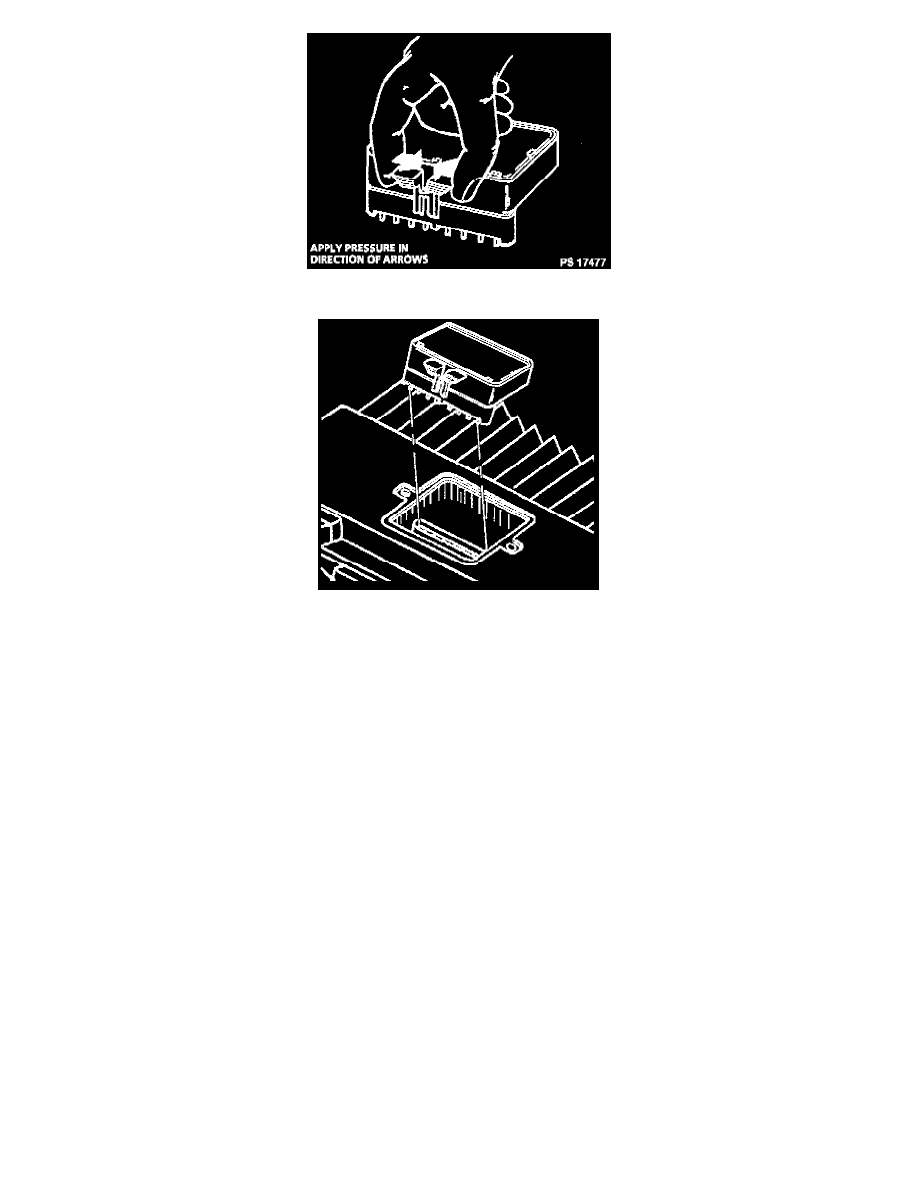
Removing Knock Sensor Module From PCM
VEHICLE CONTROL MODULE (VCM) REPLACEMENT/PROGRAMMING
The service of the VCM consists of replacing the VCM. If the diagnostics call for replacement of the VCM, transfer the Knock Sensor (KS)
Calibration Programmable Read Only Memory (PROM) and program the EEPROM in the VCM. Refer to Electrically Erasable Programmable
Read Only Memory (EEPROM) Programming.
KNOCK SENSOR (KS) CALIBRATION PROM
CAUTION: In order to prevent possible Electrostatic Discharge damage to the VCM, do not touch the connector pins or soldered components on
the circuit board. In order to prevent the internal VCM damage, the ignition must be OFF when disconnecting or reconnecting or reconnecting the
power to the VCM (battery cable, ECM fuse, jumper cables, etc.).
REMOVAL PROCEDURE
1. Disconnect the negative battery cable.
2. Remove the connectors from the VCM.
3. Remove the mounting hardware. Remove the VCM from the engine compartment.
4. Remove the VCM access cover.
CAUTION: Do not remove the cover of the KS Calibration PROM. Use of an unapproved KS Calibration PROM removal methods may cause
damage to the KS Calibration PROM or the socket.
NOTE: The replacement VCM is supplied without a KS Calibration PROM, so for reuse in the new VCM carefully remove the PROM from the
defective VCM.
5. Remove the Calibration PROM.
5.1.Using the thumb and first finger, remove the KS Calibration PROM by gently squeezing each end of the blue KS Calibration PROM
5.2.Pull upward.
6. Inspect for the alignment notches of the KS Calibration PROM.
7. Carefully set it aside.
8. Do not open the KS Calibration PROM.
9. Remove the new VCM from the packaging. Check the service number in order to make sure it is the same as the defective VCM.
