
S10/T10 P/U 2WD V6-4.3L VIN W (1997)
Important: If the sensor mounting holes or fasteners are damaged to the extent the sensor can no longer be properly mounted, use the following repairs.
First Repair
1. Remove the improperly installed rivet.
2. Reattach sensor with new rivet P/N 15955523.
Second Repair
1. Remove the improperly installed rivet.
2. Enlarge the mounting holes in the lower radiator support to 9.0 mm (0.35 in).
3. Insert and properly seat rivnut P/N 15699834. Install sensor with screw P/N 11515664.
4. Tighten
Tighten the sensor screws to 8.0 N.m (71 lb in).
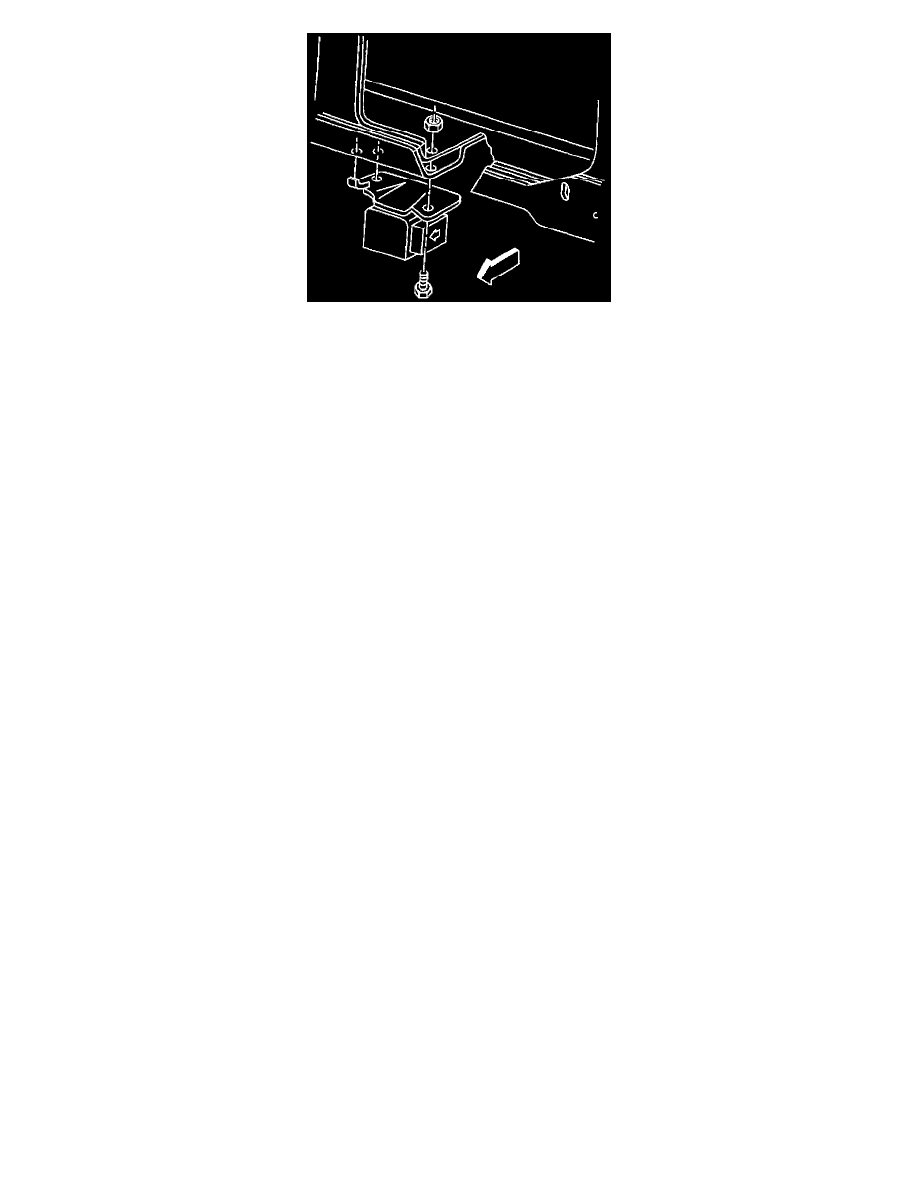
Installation Procedure
Caution: Attach the forward discriminating sensor rigidly to the vehicle structure, in order to ensure that the sensor operates properly. Make
sure the arrow on the sensor points toward the front of the vehicle.
1. Install sensor to vehicle. Arrow must point toward the front of the vehicle.
2. Install rivets P/N 15955523.
3. Connect the sensor electrical connector.
4. Connect the Connector Position Assurance (CPA) lock.
5. Enable the SIR System. Refer to Air Bag(s) Arming and Disarming.
Tighten
Sensor Screws to 8.0 N.m (71 lb in).