
Silverado 1500 4WD V8-6.2L (2010)
Back Window Motor: Service and Repair
Rear Sliding Window Module Replacement
Removal Procedure
Note: The new rear sliding window motor/module is equipped with the bracket and relays.
1. Remove the rear sliding window lower garnish molding. Refer to Rear Window Lower Garnish Molding Replacement (Ext Cab/Crew Cab w/A48)
(See: Body and Frame/Interior Moulding / Trim/Trim Panel/Service and Repair/Rear Window Lower Garnish Molding Replacement (Ext
Cab/Crew Cab w/A48))Rear Window Lower Garnish Molding Replacement (Ext Cab/Crew Cab w/o A48) (See: Body and Frame/Interior
Moulding / Trim/Trim Panel/Service and Repair/Rear Window Lower Garnish Molding Replacement (Ext Cab/Crew Cab w/o A48))Rear Window
Lower Garnish Molding Replacement (Regular Cab) (See: Body and Frame/Interior Moulding / Trim/Trim Panel/Service and Repair/Rear
Window Lower Garnish Molding Replacement (Regular Cab)).
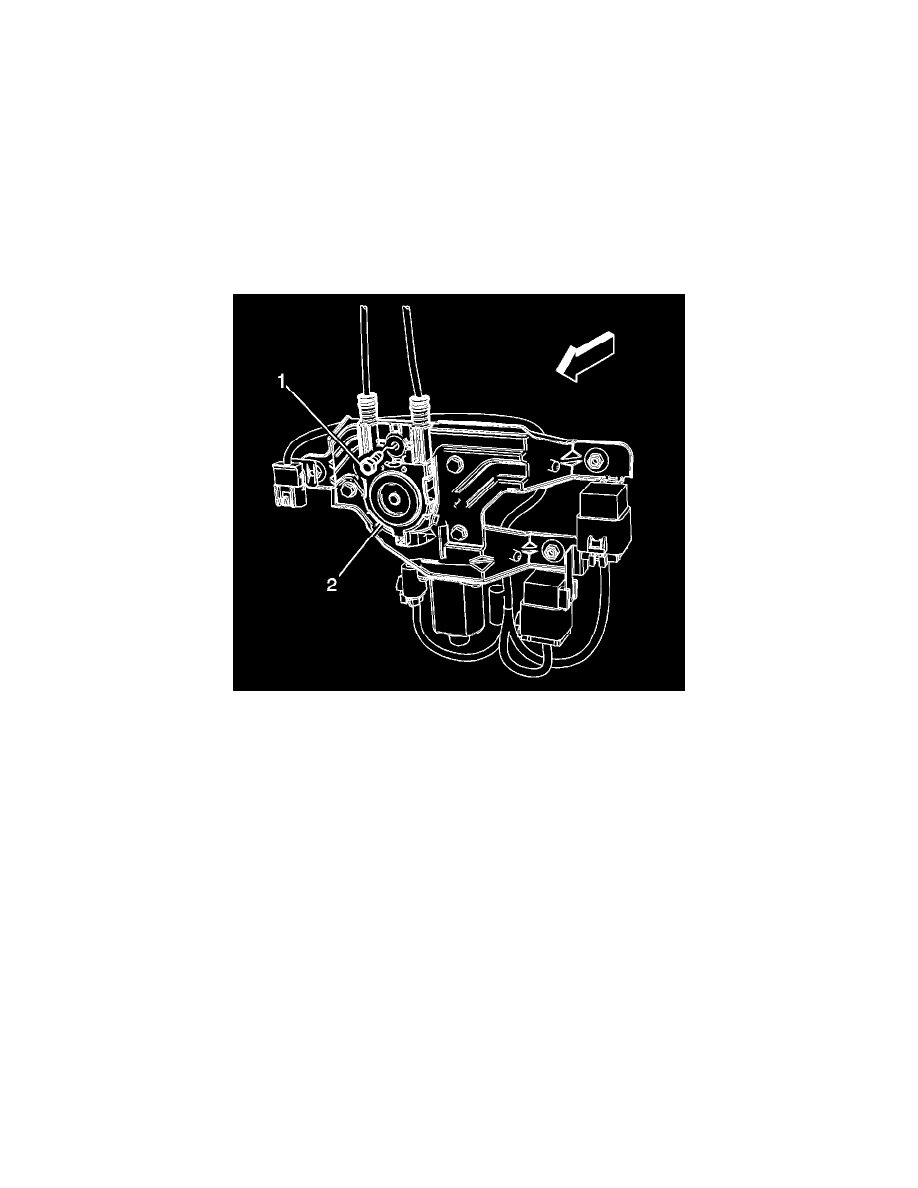
2. Cycle the rear sliding window to the fully closed position.
3. Remove the screw (1) from the rear sliding window regulator and cables (2).
4. Pull forward on the regulator and cables (2) to release it from the motor/module.