
Spectrum L4-91.5 1.5L (1985)
Timing Belt: Service and Repair
REMOVAL
1.
Remove engine as described under ``Engine, Replace.''
2.
Remove accessory drive belts, then the engine mounting bracket from front cover.
3.
Rotate crankshaft to position No. 4 piston at TDC of compression stroke.
4.
Remove starter motor, then install flywheel holder tool No. J-35271 or equivalent.
5.
Remove crankshaft bolt, then the boss and crank pulley.
6.
Remove front cover, then loosen tension pulley fixing bolt.
7.
Loosen timing belt tension using a hex wrench in the tension pulley hole.
8.
Remove timing belt.
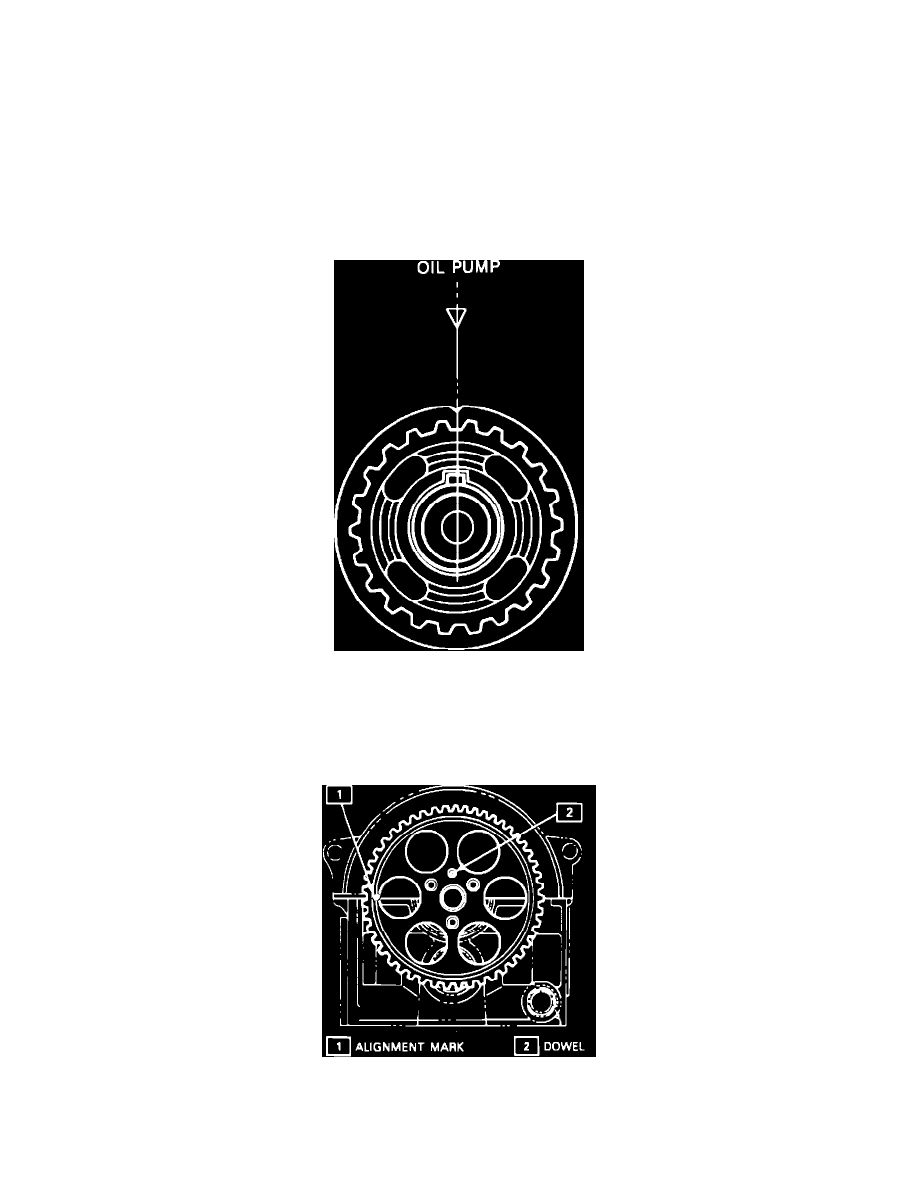
Fig. 10 Crankshaft pulley alignment
INSTALLATION
1.
Install crankshaft timing pulley, ensuring Woodruff key is properly positioned, Fig. 10.
2.
Position pulley on crankshaft, aligning pulley timing groove with mark on oil pump, Fig. 10.
Fig. 11 Camshaft pulley alignment
3.
Ensure camshaft pulley timing mark is aligned with upper surface of cylinder head and dowel pin is in up position, Fig. 11.