
Tahoe 2WD V8-4.8L VIN V (2004)
5. Disconnect the electrical connector from the A/C low pressure switch.
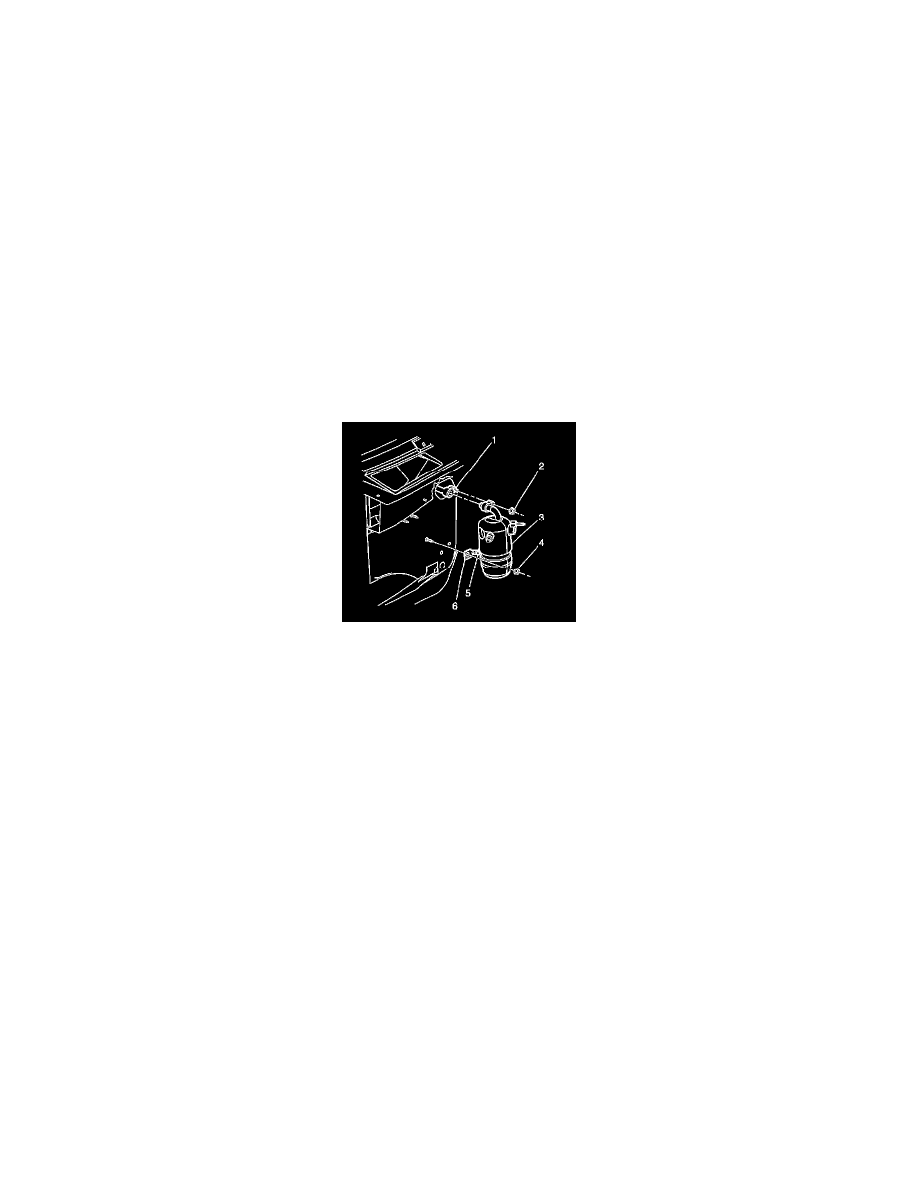
6. Remove the compressor hose nut from the accumulator.
7. Remove the compressor hose from the accumulator.
8. Remove the nut (2) from the evaporator fitting.
9. Remove the accumulator bracket nut (4) from the retaining stud.
10. Remove the accumulator (3).
11. Remove the retaining bracket bolt (5).
12. Remove the retaining bracket (6) from the accumulator.
13. Remove and discard the O-ring seals.
INSTALLATION PROCEDURE
1. Install the O-ring seals.
IMPORTANT: If replacing the accumulator, add the refrigerant oil to the condenser. Refer to Refrigerant System Capacities for system capacity
information.
2. Install the retaining bracket (6) to the accumulator.
3. Install the retaining bracket bolt (5).
NOTE: Refer to Fastener Notice in Service Precautions.
Tighten the bolt to 10 N.m (89 lb in).
4. Install the accumulator (3).
5. Install the accumulator bracket nut (4).
Tighten the nut to 9 N.m (80 lb in).
6. Install the nut (2) to the evaporator fitting.
Tighten the nut to 16 N.m (12 lb ft).
7. Install the compressor hose to the accumulator.
8. Install the compressor hose nut to the accumulator.
Tighten the nut to 16 N.m (12 lb ft).
9. Connect the electrical connector to the A/C low pressure switch.