
Tahoe 2WD V8-6.0L Hybrid (2008)
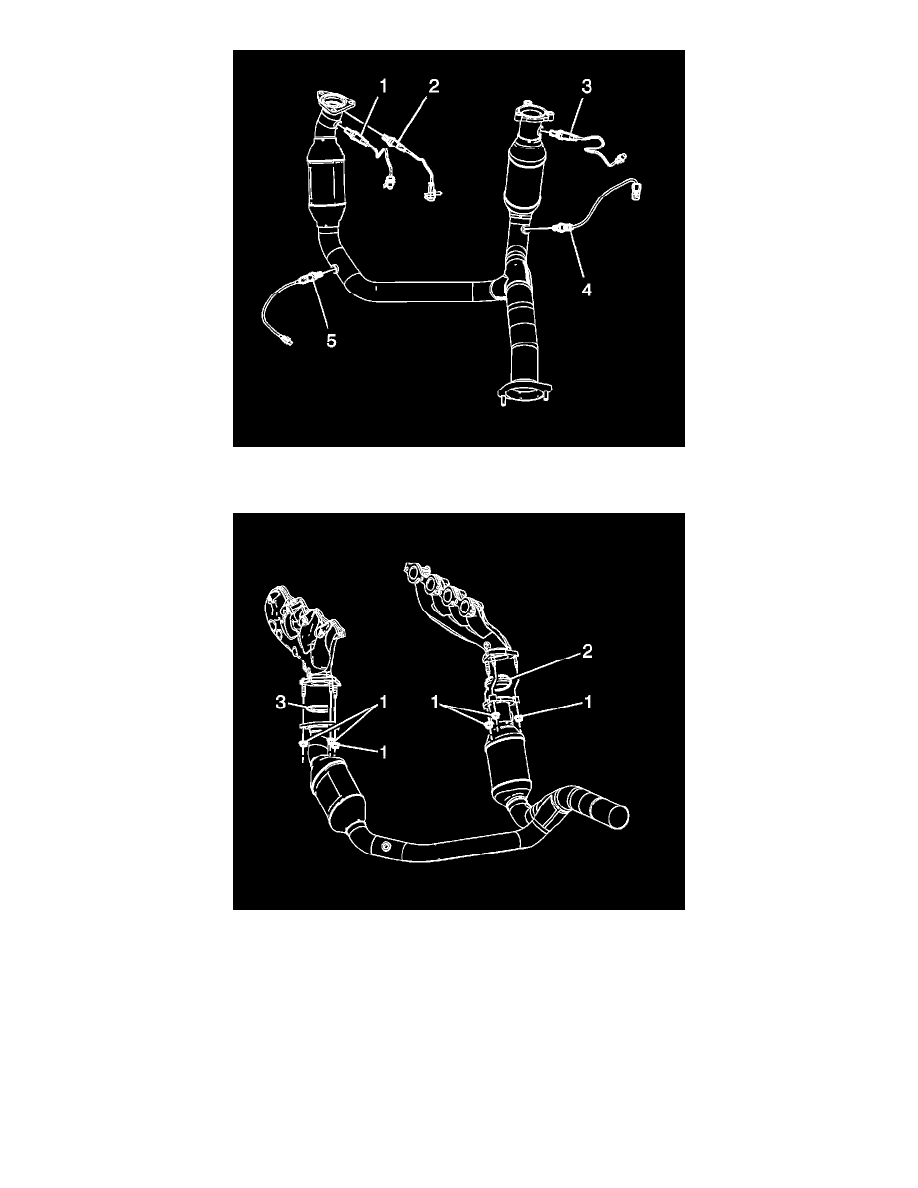
1. If replacing the catalytic converter assembly, perform the following steps, otherwise proceed to step 4.
2. If reinstalling the old sensors, coat the threads with anti-seize compound GM P/N 12377953, or equivalent.
3. Install the NEW exhaust seals (2 and 3) as required.
4. Install the catalytic converter assembly to the muffler.
5. Install the catalytic converter assembly to the exhaust manifolds.
Notice: Replacement components must be the correct part number for the application. Components requiring the use of the thread locking
compound, lubricants, corrosion inhibitors, or sealants are identified in the service procedure. Some replacement components may come with these
coatings already applied. Do not use these coatings on components unless specified. These coatings can affect the final torque, which may affect
the operation of the component. Use the correct torque specification when installing components in order to avoid damage.
6. Install the catalytic converter to exhaust manifold nuts (1).
Tighten the nuts to 50 N.m (37 lb ft).