
Tracker 2WD L4-1.6L VIN 6 (2000)
Brake Proportioning/Combination Valve: Service and Repair
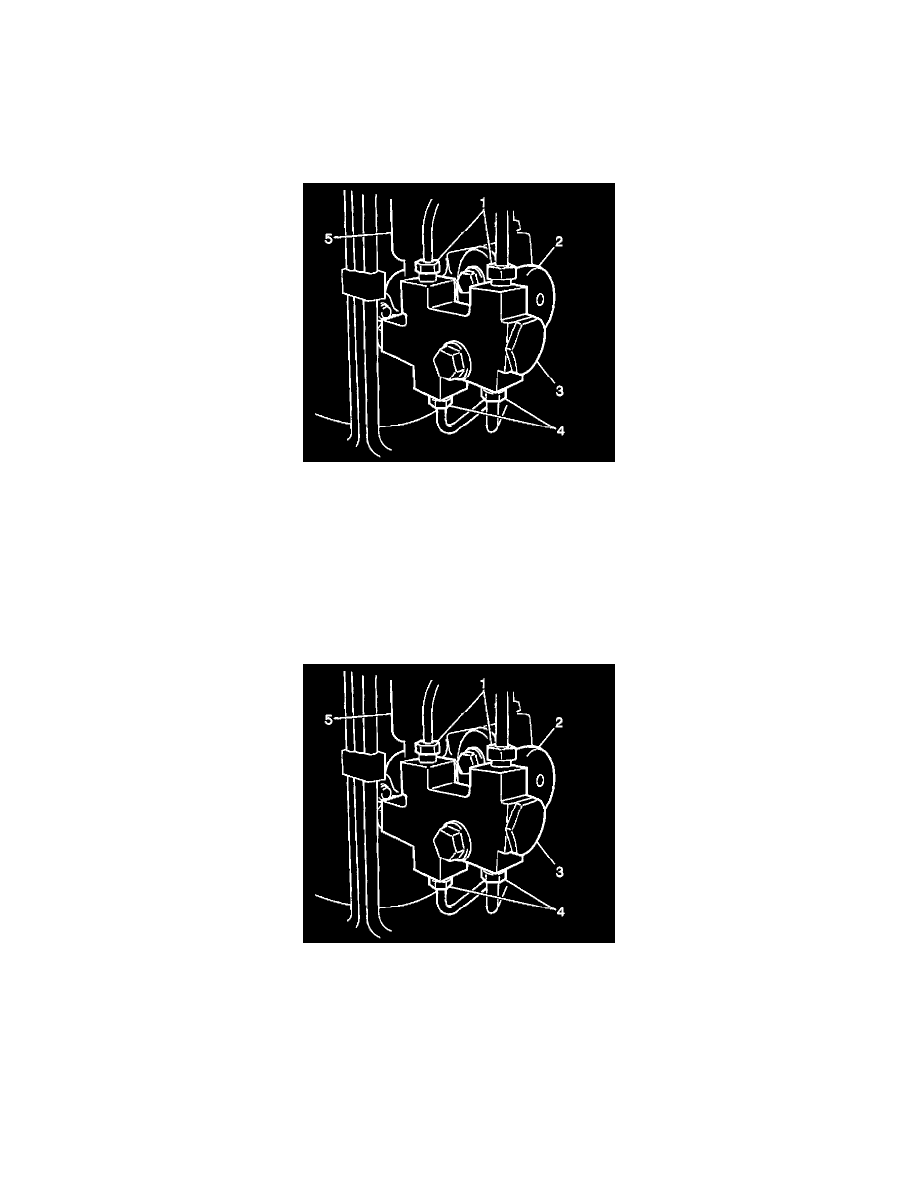
Proportioning Valve Replacement
Removal Procedure
Caution: Refer to Brake Fluid Irritant Caution in Service Precautions.
Notice: Refer to Brake Fluid Damage to Electrical Connections Notice in Service Precautions.
1. Clean around the reservoir cap and remove fluid with a syringe or equivalent.
2. Disconnect the brake pipes (1) from the proportioning valve (3).
Important: Do NOT disassemble the proportioning valve assembly.
3. Remove the proportioning valve.
Installation Procedure
Notice: Refer to Fastener Notice in Service Precautions.
1. Install the proportioning valve (3).
^
Tighten the proportioning valve bracket bolt to 10 Nm (88.5 inch lbs.).
^
Tighten the proportioning valve bolt to 23 Nm (17 ft. lbs.).
2. Install the brake pipes to the proportioning valve.
^
Tighten the flair nuts (1) to 16 Nm (12 ft. lbs.).
3. Fill the brake fluid reservoir. Refer to Master Cylinder Reservoir Filling.
4. Bleed the air from the hydraulic brake system. Refer to Hydraulic Brake System Bleeding.
5. Perform a brake test and inspect each installed part for fluid leakage.
6. Inspect the brake pedal play. Refer to Brake Pedal Travel.