
Tracker 2WD L4-1.6L VIN 6 (2000)
Front Crankshaft Seal: Service and Repair
Removal Procedure
Caution: Refer to Battery Disconnect Caution in Service Precautions.
1. Disconnect the negative battery cable.
2. Remove the crankshaft pulley. Refer to Crankshaft Pulley Replacement.
3. Remove the timing belt. Refer to Timing Belt Replacement.
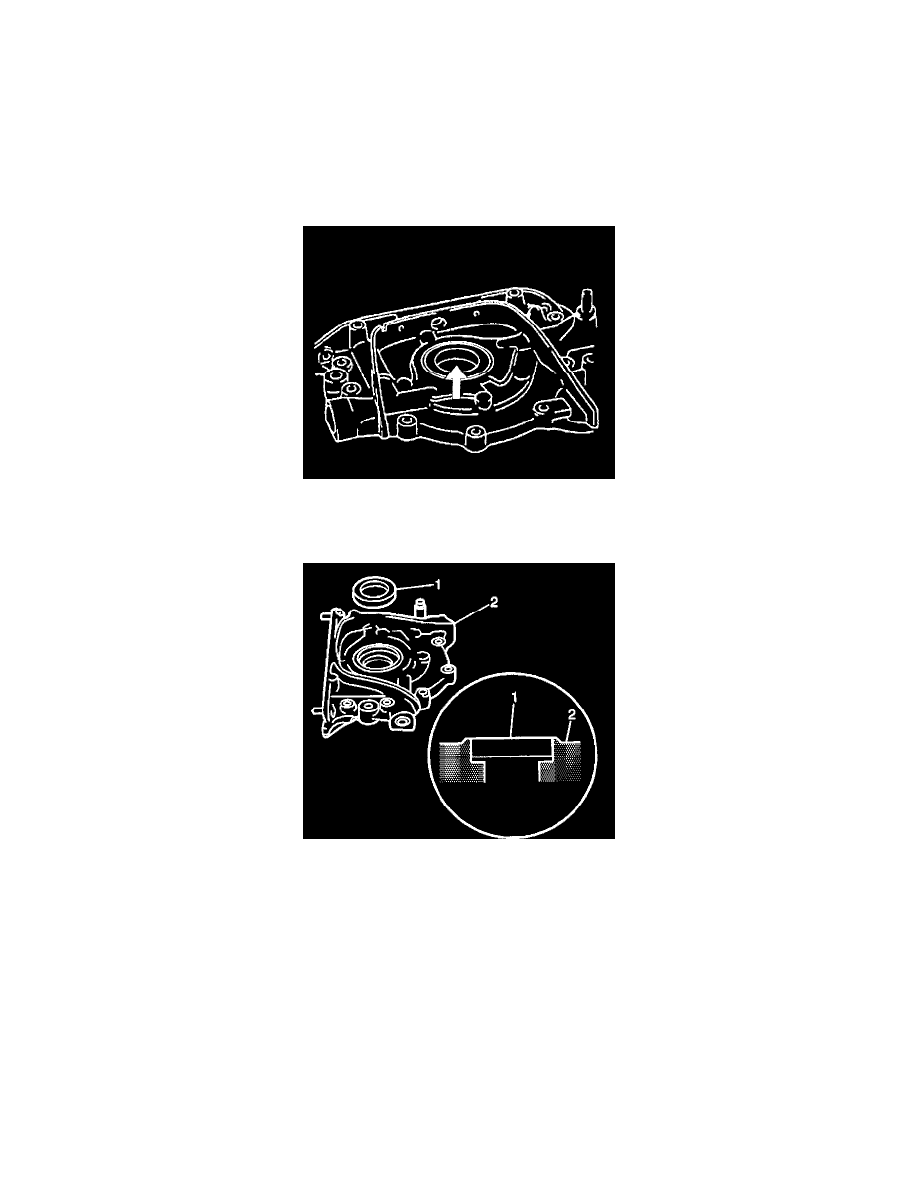
Important: To protect the crankshaft from damage, wrap the tip of the screwdriver with tape.
4. Use a screwdriver and pry out the crankshaft front oil seal.
Installation Procedure
1. Lubricate the new crankshaft front oil seal (1) with Chassis Grease GM P/N 1051344 or equivalent.
2. Using a hammer, lightly tap the crankshaft front oil seal into place.
Important: Tap the oil seal in until its surface is flush with the crankshaft front oil seal retainer edge.
3. Install the timing belt. Refer to Timing Belt Replacement.
4. Install the crankshaft pulley. Refer to Crankshaft Pulley Replacement.
Notice: Refer to Fastener Notice in Service Precautions.
5. Connect the negative battery cable.
^
Tighten the bolt to 15 Nm (11 ft. lbs.).
6. Start the engine.