
Tracker 2WD L4-1.6L VIN 6 (2000)
11. Gently pry the heater control fascia (4) from the control assembly.
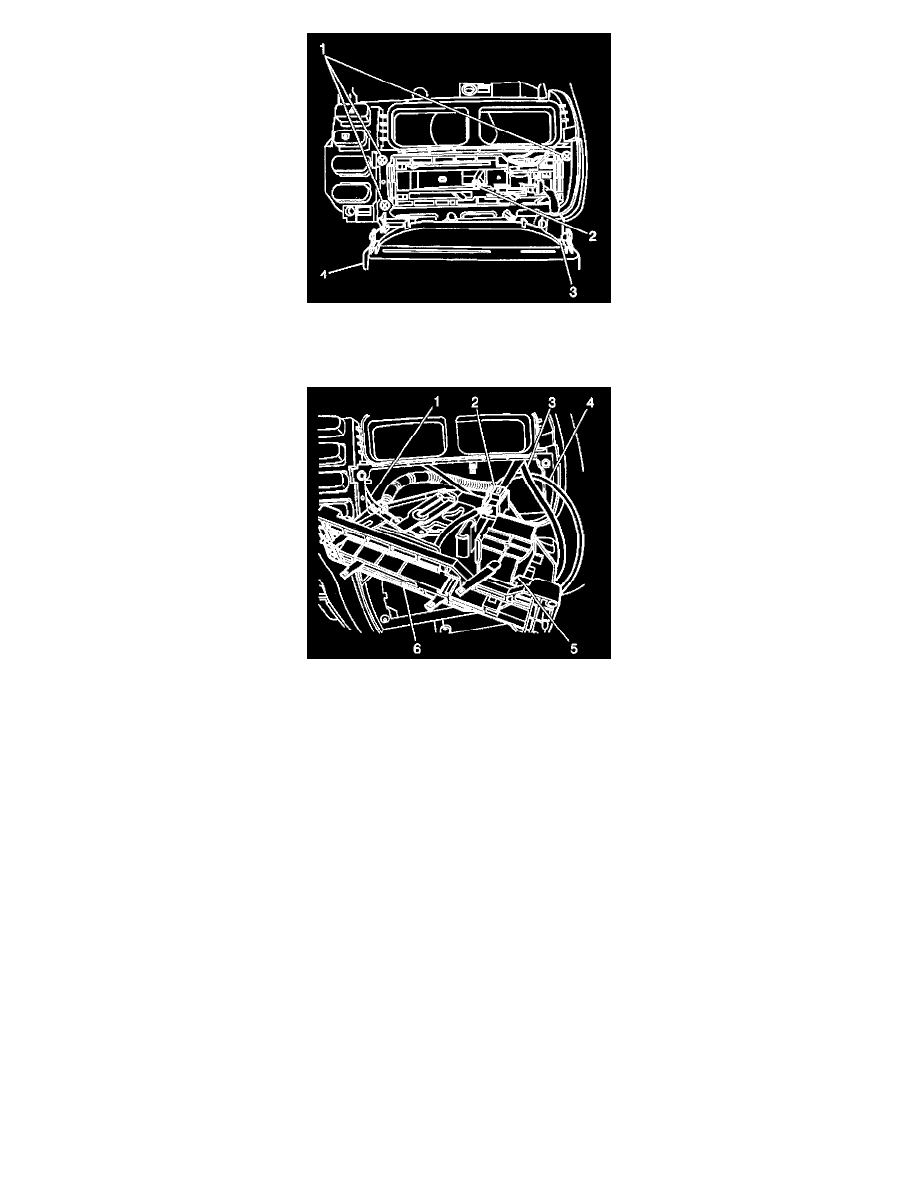
12. Twist and remove the bulb socket (2).
13. Remove the 3 screws (1).
14. Tilt the heater control unit to 1 side and pull through the IP.
15. Disconnect the blower switch electrical connector (5).
IMPORTANT: Note the routing position of the cables in order to facilitate installation.
16. Remove the heater control unit from the IP with the cables attached.
17. Remove the blower switch from the heater control unit, as necessary.
18. Remove the A/C switch from the heater control unit, as necessary.
19. Disconnect each control cable from the heater control unit:
19.1. Gently pry the temperature control cable (4) sheath from the heater control unit. Unhook the cable from the lever arm.
19.2. Gently pry the mode control cable (1) sheath from the heater control unit. Unhook the cable from the lever arm.
19.3. Gently pry the fresh/recirc control cable (3) from the heater control unit. Unhook the cable from the lever arm.
INSTALLATION PROCEDURE