
Tracker 2WD L4-2.0L VIN C (1999)
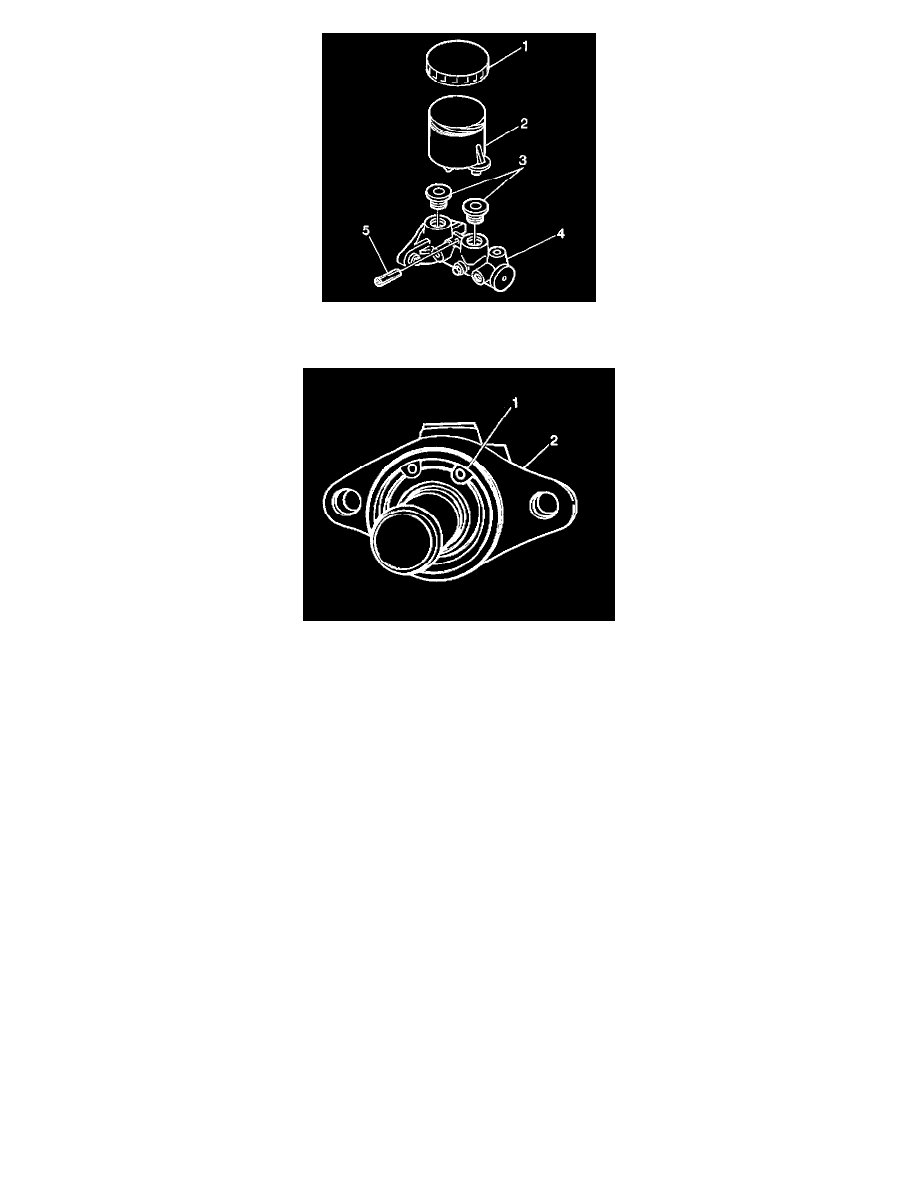
1. Remove the reservoir (2) from the master cylinder (4).
2. Remove the master cylinder from the booster.
3. Remove the piston stopper snap ring (1) from the master cylinder (2).
4. Remove the piston stopper.
5. Remove the cylinder cup.
6. Remove the plate.
7. Pull the primary piston assembly and the O-ring carefully from the master cylinder in order to prevent damage to the inside of the master cylinder
wall.
8. Remove the secondary piston stopper bolt and the washer from the master cylinder.
CAUTION: Do not place your fingers in front of the piston in order to catch or protect the piston while applying compressed air. This could
result in serious injury.
NOTICE: Do not use lubricated compressed air on brake parts as damage to rubber components may result.
9. Remove the secondary piston assembly by blowing compressed air into the secondary piston stopper bolt hole.
10. Remove the piston cup and the secondary piston pressure cup.
11. Remove the spring.
12. Inspect all disassembled parts for wear or damage. Replace parts if necessary.
IMPORTANT: DO NOT reuse piston cups.
13. Wash disassembled parts with brake fluid.
14. Inspect the master cylinder bore for scoring or corrosion (pits or excessive roughness). Replace a corroded master cylinder.
IMPORTANT: DO NOT use a cloth in order to dry the cylinder, because lint from a cloth will stick to the cylinder bore surfaces.
15. Rinse the cylinder in clean brake fluid. Shake excess rinsing fluid from the cylinder.
ASSEMBLY PROCEDURE