
Tracker 4WD L4-1.6L VIN 6 (1998)
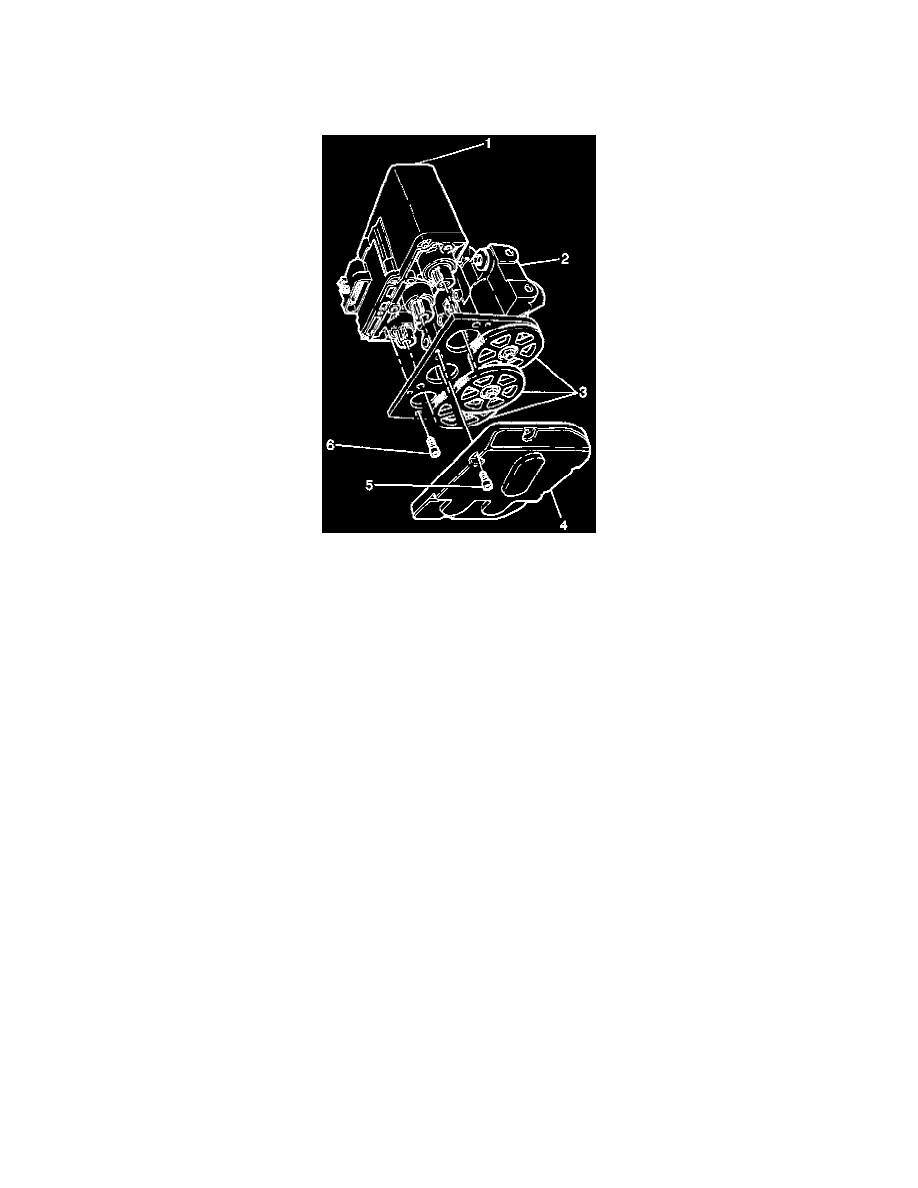
6. With the ABS brake modulator positioned upside down, and the gears facing you, rotate each ABS brake modulator gear clockwise until
movement stops.
The procedure causes the following conditions:
-
The pistons are positioned very close to the top of the modulator bore.
-
The brake bleeding procedure is simplified.
7. Install the ABS brake motor pack (1) onto the hydraulic brake modulator (2). Aligning the three motor pack gears with the modulator gears.
8. Install the four Torx head screws (6) that retain the motor pack (1) to the hydraulic brake modulator (2).
^
Tighten the four Torx head screws to 5 Nm (44 inch lbs.).
9. Install the gear cover (4) to the hydraulic brake modulator/motor pack assembly (2).
10. Install the Torso head screws (5) that retain the gear cover (4).
^
Tighten the Torx head screws to 4 Nm (36 inch lbs).
11. Install the ABS brake solenoids to the hydraulic brake modulator/motor pack assembly.
-
Lubricate the solenoid seals with clean brake fluid.
-
Verify that the solenoid seal is properly positioned to each solenoid.
-
Position solenoids so that their electrical connectors will face the same direction prior to removal.
-
By hand, press down firmly on the solenoids until their flanges seat onto the hydraulic modulator.
12. Install the four Torch head bolts that retain the brake solenoids.
^
Tighten the Torch head screws to 5 Nm (44 inch lbs.).
13. Install the brake modulator assembly.
14. Perform the Diagnostic System Check.