
Tracker 4WD L4-1.6L VIN 6 (1998)
Wheel Speed Sensor: Service and Repair
Replacement (Front)
REMOVAL PROCEDURE
1. Disconnect the Negative (-) battery cable.
CAUTION: Before removing or installing any electrical unit or when a tool or equipment could easily come in contact with "live"
exposed electrical terminals, disconnect the negative battery cable to help prevent personal injury and/or damage to the vehicle or
components. Unless instructed otherwise, the ignition switch must be in the "OFF" or "LOCK" position.
2. Raise and support the vehicle on a suitable hoist.
3. Disconnect the front wheel speed sensor electrical connector.
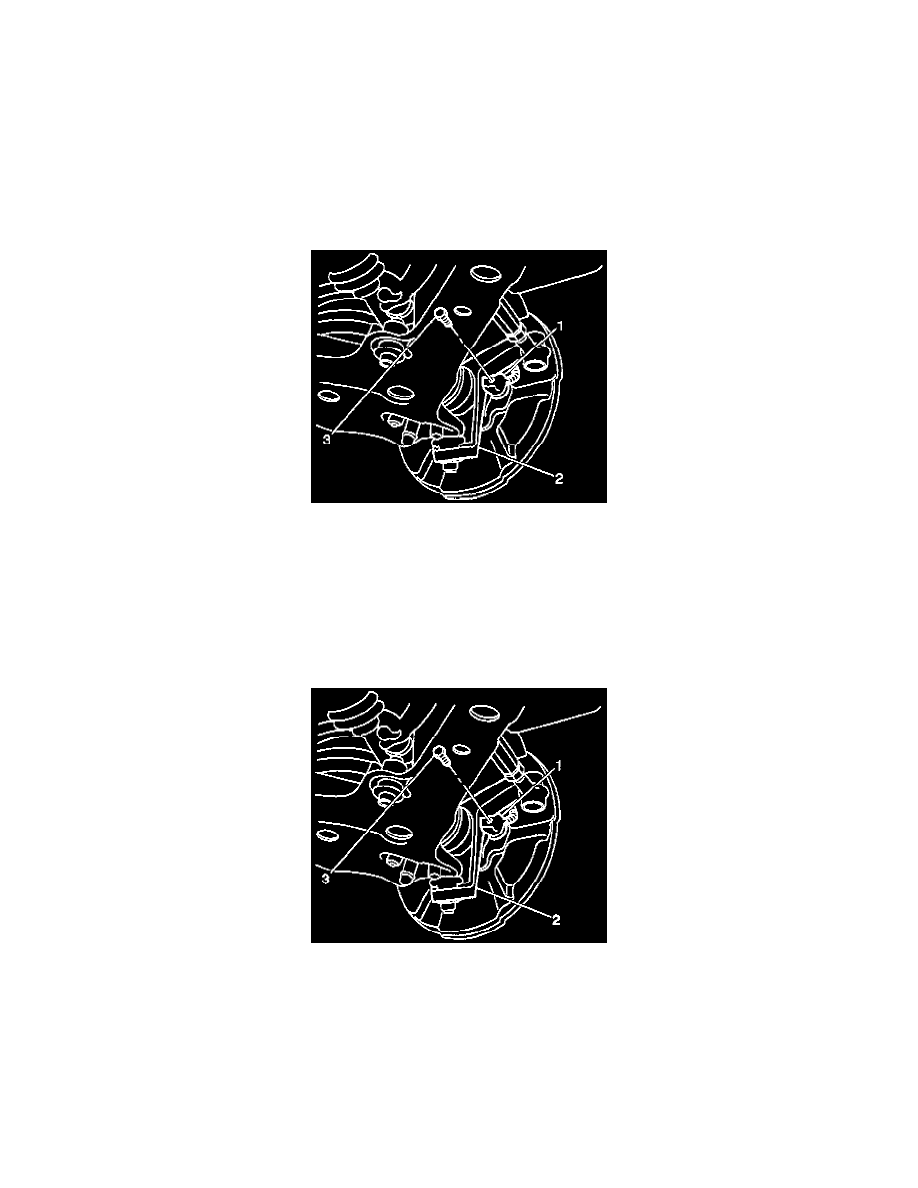
4. Remove the retaining bolt (3).
5. Remove the front wheel speed sensor (1) from the steering knuckle (2).
IMPORTANT: If the sensor locating pin breaks off and remains in the knuckle during removal, proceed as follows:
1. Remove the brake rotor and remove broken pin using a blunt punch.
2. Clean the hole using sand paper wrapped around a screwdriver or other suitable tool. Never attempt to enlarge the hole.
INSTALLATION PROCEDURE
1. Install the front wheel speed sensor (1) to the steering knuckle (2).
2. Install the retaining bolt (3).
^
Tighten the retaining bolt to 8-12 Nm (70.8-106.2 inch lbs.).
3. Connect the front wheel speed sensor electrical connector.
4. Lower the vehicle.
5. Connect the Negative battery cable.
CAUTION: Before removing or installing any electrical unit or when a tool or equipment could easily come in contact with "live"
exposed electrical terminals, disconnect the negative battery cable to help prevent personal injury and/or damage to the vehicle or
components. Unless instructed otherwise, the ignition switch must be in the "OFF" or "LOCK" position.