
Tracker 4WD L4-1.6L VIN 6 (1998)
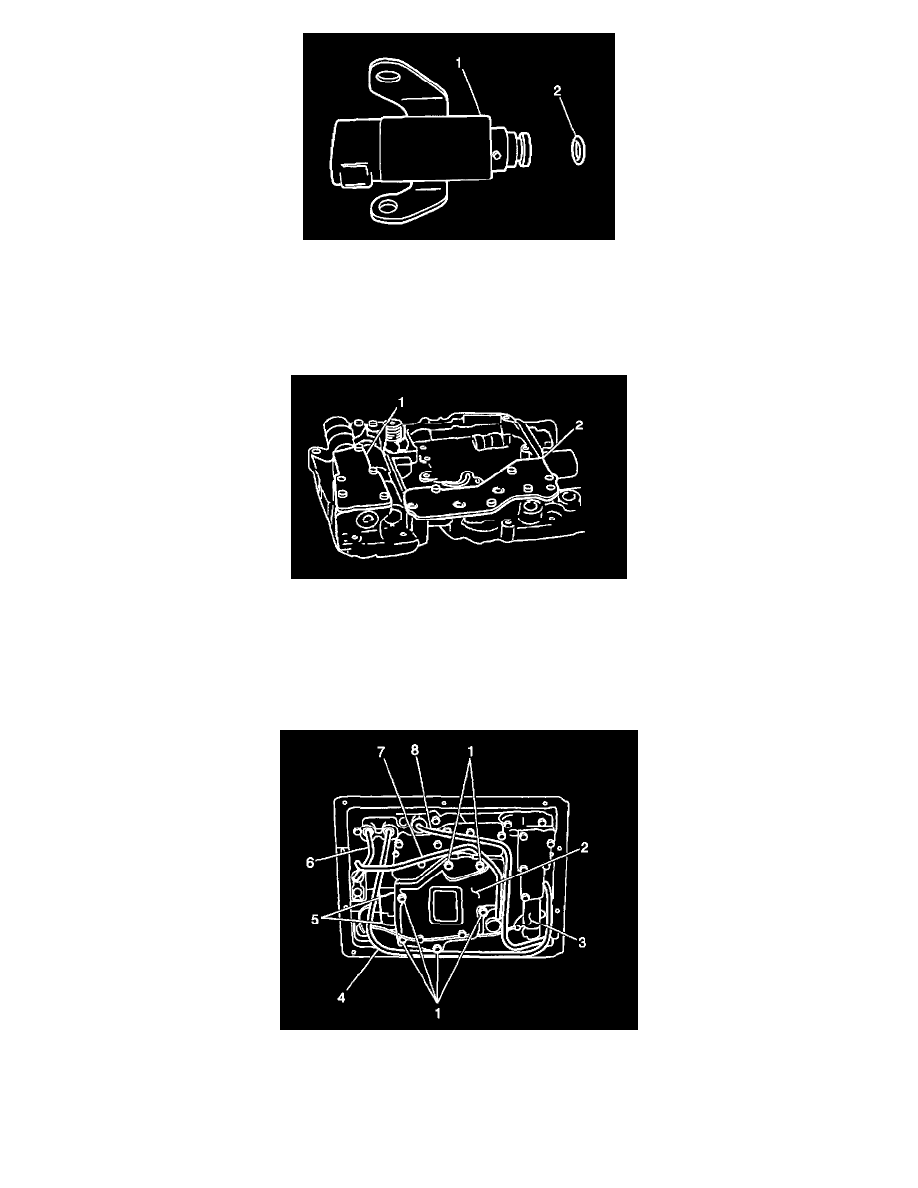
16. Remove the TCC solenoid (1) from the lower valve body.
17. Inspect the TCC solenoid pipe O-ring (2) for cuts and other damage. Replace the O-ring as necessary.
18. For TCC solenoid inspection and diagnosis procedures, Transmission Diagnosis Driveability Emissions. For a complete schematic of the TCC
system, refer to Diagrams.
INSTALLATION PROCEDURE
1. Install the new Torque Converter Clutch (TCC) solenoid gasket and TCC Solenoid (1) onto the lower valve body.
2. Secure the TCC solenoid (1) onto the lower valve body with the two bolts.
^
Tighten the TCC solenoid bolts to 5 Nm (44 inch lbs.).
NOTICE: Refer to Fastener Notice in Service Precautions.
3. Install the electrical connector to the TCC solenoid.
4. Apply a thin coat of automatic transmission fluid to the fluid pipe O-rings.
5. Install the fluid pipes in the following order 8, 4 and 7.