
Tracker 4WD L4-1.6L VIN 6 (1998)
Negative: Service and Repair
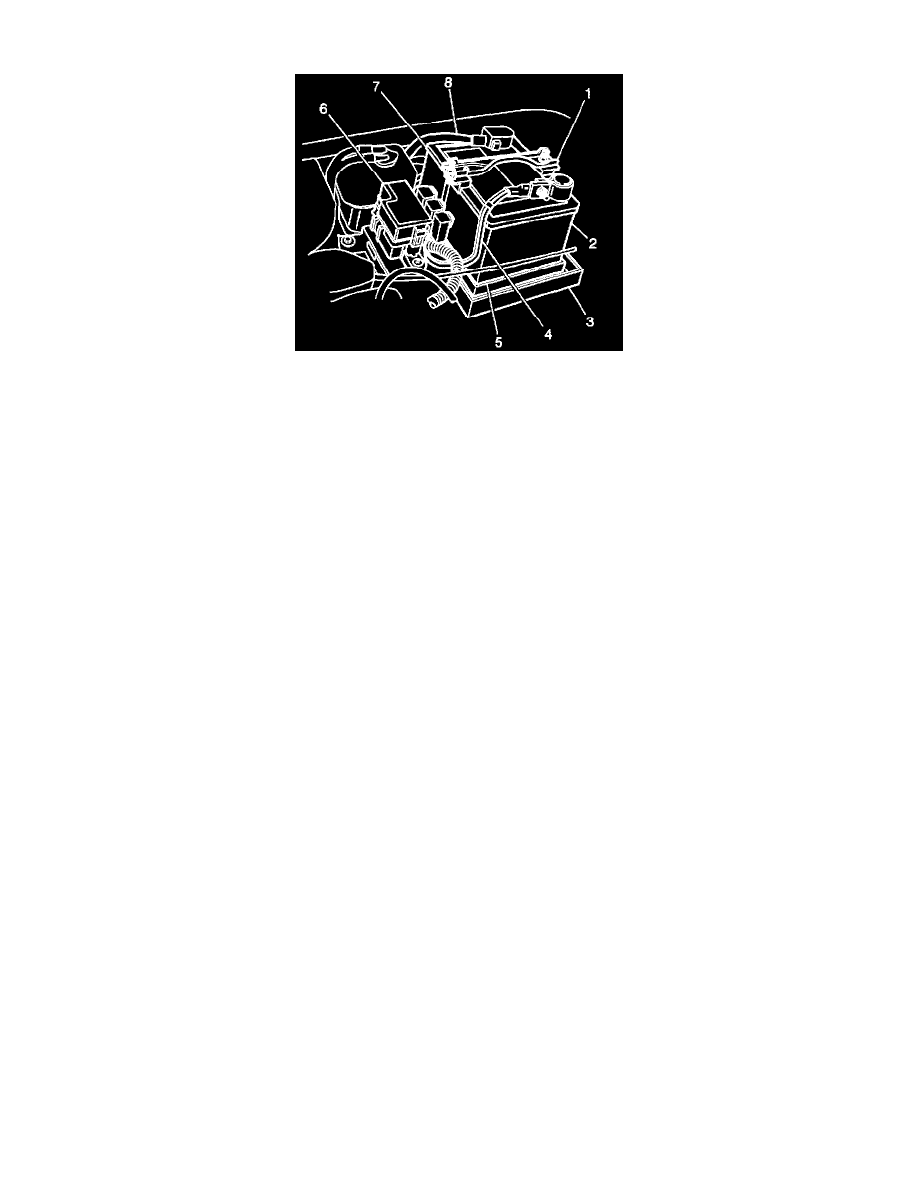
REMOVAL PROCEDURE
IMPORTANT: Whenever battery cables are being replaced, always be certain to use a replacement cable that is the same type, size and length. Some
positive (+) cables have additional feed wires attached to them and some negative (-) cables have additional ground leads attached. Always be certain to
route the replacement battery cable in exactly the same manner as the original cable.
1. Remove the battery from the vehicle.
CAUTION: Refer to Battery Disconnect Caution in Cautions and Notices
2. Remove the ground bolt and the negative (-) battery cable (4) from the body.
3. Remove the ground bolt and the cable from the starter motor housing.
4. Remove the cable from the harness retainer near the starter motor and remove the cable from the vehicle.
INSTALLATION PROCEDURE
1. Position the negative (-) battery cable (4) into the vehicle.
NOTICE: Refer to Fastener Notice in Cautions and Notices.
2. Connect the cable to the starter motor housing. Secure with the ground bolt.
Tighten
Tighten the ground bolt to 23 N.m (17 lb ft).
3. Connect the cable to the body. Secure with the ground bolt.
Tighten
Tighten the body ground bolt to 14 N.m (124 lb in).
4. Route the cable and secure it in the harness retainer near the starter motor.
5. Install the battery into the vehicle.