
Tracker 4WD L4-2.0L VIN C (1999)
Brake Caliper: Service and Repair
Brake Caliper Overhaul
DISASSEMBLY PROCEDURE
1. Raise and support the vehicle.
2. Remove the tire and wheel assembly.
3. Remove the caliper from the vehicle.
CAUTION:
^
Do not place your fingers in front of the piston in order to catch or protect the piston while applying compressed air. This could result
in serious injury.
^
Wear safety glasses in order to avoid eye damage.
NOTICE: Use just enough air pressure to ease the piston out of the bore. You can damage a blown-out piston even with the padding.
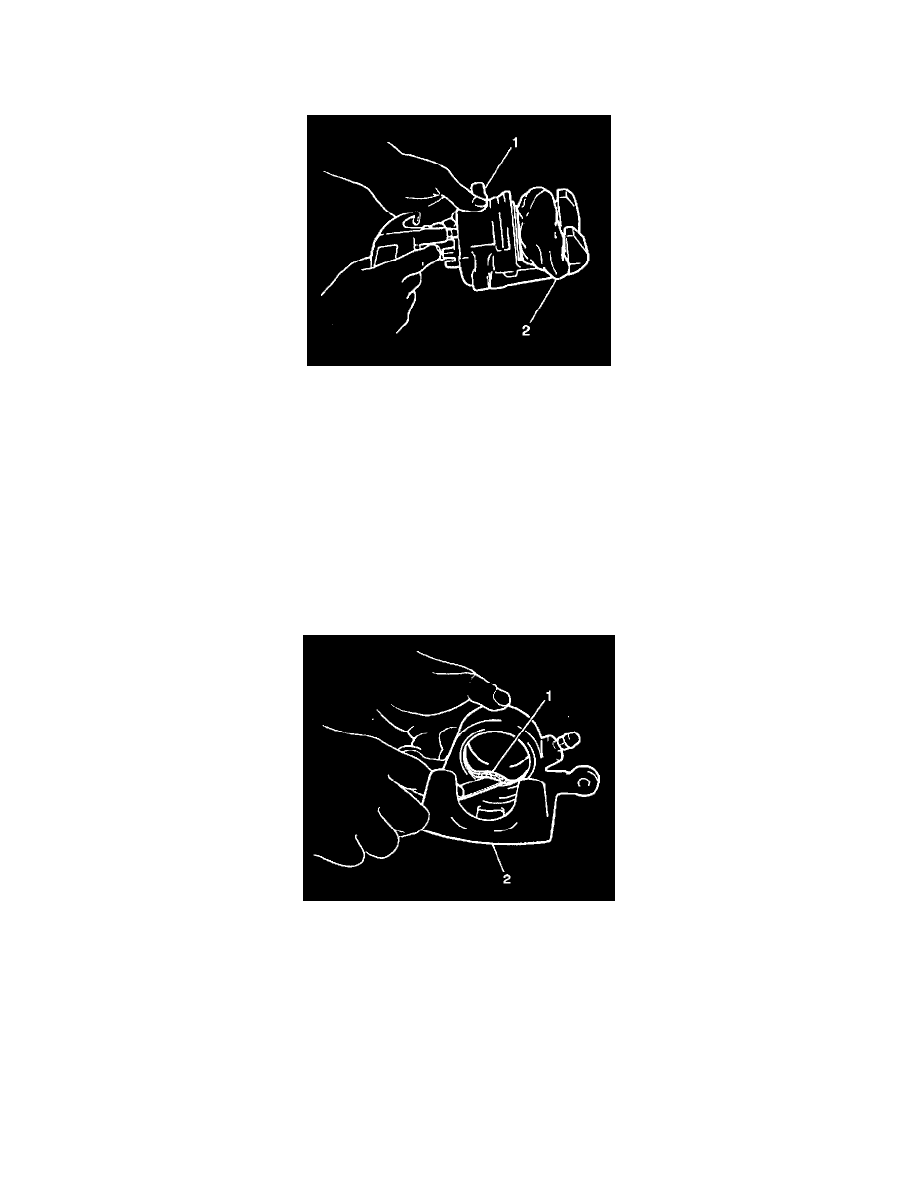
4. Insert a block of hard wood or a shop cloth (2) into the caliper interior (1) to catch the piston as it is forced out of the bore with compressed air.
5. Remove the piston from the caliper by applying compressed air to the caliper brake hose connector hole.
6. Remove the rubber boot from the caliper groove.
7. Use a flat plastic tool in order to remove the piston seal (1) from the caliper (2).
8. Remove the bleeder valve from the caliper.
9. Remove the caliper pin bolts, with the boots, from the caliper.
CAUTION: Brake fluid may irritate eyes and skin. In case of contact, take the following actions:
^
Eye contact-rinse thoroughly with water.
^
Skin contact-wash with soap and water.
^
If ingested-consult a physician immediately.
NOTICE: Brake fluid will damage electrical connections and painted surfaces. Use shop cloths, suitable containers, and fender covers to prevent
brake fluid from contacting these areas. Always re-seal and wipe off brake fluid containers to prevent spills.
10. Clean the following items in brake fluid: