
Tracker 4WD L4-2.0L VIN C (1999)
Timing Chain: Service and Repair
Timing Chain and Sprockets Replacement - Crankshaft
Removal Procedure
Caution: Refer to Battery Disconnect Caution in Service Precautions.
1. Disconnect the negative battery cable.
2. Remove the spark plugs in order to make rotating the crankshaft to line up the timing marks easier.
3. Remove the timing chain housing.
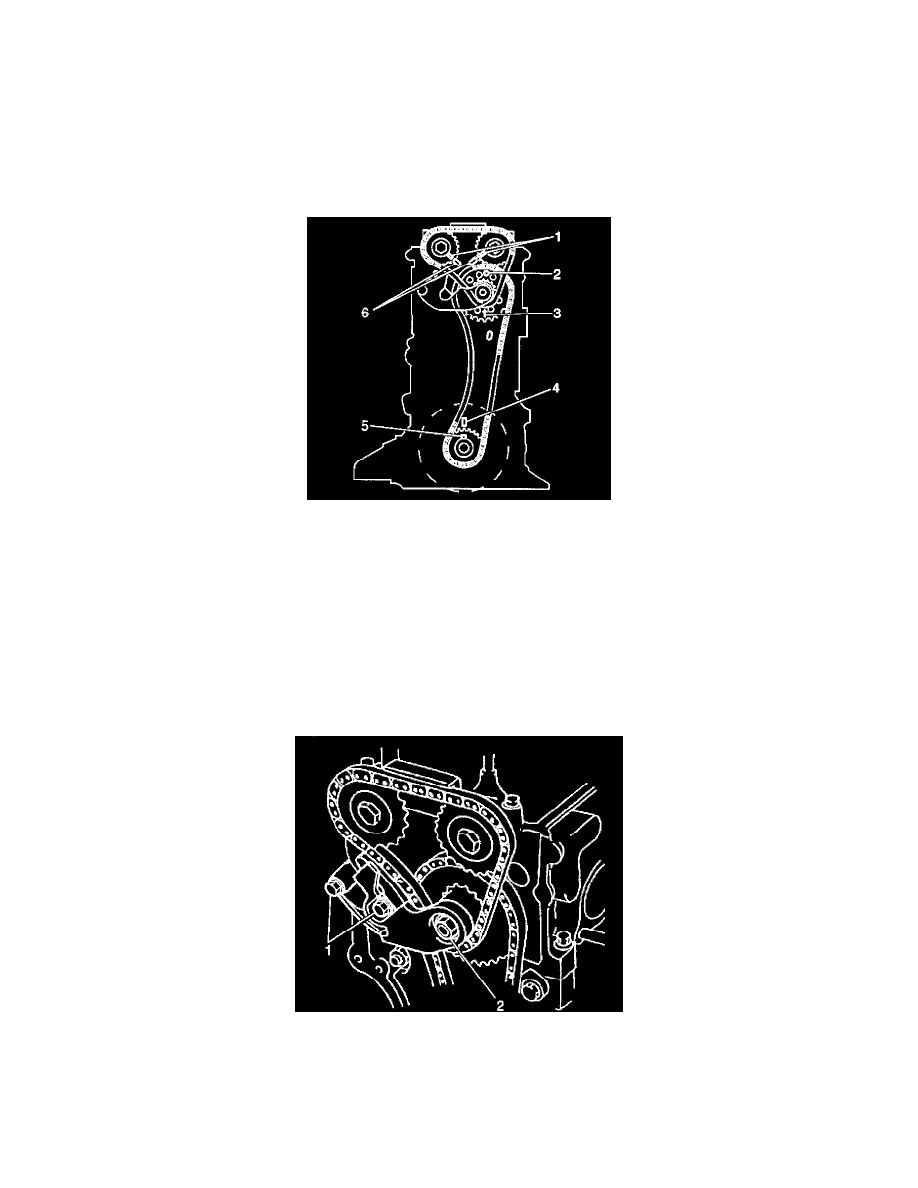
Important:
^
The timing marks must be correctly aligned before disassembly in order to correctly install the timing chains.
^
Avoid turning the camshafts and the crankshaft once the timing chain is removed. Valve and piston damage may occur.
^
If necessary, the camshafts (1) may be turned 15 degrees from the notches (6) on the cylinder head in either direction.
^
If necessary, the crankshaft (5) may be turned 90 degrees from the mark (4) on the engine block in either direction.
4. Rotate the crankshaft so that the following conditions are met:
^
The number 1 (frontmost) cylinder is at the Top Dead Center (TDC) position.
^
The keyway on the crankshaft (5) aligns with the mark on the engine block (4).
^
The arrow (3) on the idler sprocket is pointing upward.
^
The guide pins (1) on the camshaft sprockets line up with the notches (6) on the cylinder head.
5. Relieve the tension on the camshaft timing chain by turning the intake camshaft slightly counterclockwise.
6. Remove the nut and 2 bolts (1, 2).
7. Remove the camshaft timing chain tensioner and the gasket.