
Tracker 4WD L4-2.0L VIN C (1999)
Control Module HVAC: Service and Repair
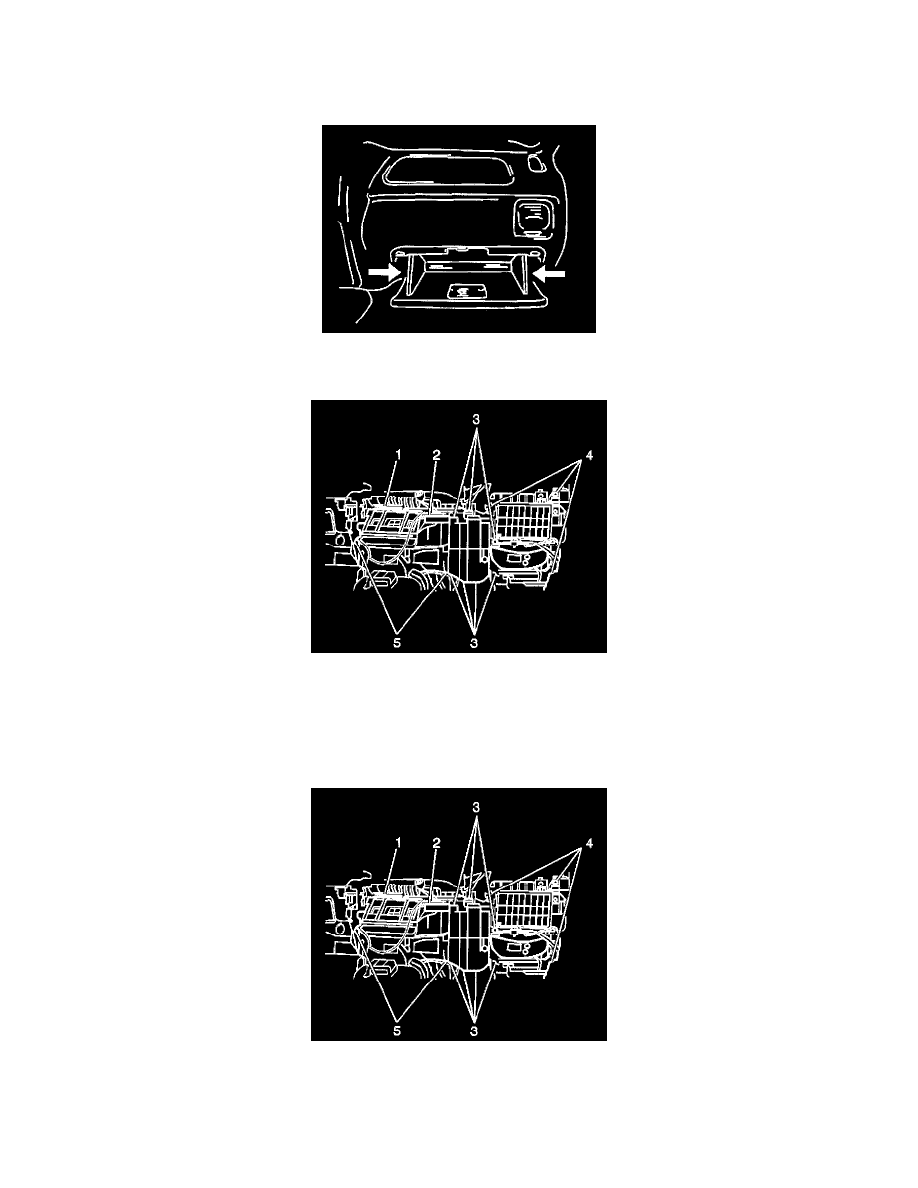
A/C COMPRESSOR CONTROL MODULE REPLACEMENT
REMOVAL PROCEDURE
1. Open the Instrument Panel (IP) compartment.
2. Push in the left and right side of the IP compartment and lower the IP compartment.
3. Unsnap the A/C compressor control module (2) and slide towards the rear of the vehicle.
4. Tilt the A/C compressor control module and disconnect the evaporator temperature sensor connector.
5. Disconnect the A/C compressor control module connector.
6. Remove the A/C compressor control module from the vehicle.
INSTALLATION PROCEDURE
1. Install the A/C comparison control module (2) to the vehicle.
2. Connect the A/C comparison control module electrical connector.
3. Tilt the A/C compressor control module and connect the evaporator temperature sensor.
4. Line up the A/C comparison control module with the slots on the heater case and slide into place. Ensure that the A/C comparison control module
snaps into place.