
Tracker 4WD L4-2.0L VIN C (1999)
Turn Signal Flasher: Service and Repair
REMOVAL PROCEDURE
CAUTION: Refer to Battery Disconnect Caution in Cautions and Notices.
1. Disconnect the negative battery cable.
2. Remove the IP steering column opening trim plate.
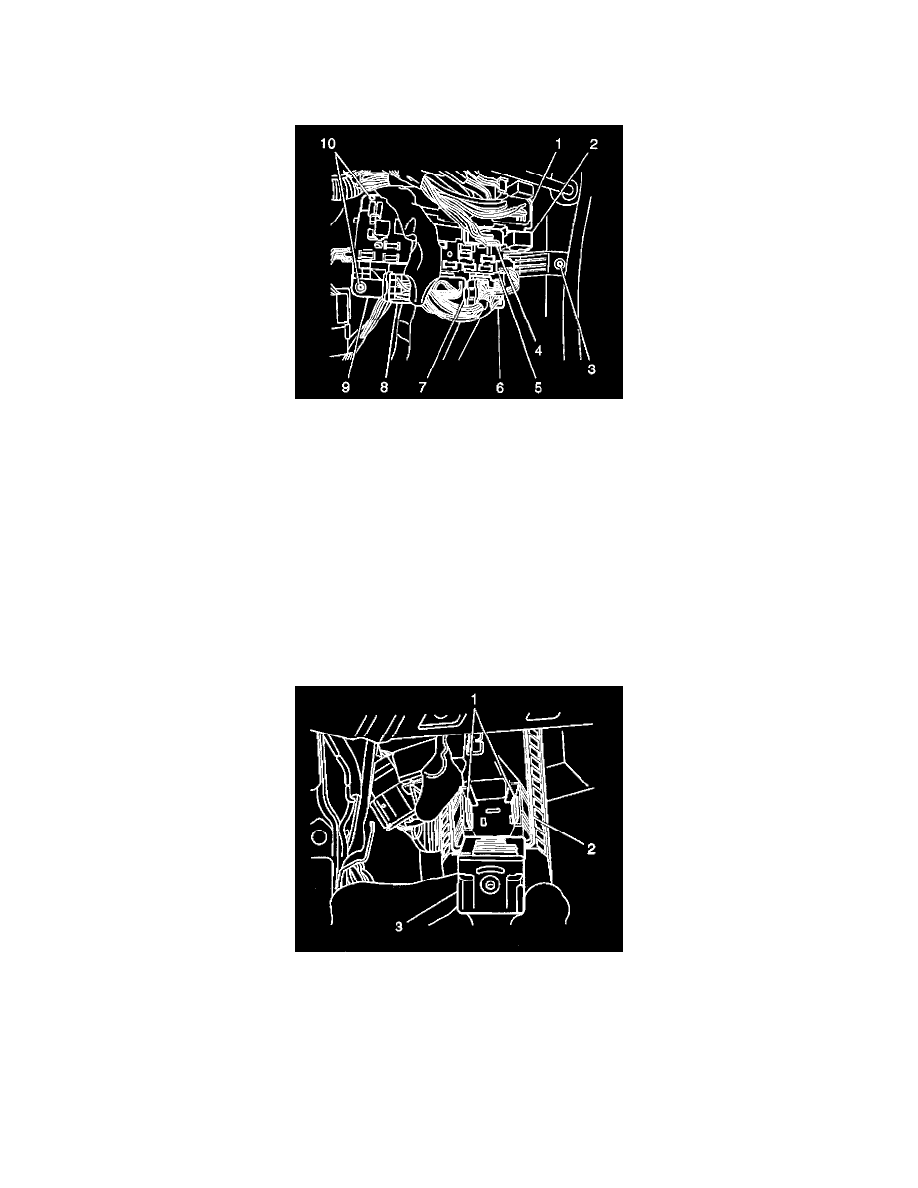
3. Slide the bracket that contains the fuel pump relay and the main relay from the left front side of the junction block (9).
4. Slide the following connectors from the bottom of the junction block (9):
-
Inline connector C213 (8)
-
Inline connector C205 (7)
-
Inline connector C204 (6)
5. Disconnect the following electrical connectors from the front of the junction block (9):
-
Junction block connector C4 (4)
-
Junction block connector C5 (5)
6. Remove the 2 nuts (10) that retain the junction block (9) to the left hinge pillar.
7. Remove the nut (3) that retains the junction block (9) to the bulkhead.
8. Remove the junction block (9) from the 3 retaining studs in order to gain the necessary clearance to disconnect the electrical connectors from the
rear of the junction block (9).
9. Separate the connector housing from the junction block (9) by gently disengaging the retaining tabs (1) at the top of the junction block (9).
10. Remove the turn/hazard flasher (3) from the junction block (2) by disengaging the retaining tabs (1) and pulling the flasher straight out.
INSTALLATION PROCEDURE