
Tracker 4WD L4-2.0L VIN C (1999)
Camshaft Position Sensor: Service and Repair
Camshaft Position (CMP) Sensor Replacement
REMOVAL PROCEDURE
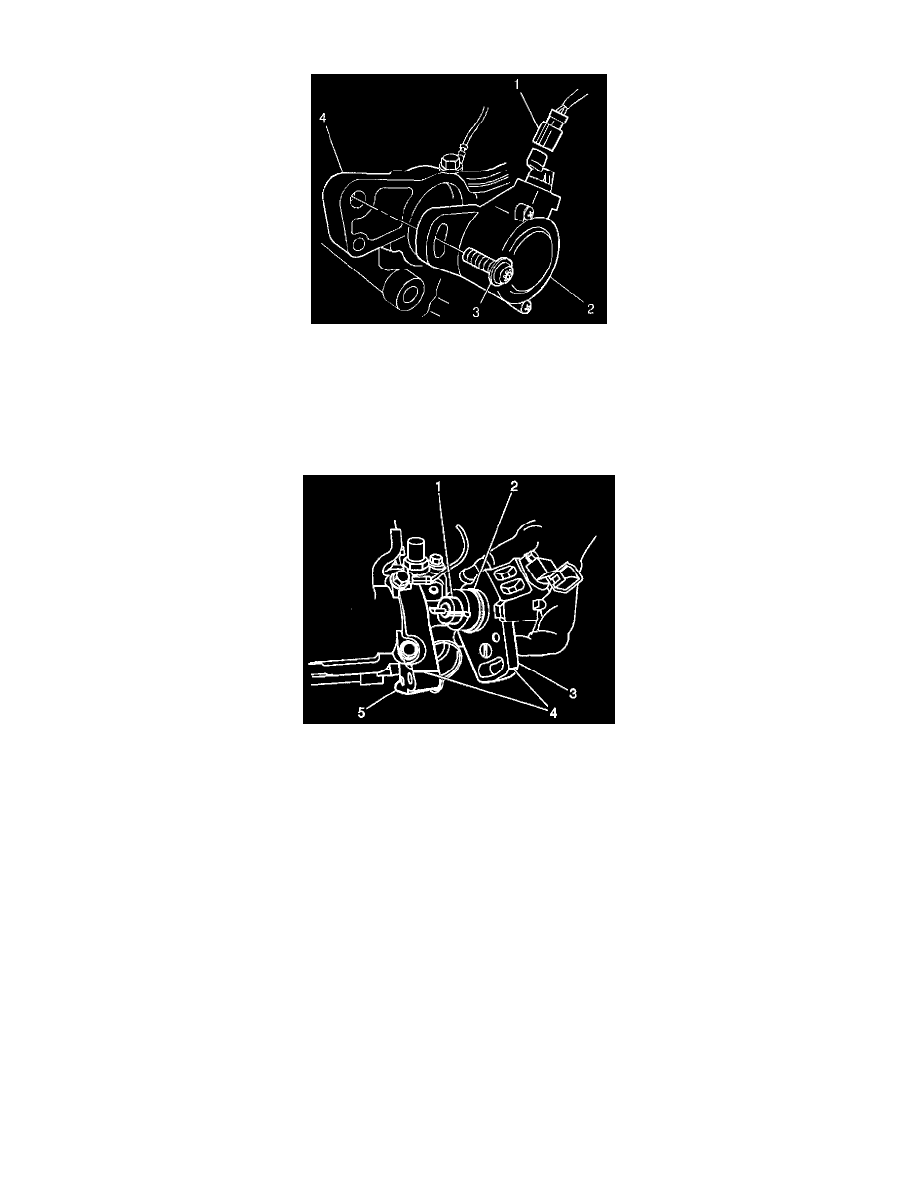
1. Disconnect the camshaft position CMP sensor electrical connector (1).
2. Scribe an alignment mark on the flange of the CMP sensor housing and the cylinder head.
3. Remove the CMP sensor housing bolt (3).
4. Remove the CMP sensor (2) from the cylinder head (4).
INSTALLATION PROCEDURE
1. Install a new O-ring (2) on the CMP sensor housing.
2. Lubricate the CMP sensor O-ring with engine oil.
IMPORTANT: Do not use force to install the CMP sensor housing into the cylinder head. The CMP sensor coupling has an offset drive that engages
an offset slot in the end of the camshaft. Align the CMP sensor coupling and the camshaft slot before installing the CMP sensor housing into the
cylinder head.
3. Align the offset coupling (1) of the CMP sensor to correctly engage the drive slot in the end of the camshaft.
4. Install the CMP sensor housing (3) into the cylinder head (5), while observing the offset coupling (1) on the CMP sensor for proper alignment
during installation.
5. Install the CMP sensor housing bolt, but do not tighten.
6. Rotate the CMP sensor housing (2) until the alignment marks (4) are matched up.
NOTE: Refer to Fastener Notice in Cautions and Notices.
7. Tighten the CMP sensor housing bolt.
Tighten
Tighten the CMP sensor housing bolt to 15 N.m (11 lb ft).
8. Connect the CMP sensor electrical connector (1).
9. Install a timing light and check the ignition timing. Refer to Ignition Timing Adjustment.