
Tracker 4WD L4-2.0L VIN C (1999)
Heated Oxygen Sensor2 (HO2S 2) Replacement
NOTE: Refer to Heated Oxygen and Oxygen Sensor Notice in Cautions and Notices.
REMOVAL PROCEDURE
IMPORTANT: The HO2S may be difficult to remove at temperatures above 48°C (120°F). In order to prevent damage to any threads in the exhaust
manifold, allow the exhaust system to cool down before attempting to remove the HO2S.
CAUTION: Refer to Vehicle Lifting Caution in Cautions and Notices.
1. Raise and suitably support the vehicle. Refer to Lifting and Jacking the Vehicle in General Information.
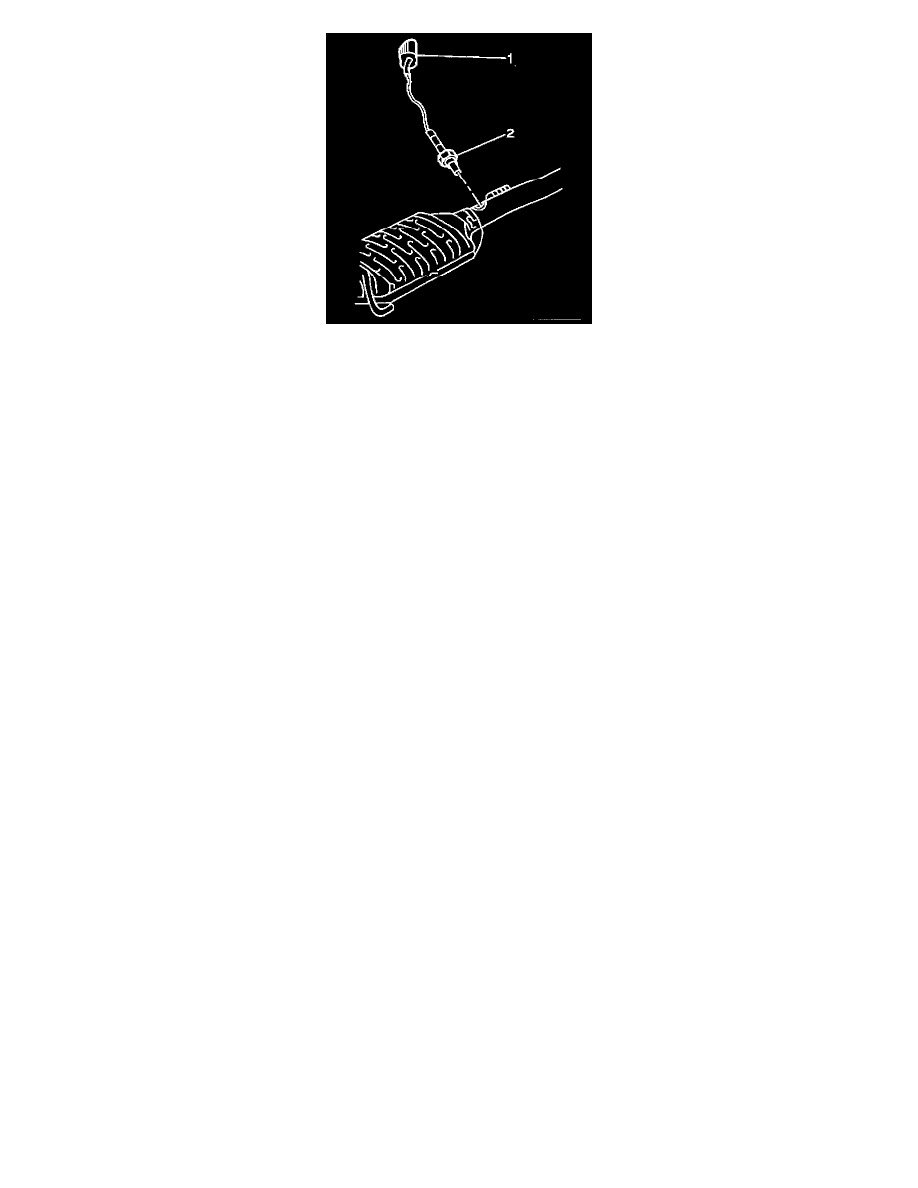
2. Pull the HO2S 2 electrical connector (1) through the floor pan.
3. Disconnect the HO2S 2 (2) electrocal connector.
4. Remove the HO2S 2 (2) from the exhaust pipe.
INSTALLATION PROCEDURE
NOTE: Refer to Component Tightening Notice in Cautions and Notices.
IMPORTANT: The new HO2S 2 comes with an anti-seize coating on the sensor threads. Take precautions in order to prevent the removal of any of
the anti-seize coating prior to installation. If the sensor was removed and is being reinstalled, an anti-seize compound must be applied to the threads
before installation.
1. Install HO2S 2 (2) into the exhaust pipe.
Tighten
Tighten HO2S sensor to 45 N.m (32 lb ft).
2. Connect the HO2S 2 (2) electrocal connector.
3. Insert the HO2S 2 electrical connector (1) up through the opening in the floor pan.
4. Lower the vehicle.