
Tracker 4WD L4-2.0L VIN C (1999)
Fluid Line/Hose: Service and Repair
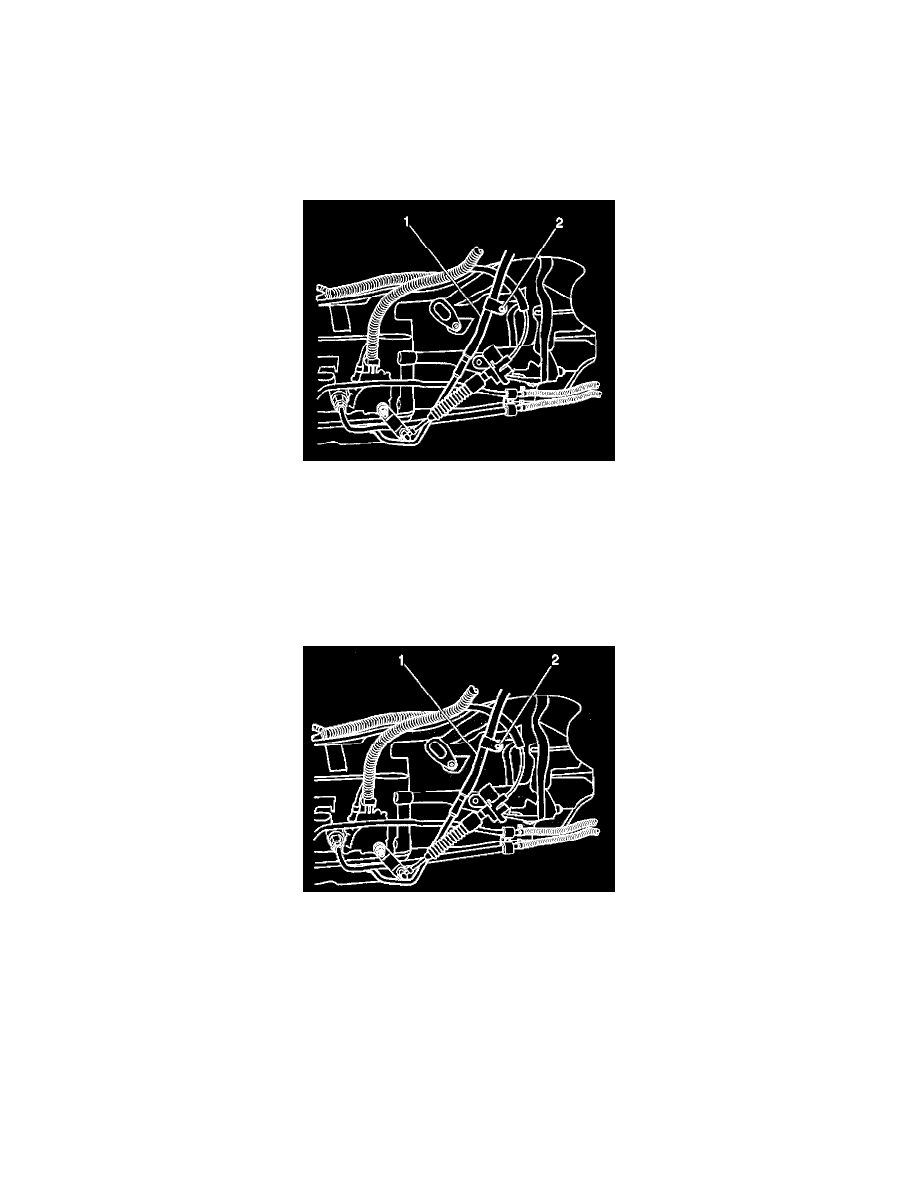
Transmission Cooler Pipes Replacement
Removal Procedure
1. Raise the vehicle. Support the vehicle. Refer to Vehicle Lifting.
2. Remove the 4 front skid plate bolts.
3. Remove the front skid plate.
4. Place a drain pan or suitable container under the transmission cooler hoses.
5. Remove the 1 bolt (2) and the cooler pipe clamp from the transmission.
6. Remove the inlet and the outlet transmission cooler pipes from the transmission by loosening both of the flare nuts at the cooler pipe fittings.
7. Remove the drain pan from under the vehicle.
8. Inspect the transmission cooler pipes for kinks or other damage. Replace the cooler pipes as necessary.
9. Inspect the cooler pipe flare nuts for damage. Replace the nuts as necessary.
Installation Procedure
Notice: Refer to Fastener Notice in Service Precautions.
1. Install the inlet and, the outlet transmission cooler pipes (1) to the transmission by threading both of the flare nuts into the cooler pipe fittings.
^
Tighten the cooler pipe flare nuts to 25 Nm (18 ft. lbs.).