
Tracker 4WD L4-2.0L VIN C (1999)
1. Position the rear axle housing under the vehicle with the hydraulic floor jack.
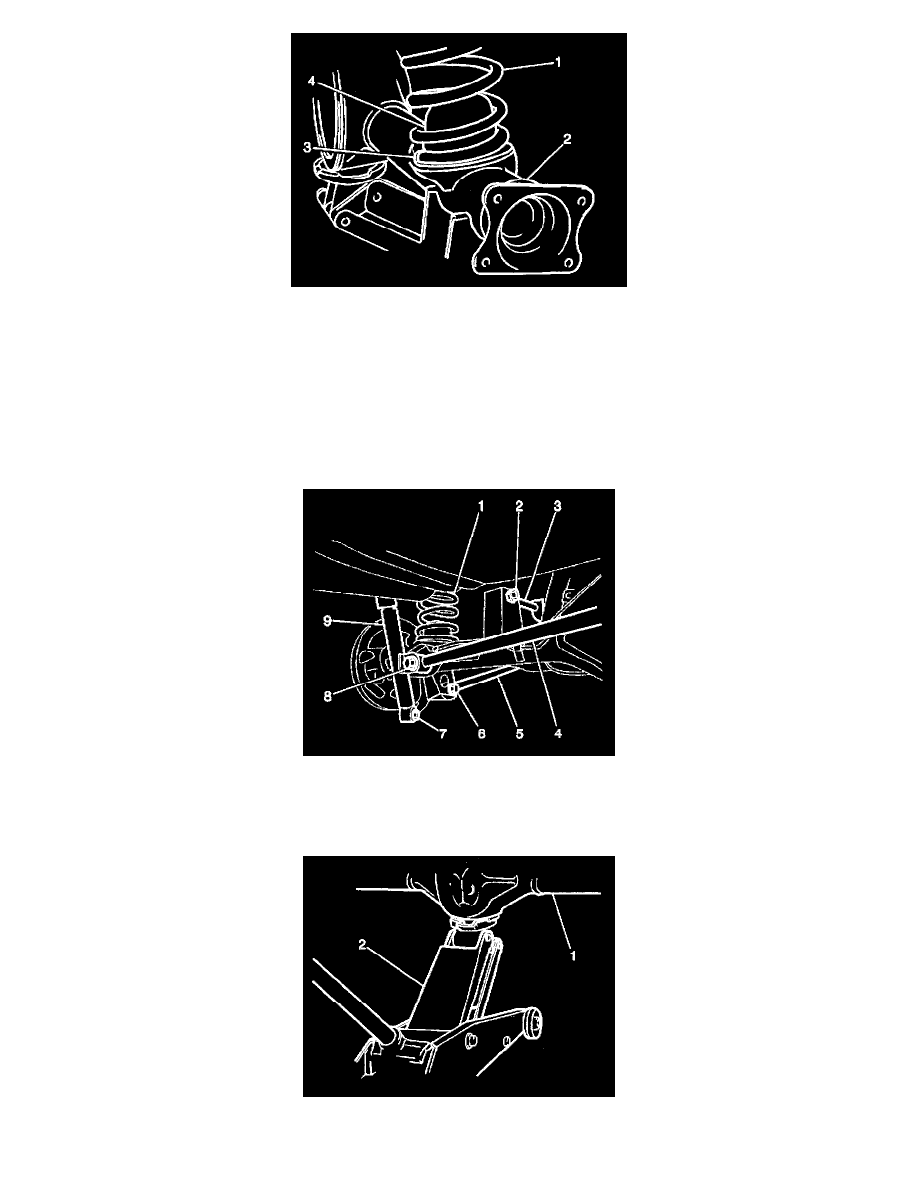
Caution: To prevent personal injury and/or component damage, make sure the coil spring is properly seated and use the proper tools to
install the lower control arm to the vehicle. The coil spring is under extreme pressure and can become a projectile should the spring separate
from the lower control arm before the lower control arm is secured to the vehicle.
Important: When installing the rear coil springs in their spring seats, make sure that the spring end with the stepped portion (landing) is aligned with
the stepped portion of the rear axle housing.
2. Install the 2 rear coil springs.
3. Install both of the lower control arms (5) to the rear axle housing and insert 2 washers and 2 through bolts (one in each side).
4. Install both of the upper control arms (3) to the rear axle housing and insert the 2 through bolts (one on each side).
5. Install both of the rear shock absorbers to the rear axle housing and insert 2 through bolts (one in each side).
6. Install the rear axle tie rod (4) and insert the washer and the through bolt.
7. Slowly raise the rear axle housing (1) with a hydraulic floor jack (2) until the rear coil springs are positioned in the upper spring seats.