
Tracker 4WD L4-2.0L VIN C (1999)
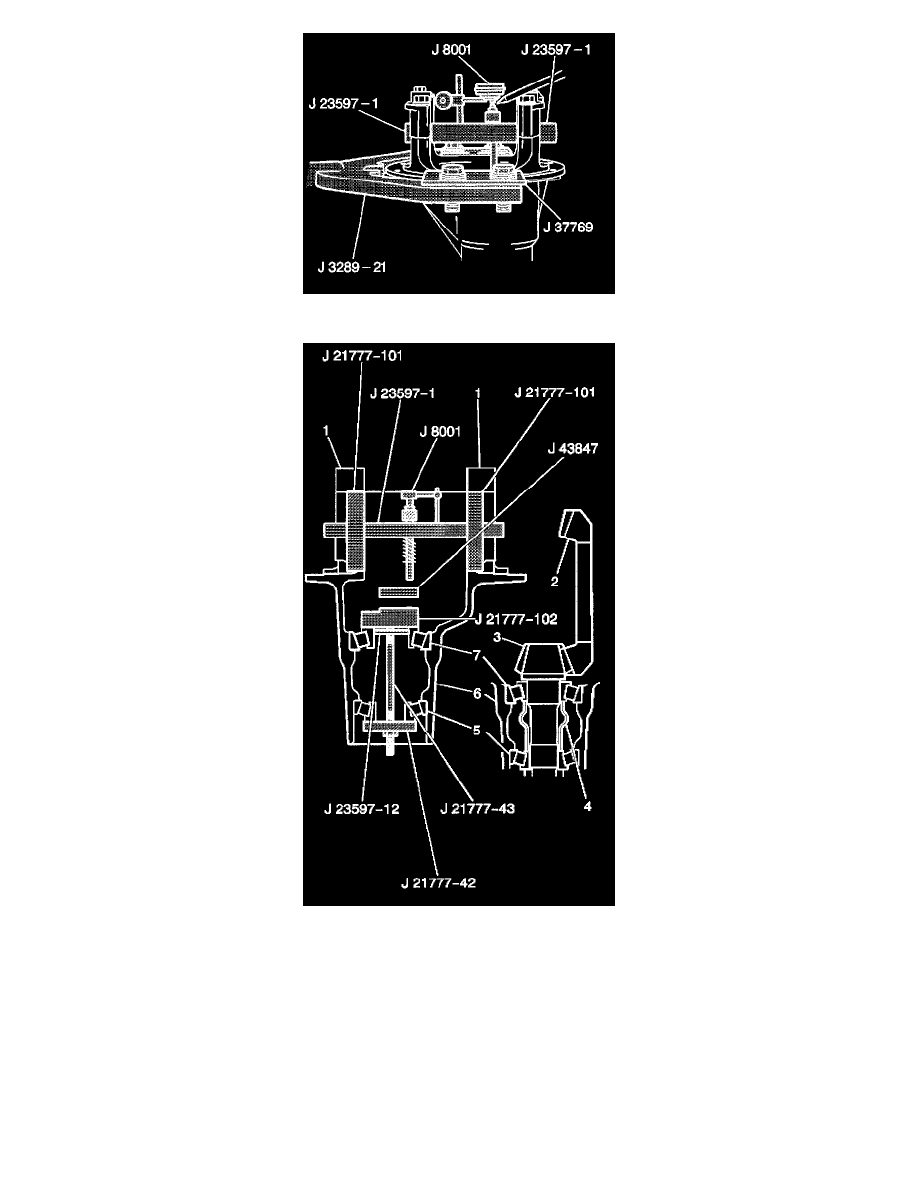
10. Install a J 8001 to the J 23597- 1.
11. Position the gauge plunger over the plunger extension and slightly load the indicator.
12. Rotate the J 8001 adjustable face so that the 0 is aligned with the dial indicator needle.
13. Slowly rotate the J 23597-1 back and forth so that the spring loaded plunger extension sweeps back and forth across the 97 mm level of the J
21777-102 with the J 43847 while observing the dial indicator.
14. Stop the J 23597-1 at the dial indicator's greatest point of deflection.
15. Without disturbing the J 8001 needle setting, rotate the J 8001 adjustable face so that 0 is aligned with the dial indicator needle.
16. Slowly rotate the J 23597-1 one way until the spring loaded plunger extension is no longer making contact with the J21777-102.
17. Record the deflection reading on the J 8001.
18. This reading indicates the selective shim size required for the correct pinion depth. Refer to Spacer and Shim Specifications for the appropriate
shim.
19. Remove the J 8001 and spring loaded plunger extension from the J23597-1.
20. Remove the J 23597-1 and the 2 J 21777-101 from the differential carrier (6).
21. Remove the J 21777-102 and the differential dummy attachment, with the J23597-12, the J 21777-43 and the J 21777-42 from the differential