
Tracker 4WD L4-2.0L VIN C (1999)
22.
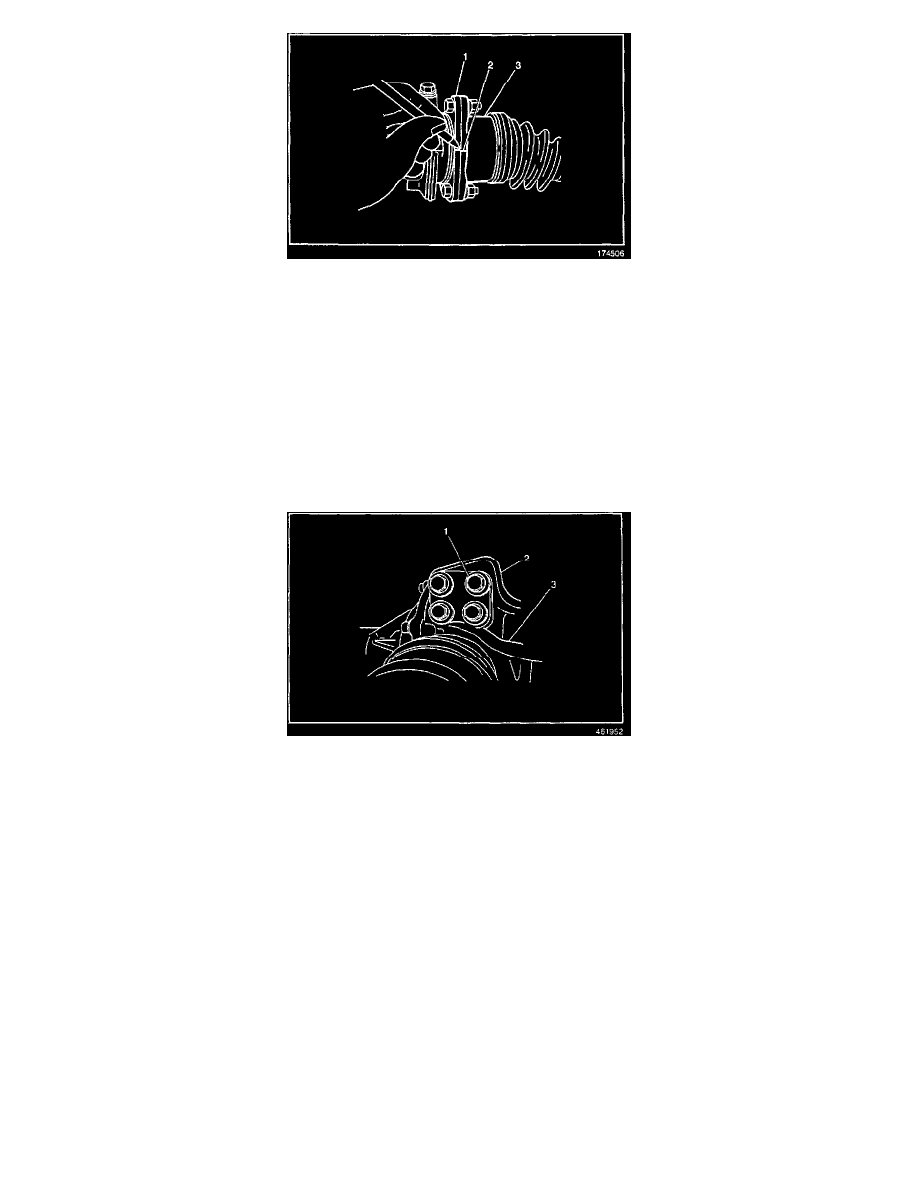
On the left drive axle, make a reference mark (2) on the following components in order to ensure correct installation.
^
The inner drive axle flange (1).
^
The differential side joint flange (3) of the drive axle shaft.
23.
Remove the left side drive axle flange bolts and position drive axle aside.
24.
Disconnect the vent hoses from the front axle housing.
25.
Remove the front propeller shaft to front axle bolts.
26.
Remove the front propeller shaft.
27.
Remove the front differential rear mount nuts and bolts (1).
28.
Remove the mount (2).
29.
Support the front differential for removal.
30.
Remove the front differential to the right side mount bolts.
31.
Remove the front differential to the left side mount bolts.
32.
Lower the front differential with assistants.
33.
Remove the left side output shaft axle from the differential housing.
34.
Remove the 6 differential carrier bolts and the two reamer bolts from the front axle housing.