
Tracker 4WD L4-2.0L VIN C (1999)
6.2.
Install the tube and forcing screw to the finger section. Ensure the forcing screw is backed out.
6.3.
Using a wrench on the forcing screw, remove the rear output shaft bushing.
Installation Procedure
1.
Using the J 45380, install a NEW rear output shaft bushing.
^
Install the bushing on the finger section of the J 45380.
^
Install the finger section of the J 45380.
^
Position the bushing and the tool to the case.
^
Using a hammer and J 45380, install the bushing.
2.
Using the appropriate seal installer, install the rear output shaft seal in the transfer case.
3.
Install the rear propeller shaft. Refer to Propeller Shaft Replacement - Rear in the Propeller Shaft sub-section of the Service Information.
4.
Verify the fluid level. Refer to Transfer Case Fluid Replacement.
5.
Install the transfer case shield, if equipped. Refer to Transfer Case Shield Replacement in the Transfer Case sub-section of the Service
Information.
6.
Lower the vehicle.
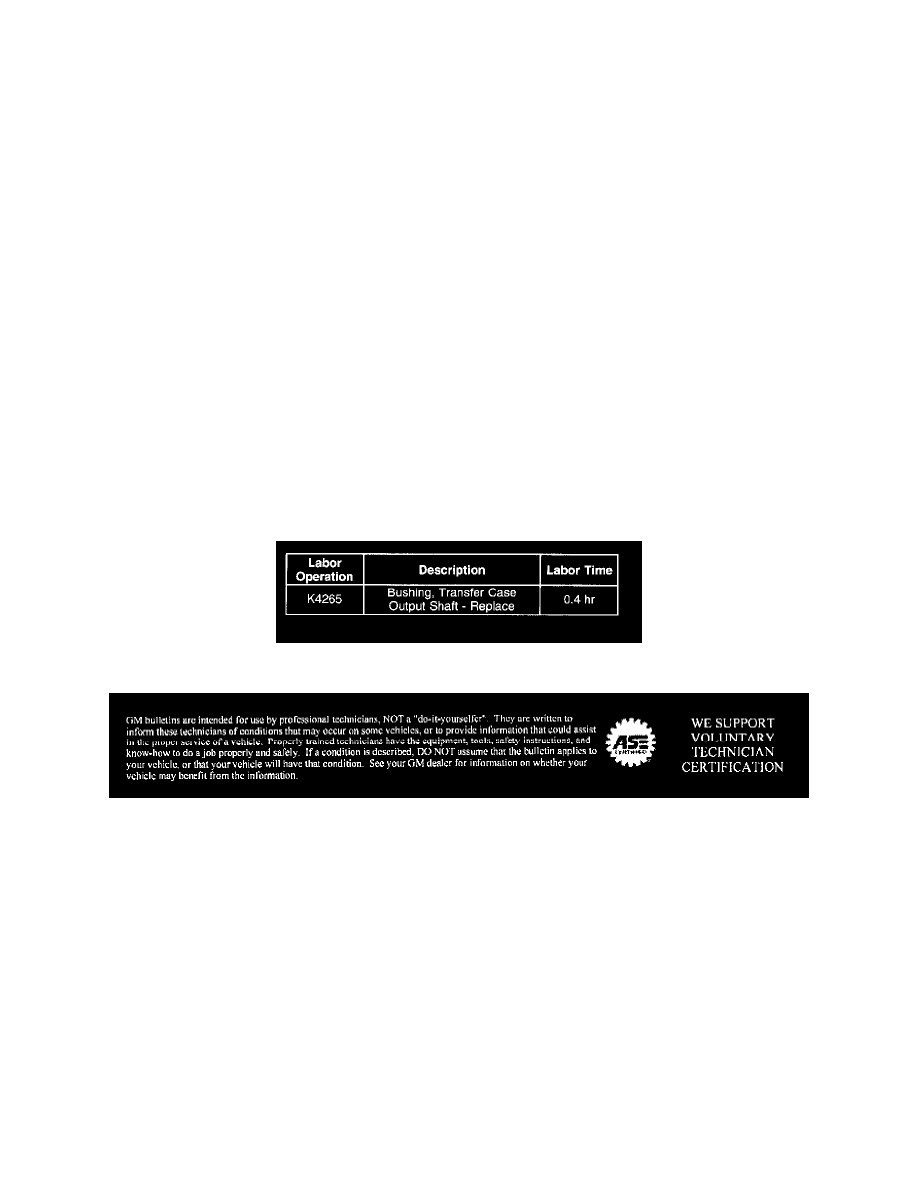
Warranty Information
For vehicles repaired under warranty, use the table.
Disclaimer