
Tracker 4WD V6-2.5L VIN 4 (2001)
11.
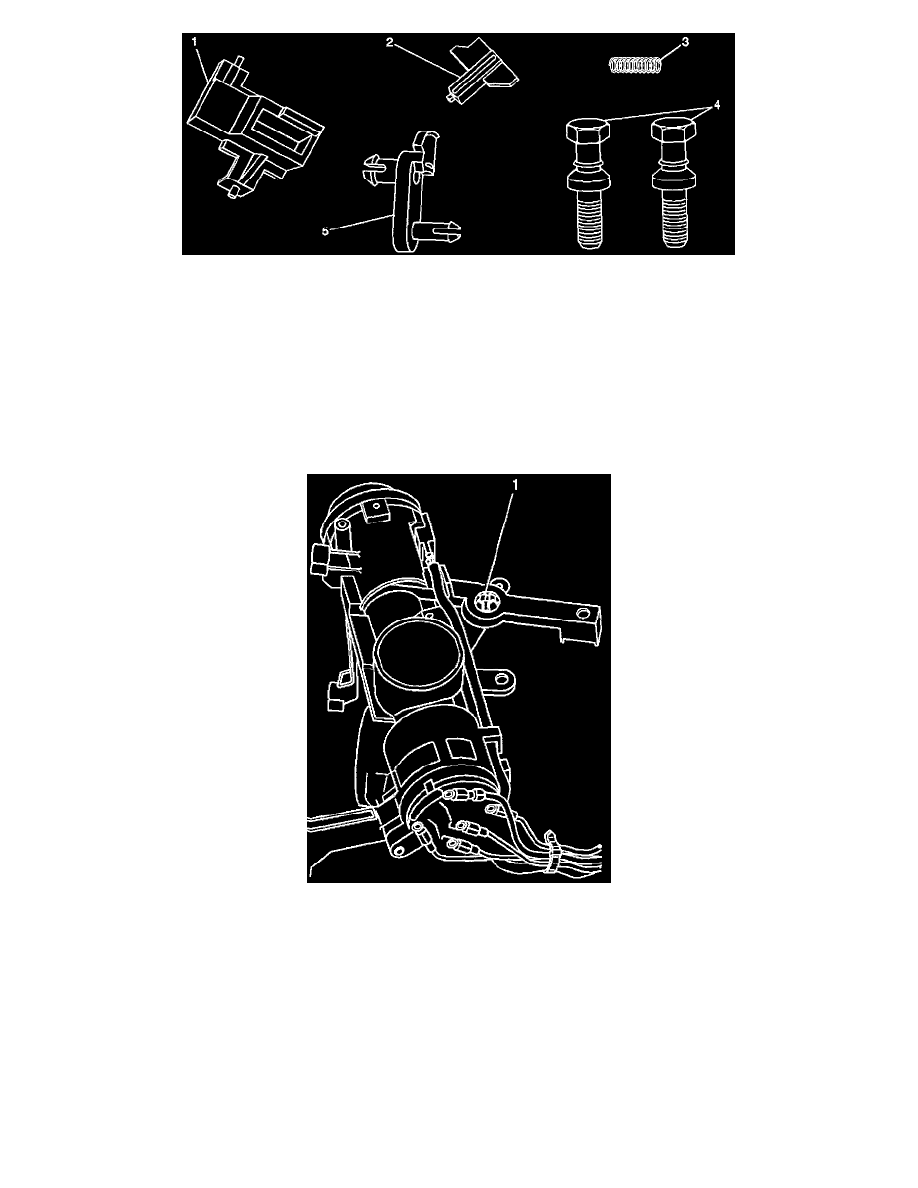
Review the contents of the parts contained in the kit. The following parts should be in the kit:
^
AT cover (1) with spring pins installed
^
Greased AT slider (2) DO NOT open smaller bag that contains the greased AT slider until instructed.
^
Return spring (3)
^
Two bolts (4)
^
AT lever (5)
Important
Reviewing how the AT lever is installed on the lock cylinder assembly prior to removal in the next step will make installation easier later in
this procedure.
12.
With the ignition switch lock cylinder on a suitable work surface, review how the AT lever is attached to the lock cylinder assembly and then
remove it by squeezing the four retaining tabs (1) together.
13.
Turn the ignition key to the ON position.