
TrailBlazer 2WD L6-4.2L VIN S (2003)
IMPORTANT:
-
The adhesion promoter must be used to assure adequate bonding of the coupling.
-
Mask or protect the surrounding area before applying the adhesion promoter.
Remove the protective film from the adhesive backing on the inner antenna coupling.
IMPORTANT:
-
Ensure the inner and outer antenna couplings are aligned.
-
Do not touch the adhesive backing on the antenna coupling.
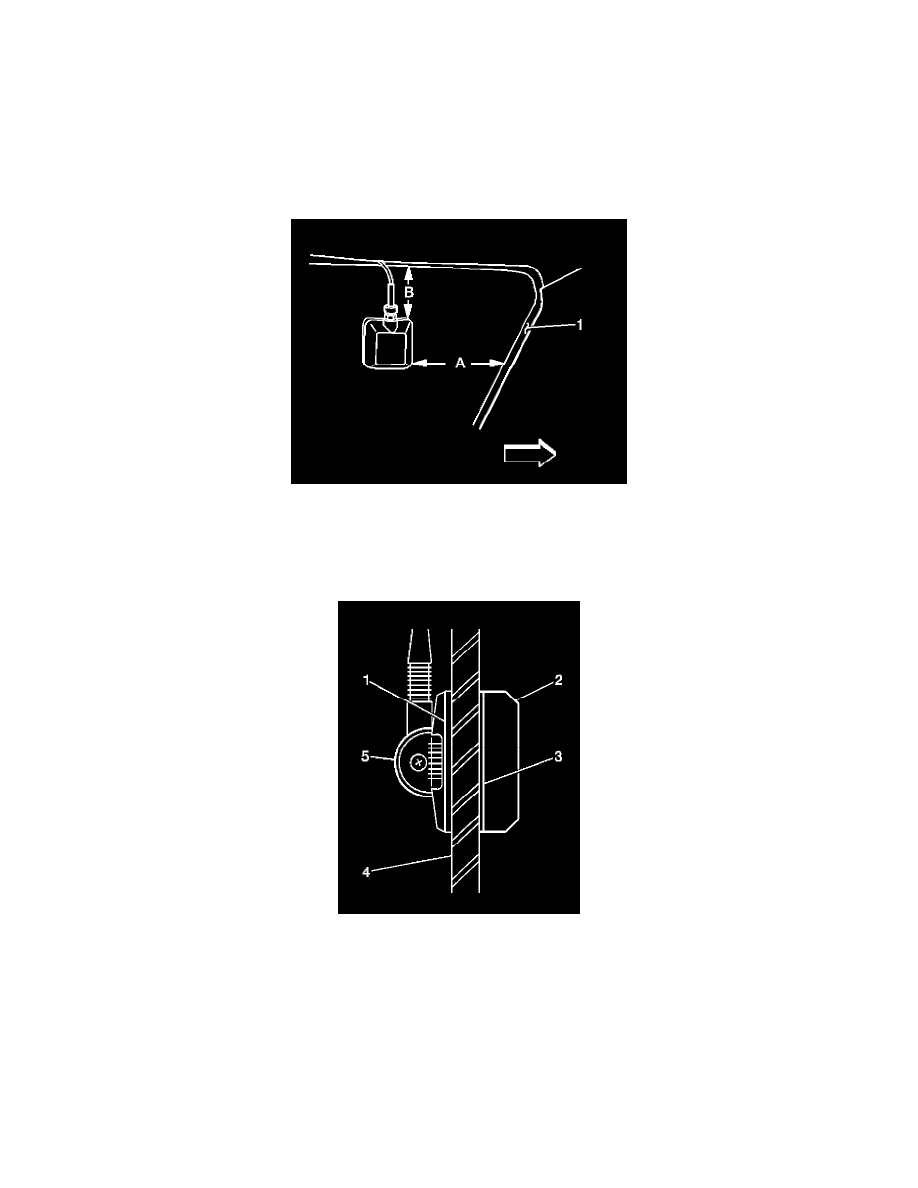
1. If the exterior antenna coupling is not installed, use a grease pencil on the outside glass to mark the mounting location of the interior antenna
coupling. Ensure the marks are level.
2. The mounting location for the couplings is on the left quarter window, 100 mm (4 in) (A) rearward of the black masking (1), and 48 mm (2 in)
(B) below the black masking.
3. If the exterior antenna coupling is installed, align the inner antenna coupling to the exterior coupling.
4. Press firmly on all 4 corners and on the center of the antenna inner coupling (2) in order to ensure proper adhesion to the back glass (4). Hold
pressure on the inner coupling (2) for 10-30 seconds.
5. Inspect the installation to ensure that no surface gaps are present between the couplings (5,2) and the back glass (4).