
TrailBlazer 2WD L6-4.2L VIN S (2003)
Reprogram the automatic transfer case control module if necessary.
Chevrolet TrailBlazer, TrailBlazer EXT
Notice:
Trying to remove the transfer case control switch from the instrument panel (IP) trim panel without releasing the retainers will damage the IP
trim panel. The switch cannot be removed without first removing the trim panel.
1.
Remove the two (2) screws that retain the rear edge of the driver's side insulator to the IP.
2.
Remove the two (2) screws that retain the bottom of the knee bolster to the IP.
3.
Remove the two (2) screws that retain the top of the knee bolster to the IP.
4.
Remove the four (4) screws that retain the IP bezel to the IP.
5.
Separate the bezel from the IP enough to allow access to the transfer case control switch.
6.
Disconnect the electrical connector and remove the switch.
7.
Install the new switch and connect the electrical connector.
8.
Reposition the IP bezel and install the four (4) retaining screws.
9.
Reposition the knee bolster and install the four (4) retaining screws.
10.
Reposition the insulator and install the two (2) retaining screws.
11.
For 2002 vehicles produced prior to January 2002, verify that the vehicle contains the latest calibration for the automatic transfer case control
module. The calibrations were available from Techline starting January 2002, on the TIS 2000 version TIS 01/2002 data update or later.
Reprogram the automatic transfer case control module if necessary.
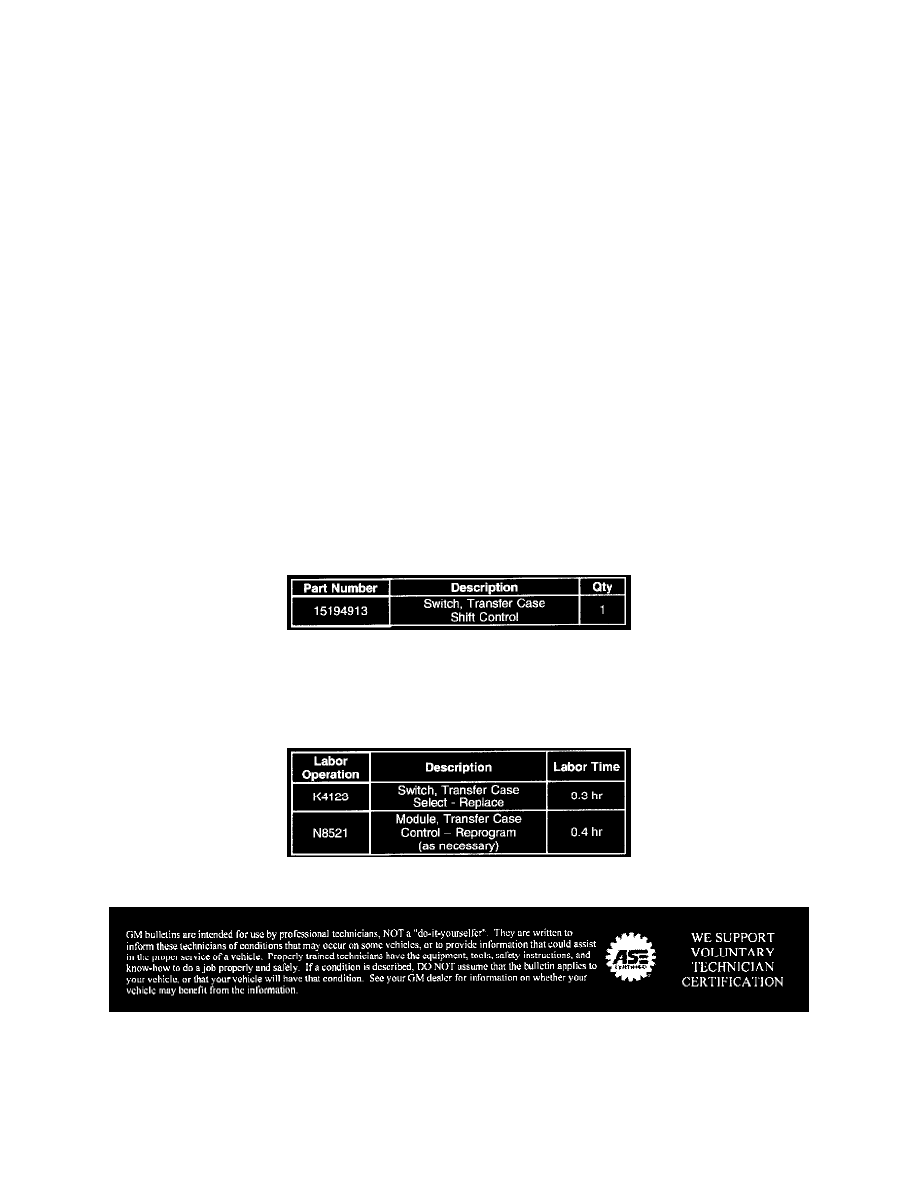
Parts Information
Parts are currently available from GMSPO.
Warranty Information
For vehicles repaired under warranty, use the table.
Disclaimer