
TrailBlazer 2WD V8-5.3L (2007)
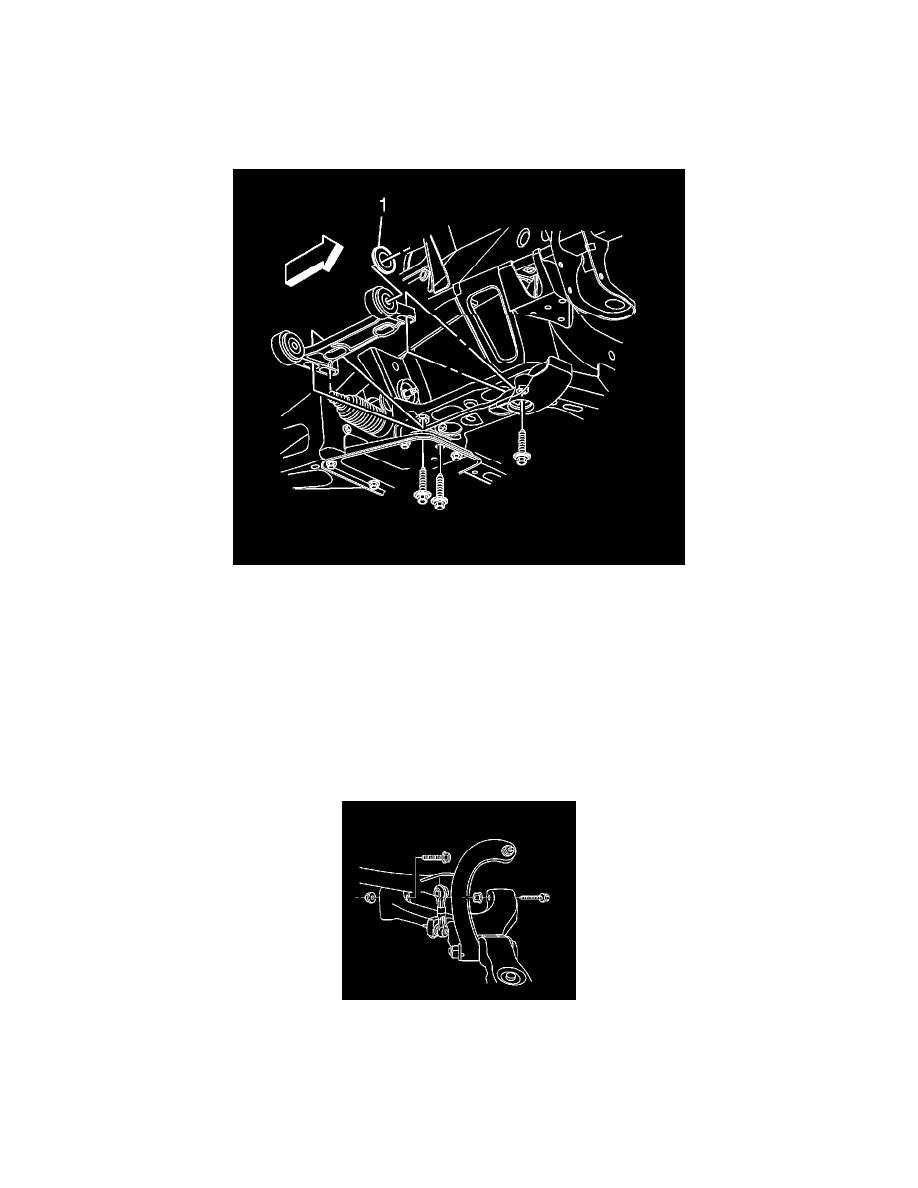
Important: Note the position of the spacer (1) on the front bushing.
8. Remove the lower control arm bracket mounting bolts from the frame.
9. Remove the lower control arm bracket from the vehicle.
Installation Procedure
Important: Ensure the spacer (1) is in the proper position on the front bushing.
1. Install the lower control arm bracket to the vehicle.
Notice: Refer to Fastener Notice.
2. Install the lower control arm bracket mounting bolts to the frame.
^
Tighten the front lower control arm bracket mounting bolt to 265 N.m (195 lb ft).
^
Tighten the rear lower control arm bracket mounting bolts to 240 N.m (177 lb ft).
3. Install the lower control arm to the lower control arm bracket.
4. Install the lower control arm to lower control arm bracket mounting bolts.
Important: Ensure that the lower control arm is parallel to the lower control arm bracket during the installation and tightening of the
lower control arm mounting bolts and nuts. This will ensure correct alignment of the lower control arm bushings.
5. Install the lower control arm to lower control arm bracket mounting nuts.