
Traverse FWD V6-3.6L (2009)
Alignment: Service and Repair
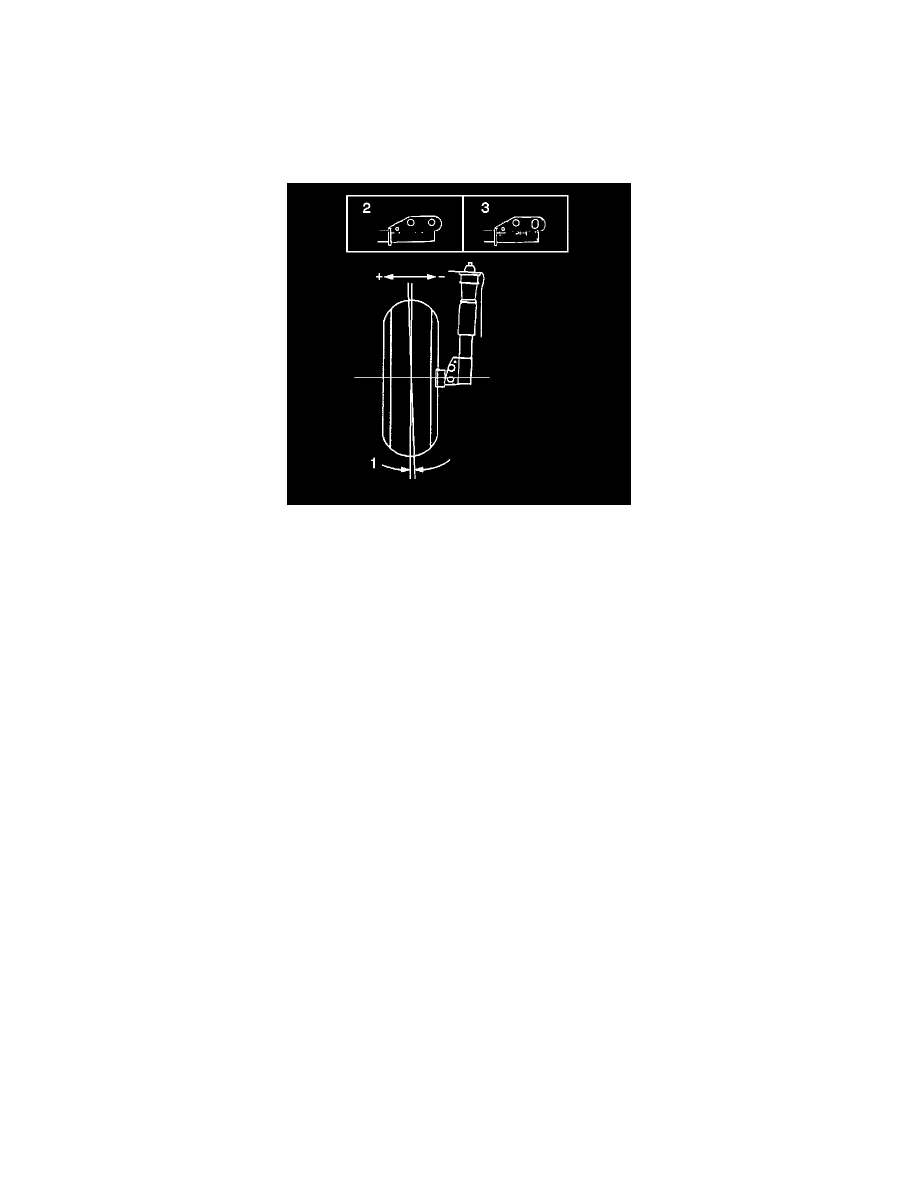
Front Camber Adjustment
Front Camber Adjustment
1. Raise and support the vehicle. Refer to Lifting and Jacking the Vehicle (See: Vehicle Lifting/Service and Repair).
2. Remove the tire and wheel. Refer to Tire and Wheel Removal and Installation (See: Wheels and Tires/Service and Repair).
3. Remove the strut lower bolt in order to inspect for an oblong strut lower hole (3). If the strut lower hole is oblong, loosen the strut upper bolt in
order to allow for camber adjustment.
If the strut lower hole is NOT oblong, perform the following steps:
1. Remove the upper strut bolt and separate lower part of the strut from the steering knuckle.
2. File the strut lower hole laterally (3) in order to allow for camber adjustment.
3. Move the strut back in to position with the steering knuckle.
4. Install the strut bolts, but do not fully tighten them.
Caution: Refer to Fastener Caution (See: Service Precautions/Vehicle Damage Warnings/Fastener Caution).
5. Adjust the camber and tighten the strut nuts.
Tighten the strut lower nuts to 112 Nm (83 lb ft).
6. Install the tire and wheel. Refer to Tire and Wheel Removal and Installation (See: Wheels and Tires/Service and Repair).
7. Lower the vehicle.