
W 3500 L4-5.2L DSL Turbo (2005)
Exhaust Pipe: Service and Repair
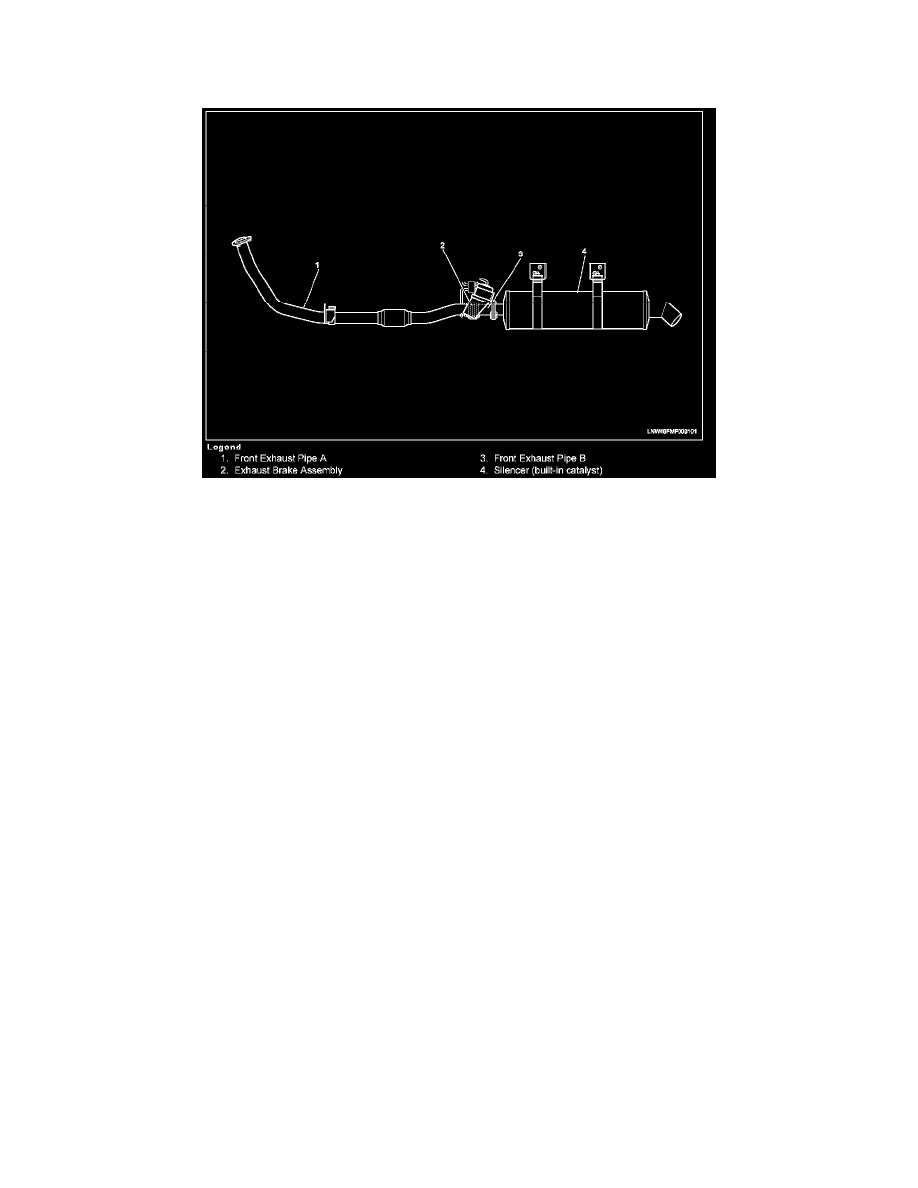
Exhaust Pipe
Removal
1. Remove the silencer fixing nut.
2. Remove the silencer brackets.
3. Remove the silencer.
4. Remove the front exhaust pipe B.
5. Remove the exhaust brake assembly.
6. Remove the front exhaust pipe A.
-
Remove the clamps and then the front exhaust pipe.
Installation
CAUTION:
-
Offset in the position of the exhaust system during assembly may sometimes cause vibrations or rattling noise. Therefore, temporarily
tighten the bolts until all the parts have been positioned and then tighten sequentially from engine side to the tail pipe side.
-
Do not reuse the removed gasket or nuts.
1. Mount the front exhaust pipe A.
-
Assemble the gasket, mount the front exhaust pipe in the turbo charger, and tighten to the specified torque.
Tightening torque: 67 N.m (49 lb ft)
-
Clamp the front exhaust pipe.
Tightening torque: M10 = 41 N.m (30 lb ft)
CAUTION: Tighten the front exhaust pipe evenly and take care to avoid gas leakage.