
300 V6-3.5L (2008)
NOTE: If camshaft gears have been removed and timing is correct, counterhold and tighten the camshaft gears to final torque
specificationSee: Timing Belt & Sprockets - Installation.
7. Install the front timing belt cover See: Timing Cover/Service and Repair/Timing Cover - Installation.
8. Tighten the rocker arm assemblies and install the cylinder head covers.
9. Connect negative battery cable.
Camshaft Sprockets
CAMSHAFT SPROCKETS
CAUTION: The camshaft sprockets are keyed and not interchangeable from side to side because of the camshaft position sensor pick-up.
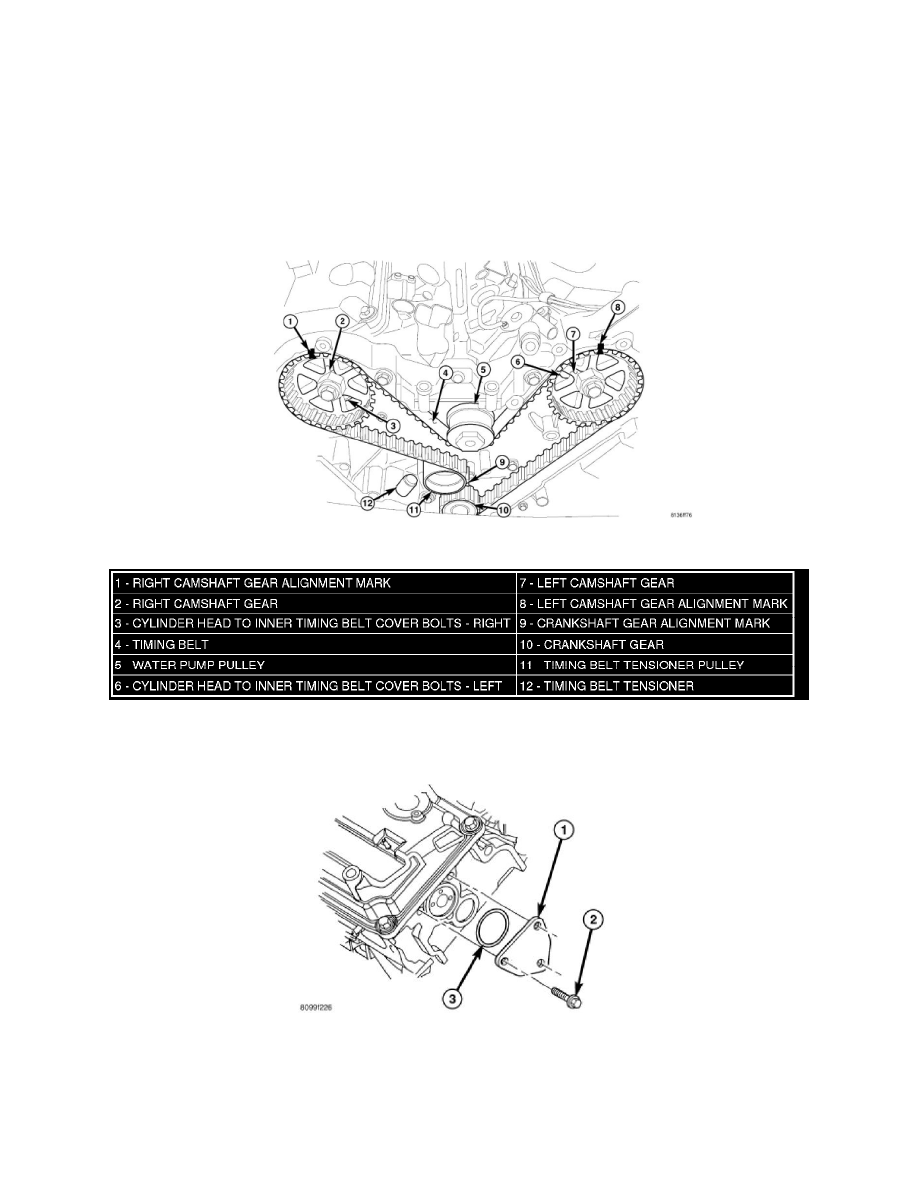
TIMING GEAR ALIGNMENT
1. Install camshaft sprockets onto the camshafts. Install NEW sprocket attaching bolts into place. The 255 mm (10 in.) bolt is to be installed in the
left camshaft and the 213 mm (8 3/8 in.) bolt is to be installed into the right camshaft. Do not tighten the bolts; tightened at later step.
Camshaft sprocket (2, 7) marks (1, 8) should be aligned with the marks on the cover at both sprockets.
2. Install the camshaft thrust plates (1) and o-ring (3). Tighten bolts (2) to 28 Nm (250 in. lbs.).
3. Install the timing belt starting first at the crankshaft sprocket (10), then to remaining components in a counterclockwise direction.
4. Install the belt around the last sprocket. Maintain tension on the belt as it is positioned around the tensioner pulley (11). Each camshaft sprockets
mark should still be aligned with the rear cover marks.
NOTE: For timing belt tensioner reset procedure, See: Timing Belt & Sprockets - Removal.