
Cirrus V6-2.5L VIN H (1995)
Fuel Line Coupler: Service and Repair
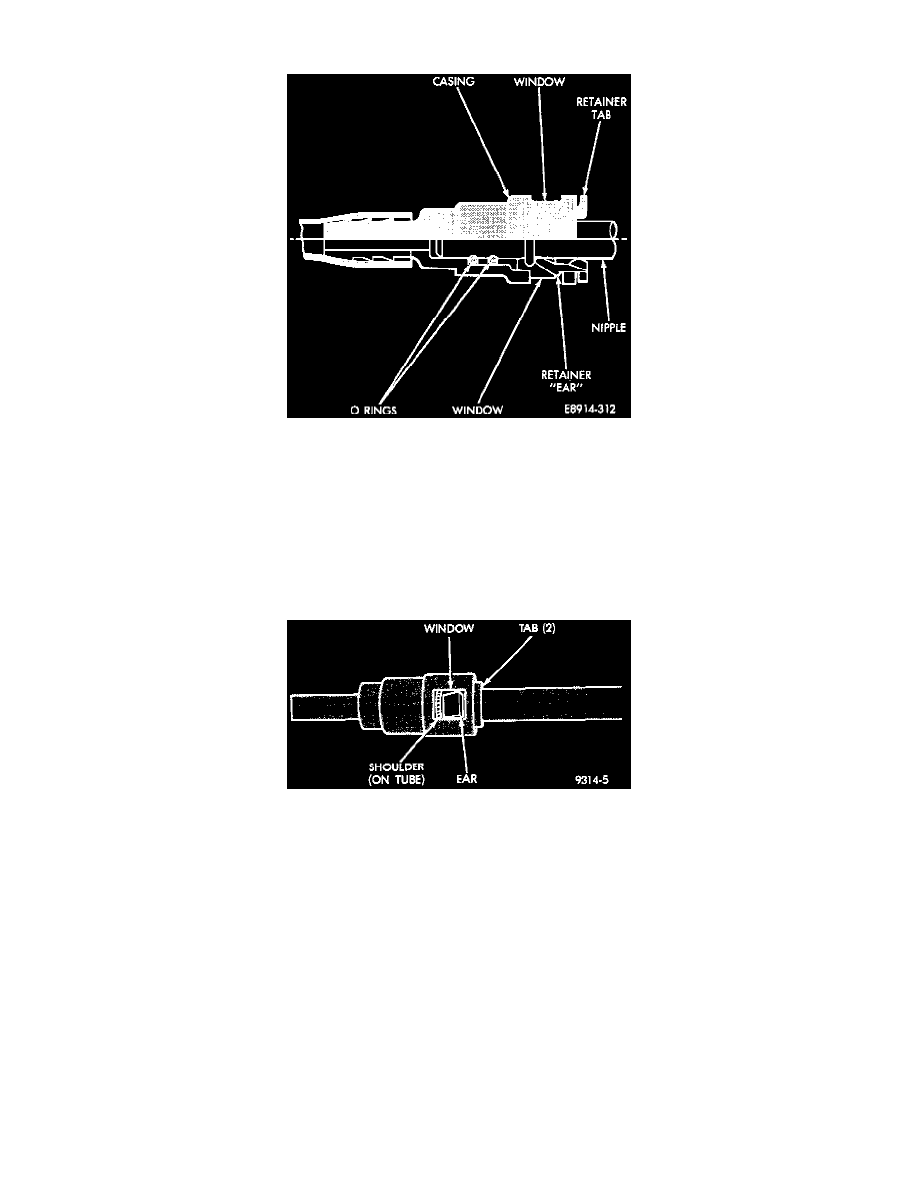
Fig. 5 Plastic Quick-Connect Fittings
REMOVAL
When disconnecting a quick-connect fitting, the retainer will remain on the fuel tube nipple.
WARNING: Release fuel system pressure before disconnecting quick-connect fittings. Refer to the fuel pressure release procedure.
1. Disconnect negative cable from auxiliary jumper terminal.
2. Perform Fuel Pressure Release Procedure. Refer to Fuel Pressure Release Procedure in this section.
3. Squeeze retainer tabs together and pull fuel tube/quick-connect fitting assembly off of fuel tube nipple. The retainer will remain on fuel tube.
Fig. 6 Plastic Quick-Connect Fitting/Fuel Tube Connection
INSTALLATION
1. Using a clean lint free cloth, clean fuel tube nipple and retainer.
2. Prior to connecting fitting to the fuel tube, coat fuel tube nipple with clean 30 weight engine oil.
CAUTION: Never install a quick-connect fitting without retainer being either on the fuel tube or already in the quick-connect fitting. In either
case, ensure retainer locks securely into quick-connect fitting by firmly pulling on fuel tube and fitting to ensure it is secured.
3. Push quick-connect fitting over fuel tube until retainer seats and a click is heard.
NOTE: The quick-connect fitting has windows in the sides of the casing. When the fitting completely attaches to the fuel tube, the retainer
locking ears and fuel tube shoulder are visible in the windows.
-
If they are not visible, the retainer was not properly installed Fig. 6.
-
Do not rely upon the audible click to confirm a secure connection.
4. Ensure locking ears on retainer and the shoulder (stop bead) on the fuel tube are completely visible in the quick-connect fitting windows.
-
Do not rely upon the audible click to confirm a secure connection.
-
Always pull on the line and fitting to ensure that retainer is seated.
5. Verify connection by pulling on the lines.