
Concorde V6-2.7L VIN V (2001)
Brake Bleeding: Service and Repair
Master Cylinder Bleeding
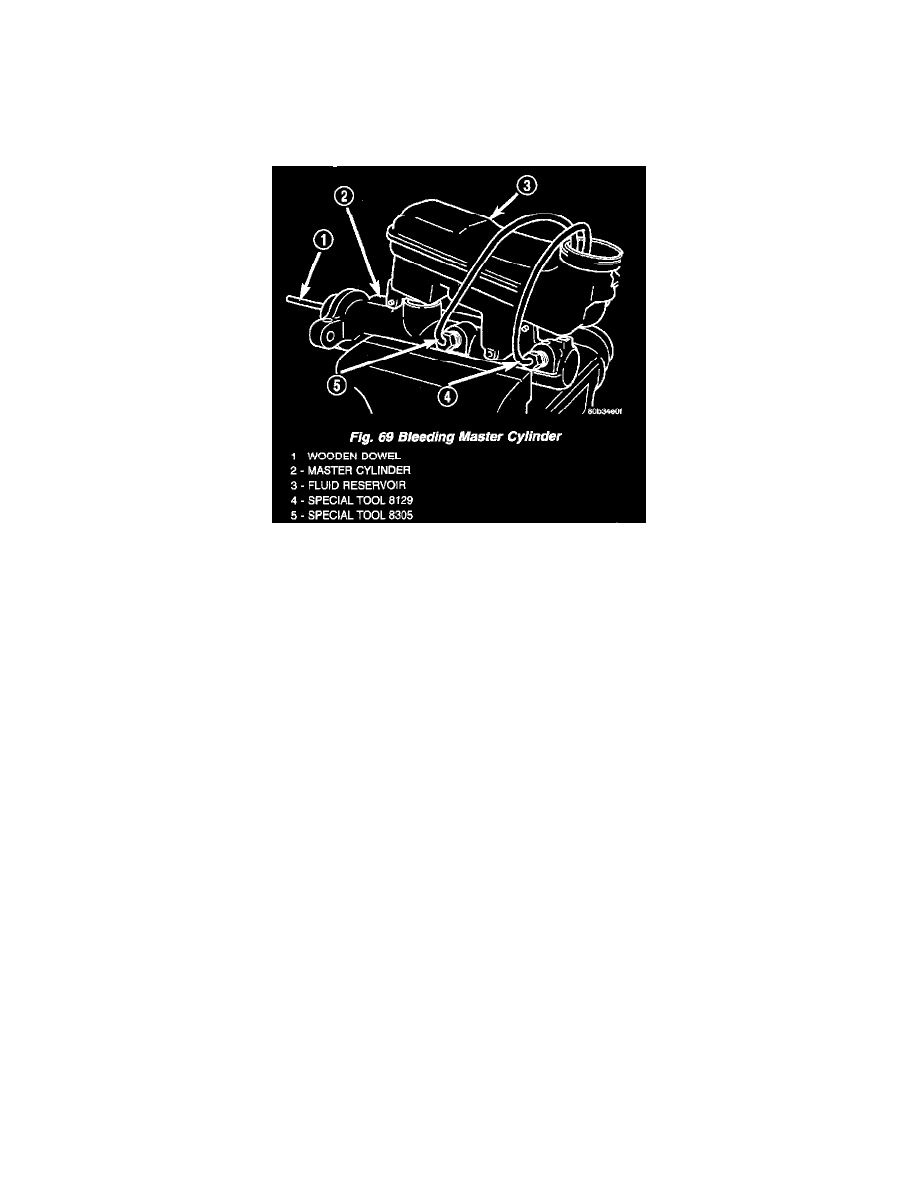
STANDARD PROCEDURE - MASTER CYLINDER BLEEDING
CAUTION: When clamping the master cylinder in a vise for bleeding, carefully tighten the vise just enough to hold the master cylinder from moving.
Excessive pressure can damage the master cylinder.
1. Clamp the master cylinder in a vise.
NOTE: The master cylinder on this vehicle uses ISO style flares and metric threads on the master cylinder outlet ports. Special Tool Packages
8129 and 8305 have ISO style flares and metric threads on their bleeding tubes.
2. Position the appropriate bleeding tubes from special tool packages 8129 and 8305 on the master cylinder by, first, placing open tube ends in the
fluid reservoir, then threading the bleeding tube fittings into the master cylinder primary and secondary outlet ports.
NOTE: Make sure the open ends of the bleeding tubes are below the surface of the brake fluid when the reservoir is filled to the proper level so no air
is ingested while bleeding.
3. Fill reservoir with brake fluid conforming to DOT 3 specifications such as Mopar(R) Brake Fluid or Equivalent.
4. Using a wooden dowel, slowly depress master cylinder pistons, then release pressure, allowing pistons to return to released position. Repeat
several times until all air bubbles are expelled.
5. Remove bleeding tubes. Plug outlets and install filler can
6. Remove master cylinder from vise and install on power brake vacuum booster.
NOTE: It is not necessary to bleed the entire hydraulic system after replacing the master cylinder, providing that the master cylinder has been
bled and filled upon installation.