
Concorde V6-2.7L VIN V (2001)
Fuel Pressure Regulator: Service and Repair
REMOVAL
1. Release fuel pressure.
2. Remove Fuel Tank. See: Fuel Tank/Service and Repair
3. Lower fuel tank and remove the purge line and vent line.
4. Disconnect fuel line from pressure regulator.
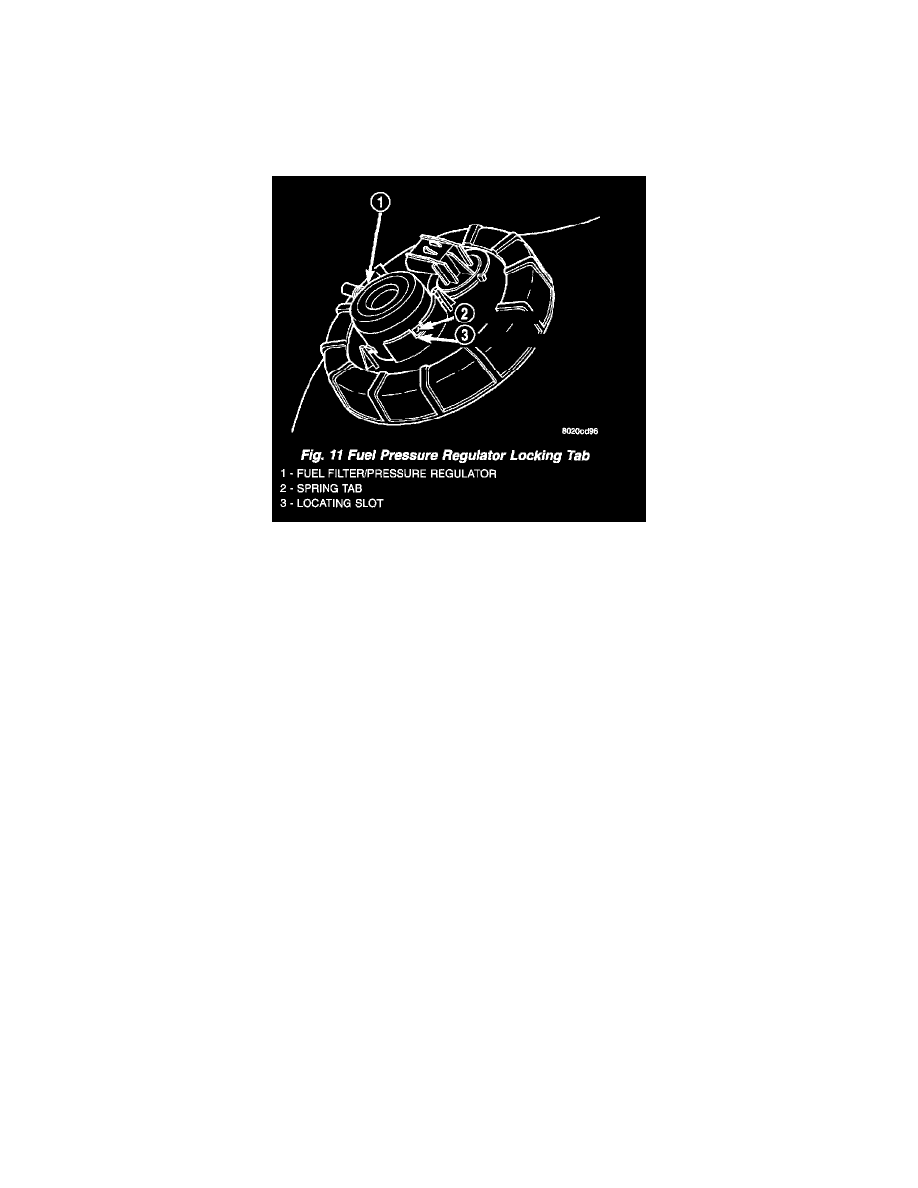
Fig. 11 Fuel Pressure Regulator Locking Tab
5. Push locking tab in from locking slot. Turn pressure regulator to unlock it (Fig. 11).
6. Pull regulator straight up.
INSTALLATION
1. Push regulator down and into place.
2. Turn fuel pressure regulator to lock it in place (Fig. 11). Make sure take the locking tab is in the locking slot.
3. Connect fuel line to regulator
4. Raise the fuel tank on the transmission stand.
5. Install fuel pump electrical connector into hole in the body.
6. Connect the purge and vent lines.
7. Raise tank into position and install tank straps.
8. Install the fuel filler tube and tighten the clamp.
9. Reposition the stabilizer bar and install bolts.
10. Lower vehicle.
11. Connect the fuel pump electrical connector that is in the rear seat.
12. Install the rear seat.
13. Connect the battery cable.
14. Fill fuel tank. Use the DRB III scan tool to pressurize the fuel system.