
Concorde V6-2.7L VIN V (2001)
Shift Interlock Solenoid: Service and Repair
REMOVAL
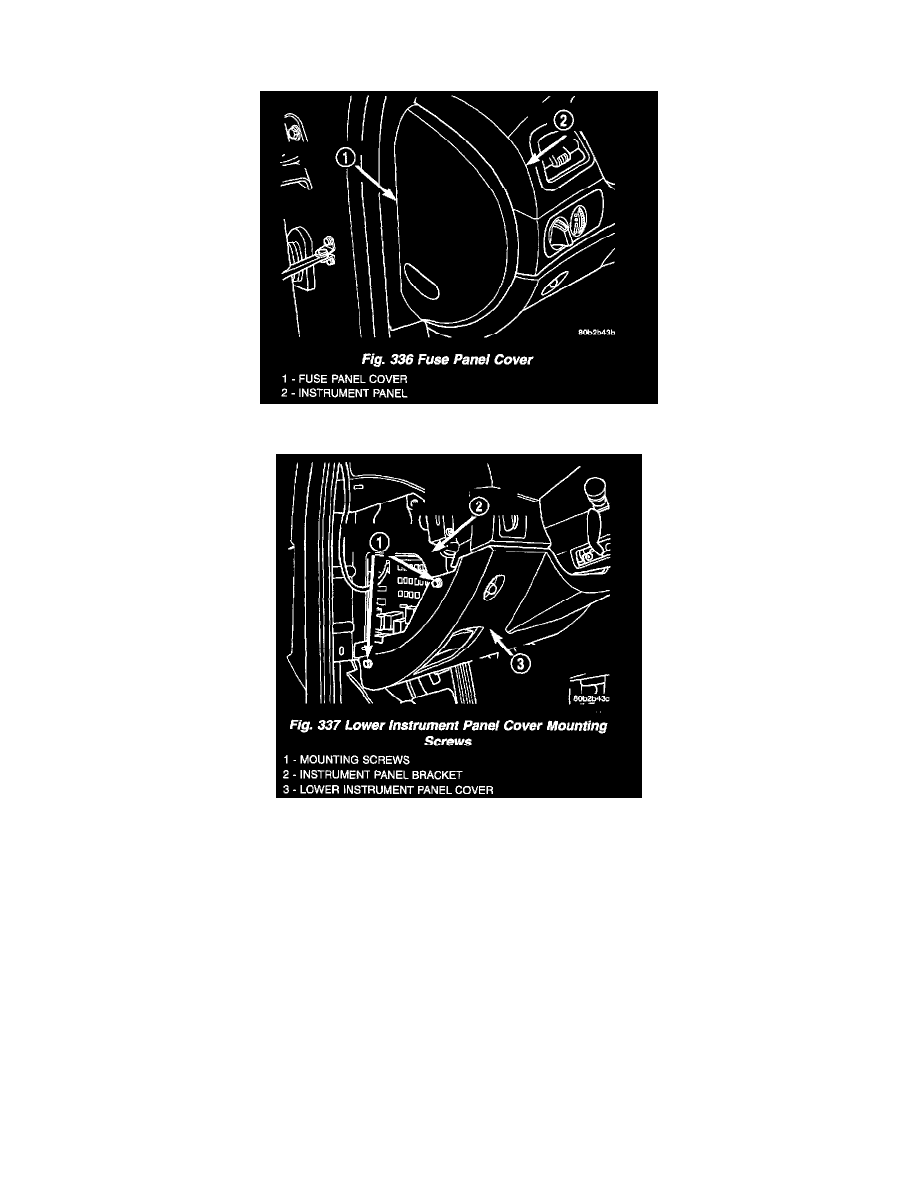
(1) Remove the fuse panel cover from the left end of the instrument panel (Fig. 336).
(2) Remove the two screws behind the fuse panel cover attaching the lower instrument panel cover to the instrument panel (Fig. 337).
(3) Remove the lower instrument panel cover. The lower instrument panel cover is attached by retaining clips along the top and right edge.
NOTE: The upper shroud on this steering column is retained to the steering column by a snap fit to the lower shroud. When removing the upper
shroud from the steering column lower shroud, DO NOT use a hard or sharp tool. This will damage the shrouds. If a tool must be used, use a soft
tool such as a trim stick.
(4) Remove the steering column upper shroud from the steering column using the following procedure:
First, on the right seam between the upper and lower shrouds, push in on seam at the forward end. When the upper shroud unsnaps, pull the upper
shroud upward away from the lower. Repeat this procedure on the opposite side of the column to release the upper shroud from the lower.
Remove the upper shroud from the steering column.