
Crossfire V6-3.2L VIN L (2004)
Idler Arm: Service and Repair
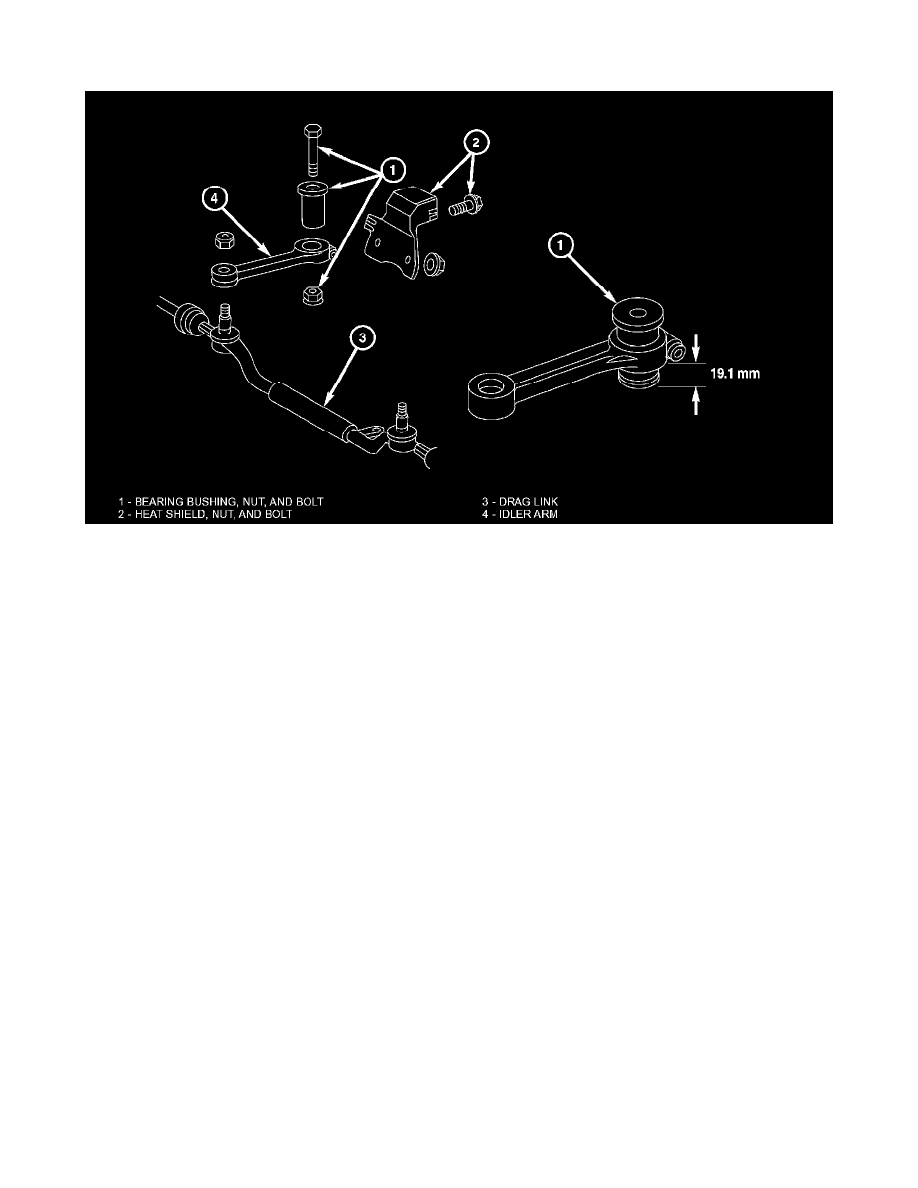
IDLER ARM
REMOVAL
1. Remove drag link (3) from the idler arm (4) by removing the idler arm nut.
2. Remove the heat shield (2).
3. Remove the nut and bolt and remove the idler arm (4) from the vehicle.
4. Loosen the pinch-bolt on the idler arm (4).
5. Remove the idler arm bushing from the idler arm (4).
6. Inspect the idler arm bushing. Replace as necessary.
INSTALLATION
1. Install the idler arm bushing to the idler arm (4).
2. Adjust the idler arm bushing to the reference dimension.
3. Install the idler arm pinch bolt. Tighten to 30 Nm (22 ft. lbs.).
4. Install the idler arm to the vehicle.
5. Install the nut and bolt on the idler arm. Tighten to 50 Nm (37 ft. lbs.).
6. Install the heat shield (2).
7. Install the drag link to the idler arm. Tighten to 50 Nm (37 ft. lbs.).